User Management
The SureIdP feature under Identity & Access Management in SureMDM allows administrators to securely manage users under verified domains. Administrators can create new users, invite them, manage their device access, and enforce security policies like MFA.
Also, users can be synced with SureIdP from external Identity Providers.
Steps to add users for the created domain
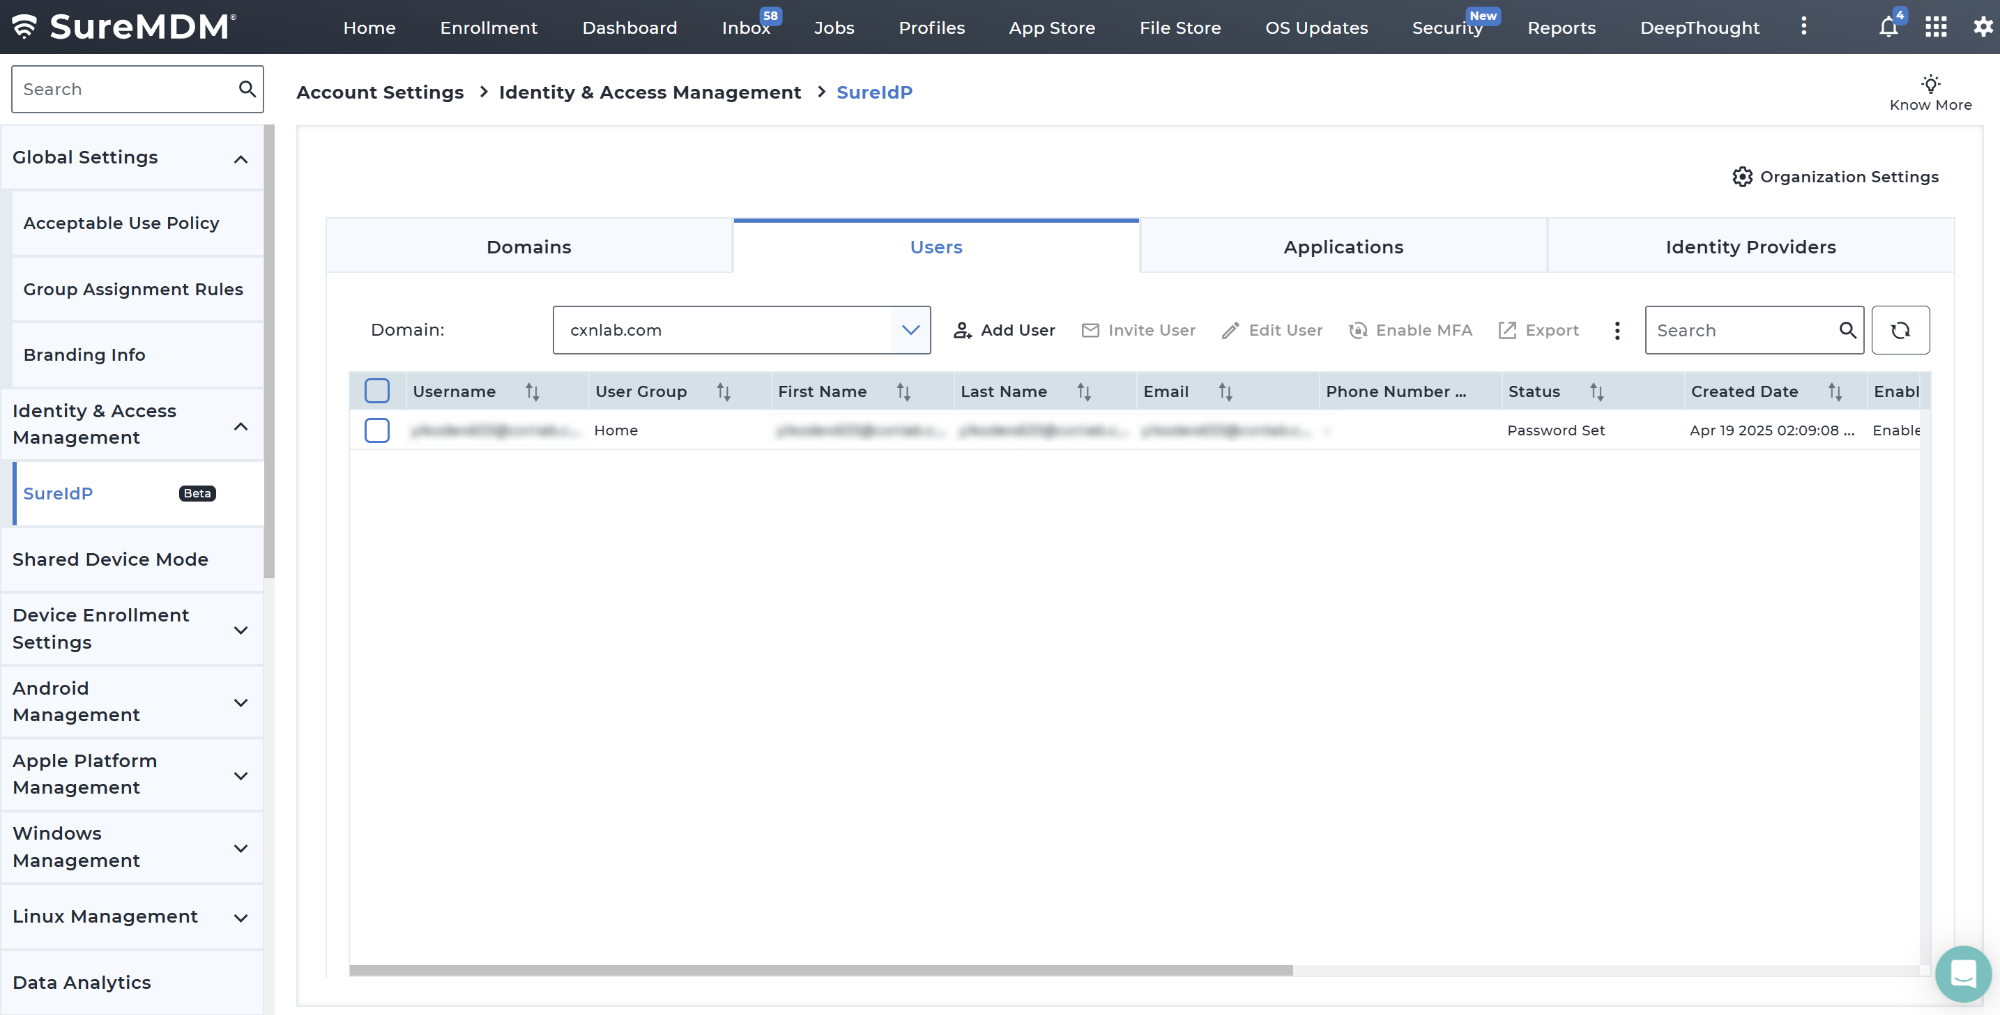
If the domain is verified immediately, click Next to proceed. If verification is completed later, navigate to SureMDM Web Console → Settings → Account Settings → Identity & Access Management → SureIdP → Users to add users.
In the Users tab, select the required Domain from the dropdown.
Click Add User.
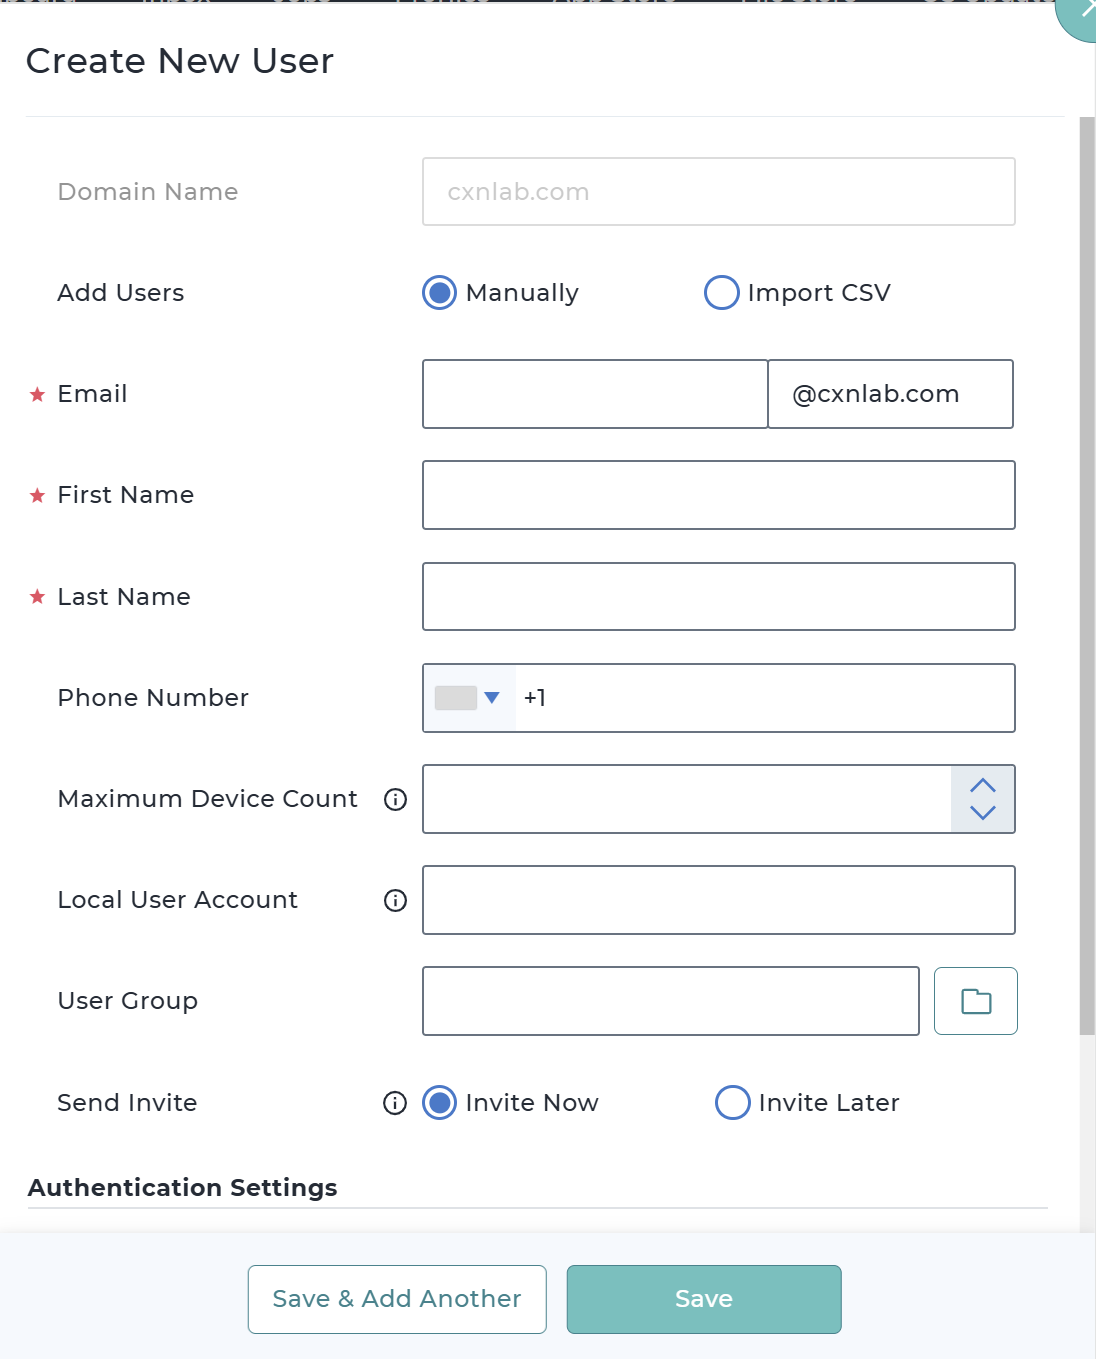
In the Create New User popup, choose the method to add users:
- Manually – Enter user details one-by-one.
- Import CSV – Bulk import users via CSV.
(a) If Manually option is selected, then provide the below information with respect to User Details and Authentication Settings and click Save.
5.1 User Details
| Field | Description |
|---|---|
| Enter the user’s email address. | |
| First Name | Enter the first name of the user. |
| Last Name | Enter the last name of the user. |
| Phone Number | Enter the user’s contact number along with the country code. |
| Maximum Device Count | Set the maximum number of devices this user can enroll under their account. |
| Local User Account | Specify the name of the current local user account on the system to be taken over on the device. SureIdP will use this account name to match and integrate the user's existing profile. SureIdP can take over existing local user accounts while preserving user data and settings, ensuring a seamless transition to centralized identity management. Ensure the "Enable Takeover of Existing User Account" setting is enabled in the OS login profile for this feature to function. |
| User Group | Assign the user to a predefined group. |
| Send Invite | Choose whether to send an invitation email to the user immediately or at a later time. Invite Now Invite Later |
5.2 Authentication Settings
| Field | Description |
|---|---|
| Set Password | Enable this option to define an initial password for new users. Below options would be displayed dynamically if this is enabled. |
| Password | Enter the password |
| Force User to Reset Password on First Login | When enabled, users will be required to change their password during their first login. |
| MFA Required | When MFA is enabled, users will be prompted to set up a Time-based One-Time Password (TOTP) after setting their password from the invite. Supported apps include Google Authenticator, Microsoft Authenticator, and FreeOTP. Once set up, users must enter this second factor at login for added security. |

(b) If Import CSV option is selected, you should upload the users list via csv file and click Save. This option is used to import users in bulk which would be a quicker approach for large organizations.
If you don’t want to provide a value for a specific field, leave it blank but retain the correct number of commas to preserve the format.- **CSV Format:**
FirstName,LastName,Email/UserName,SendInvite (1=InviteLater, 2=InviteNow),Force User to Reset Password on First Login (true/false),Password,MFARequired (true/false),Maximum Devices,Local User Account,Phone Number,User Group Path
- **Example Data:**
John,Doe,john.doe@example.com,2,true,Welcome@123,true,2,jdoe,9876543210,Sales/North
Jane,Smith,jane.smith@example.com,1,false,,false,1,jsmith,,Marketing/EMEA
Alex,,alex@example.com,2,true,Pass@123,true,,,,
LastName, Maximum Devices, Local User Account, Phone Number, and User Group Path are left empty but the structure is preserved using commas.
| Field | Description |
|---|---|
| Download CSV Template | Use this option to download the predefined CSV Template which helps in preparing the users list. Please ensure your file follows the correct format with the required fields to successfully add users to your organization |
| Upload CSV | Once the users’ list is prepared, click the upload icon on this page to import the file from the local drive. |

- Created users will be reflected in the table under Users tab in the SureIdP section.
Created User Actions
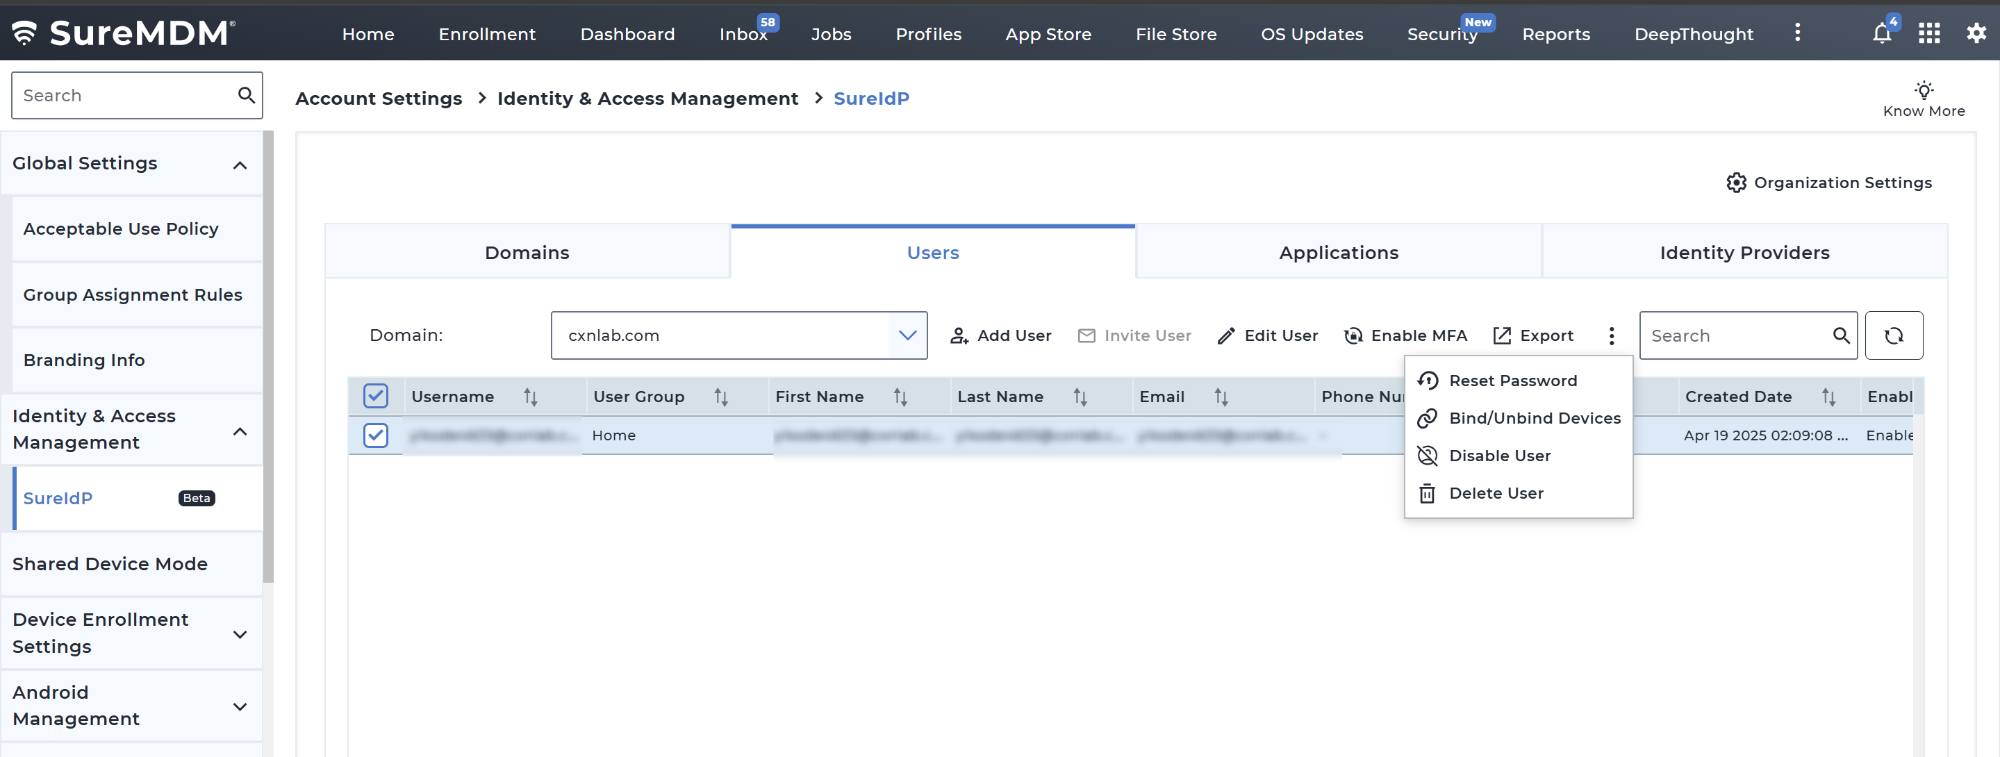
Invite User: Use this option to trigger email invite to selected users (available only when not already invited).
Edit User: Use this option to update / modify the details of the selected user.
Enable MFA: Use this option to apply Multi-Factor Authentication for enhanced security. Once enabled, a verification email will be sent to the user. To setup the TOTP, the user must scan the QR code using an Authenticator app.
Export: Download the current list of users for backup or reporting purposes.
Refresh: Use this option to initiate refresh.
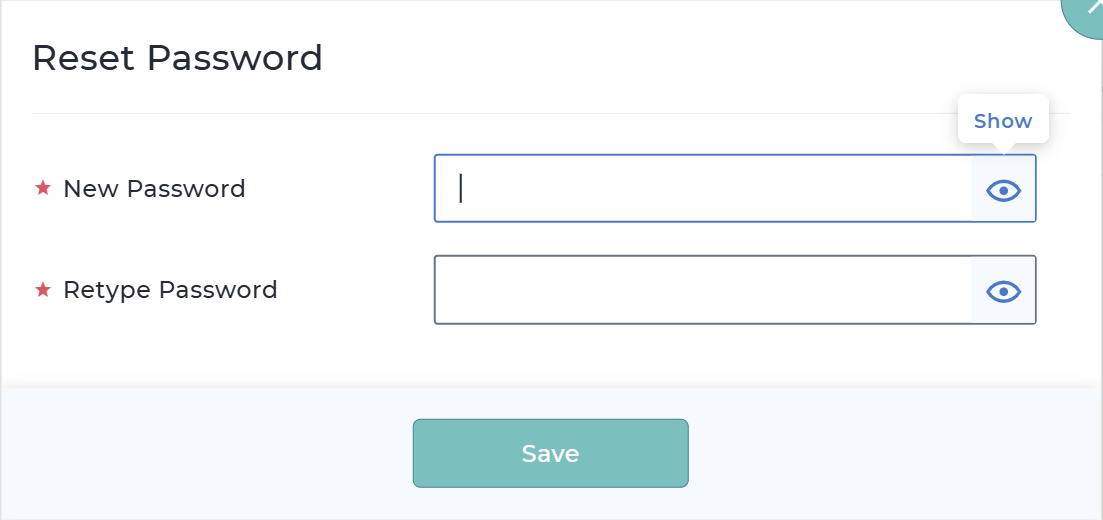
Reset Password – Use this option to initiate a password reset for the selected user.
- Upon clicking on this action will open up the Reset Password popup in which New Password value should be provided.
- Click Save to apply the password reset action on the selected users.
- Bind/Unbind Devices – Use this option to reassign or release devices associated with the user.
- Device binding capabilities create secure associations between specific users and their authorized devices for OS login. This feature enhances security by ensuring that only approved devices can be used by specific users, reducing the risk of credential abuse on unauthorized endpoints.
- The device binding system also streamlines IT operations by simplifying device reassignment when employees change roles or leave the organization. When reassigning devices, SureIdP maintains appropriate device settings while updating user information, reducing the administrative burden of employee transitions.
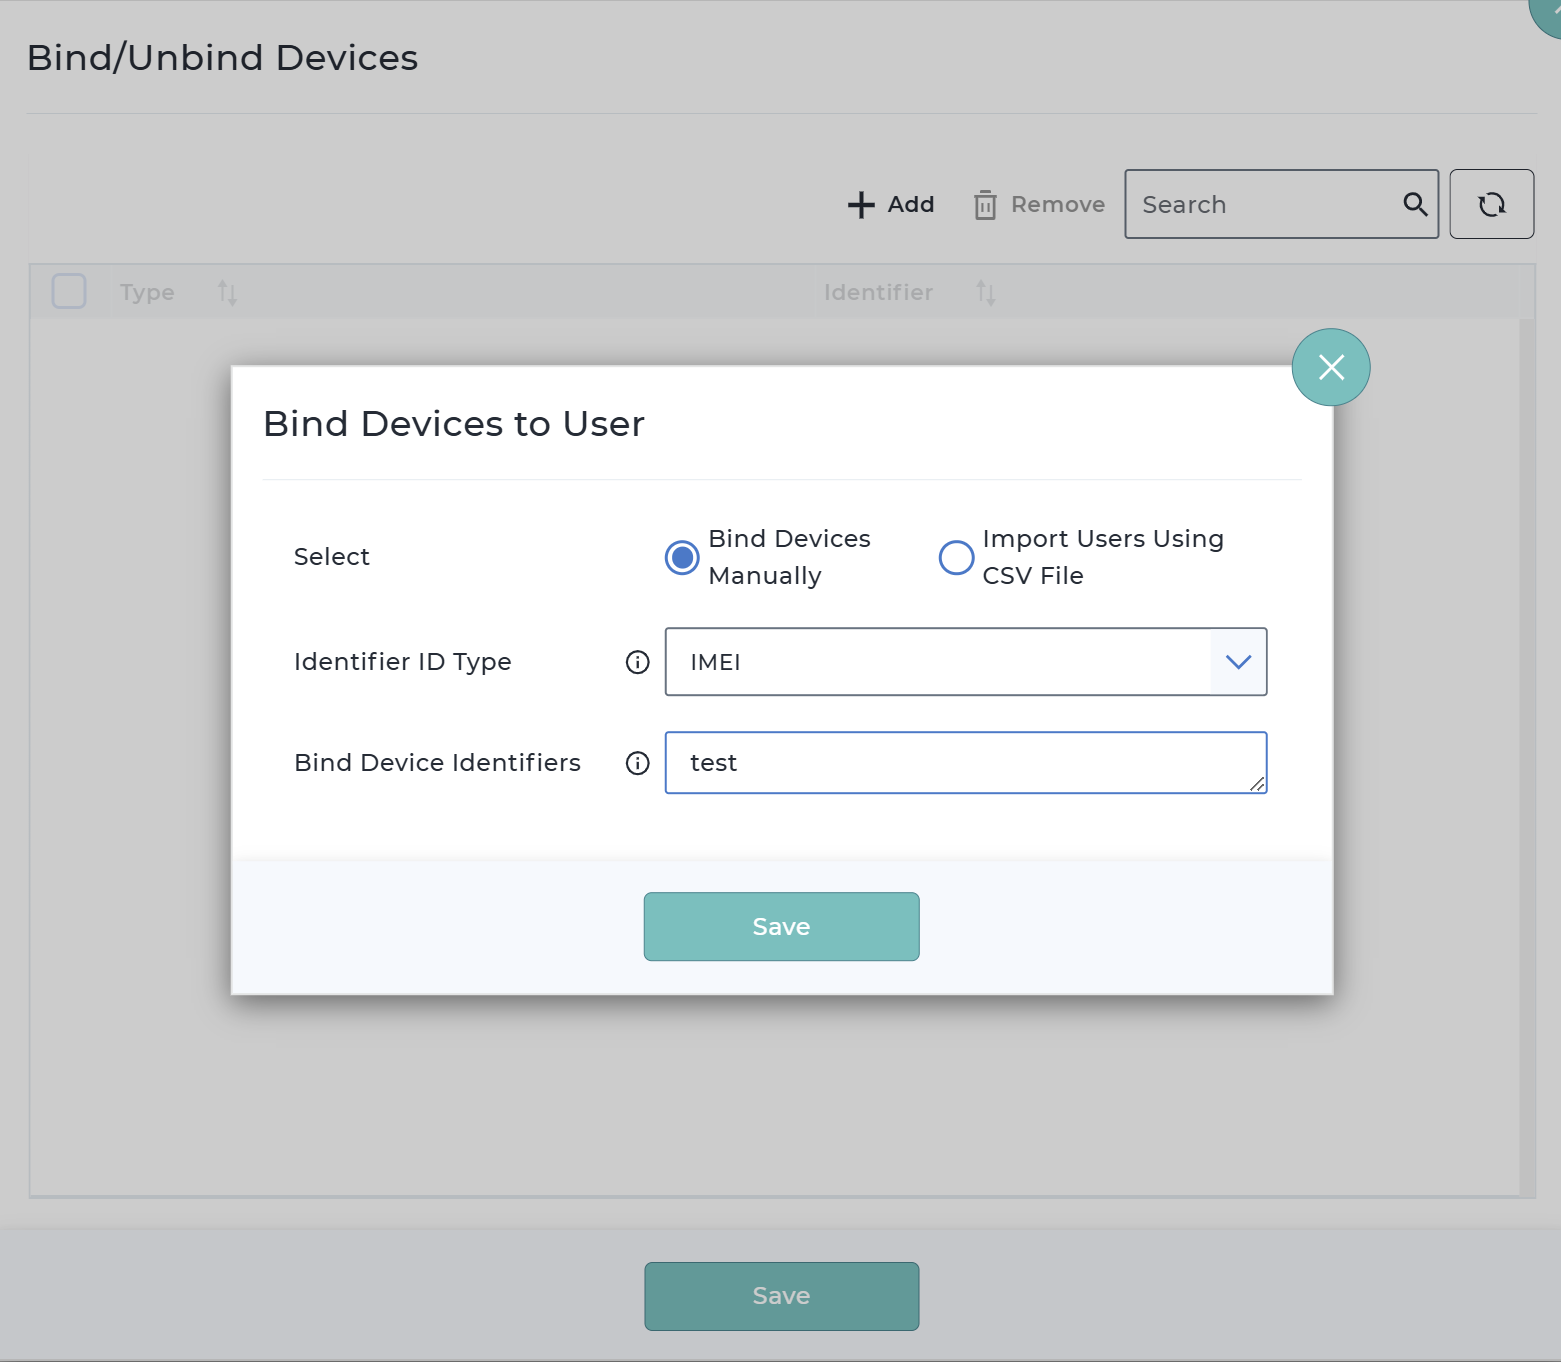
- Upon clicking on this action will open up the Bind/Unbind Devices popup.
- Click Add.
- Added devices will be reflected in the Bind/Unbind Devices table.
- If the option Bind Devices manually is selected, then provide the below information and click Save.
| Field | Description |
|---|---|
| Identifier ID Type | Select the type of device identifier you want to use. IMEI MAC Address Serial Number |
| Bind Device Identifiers | Specify a friendly name to identify this connection |
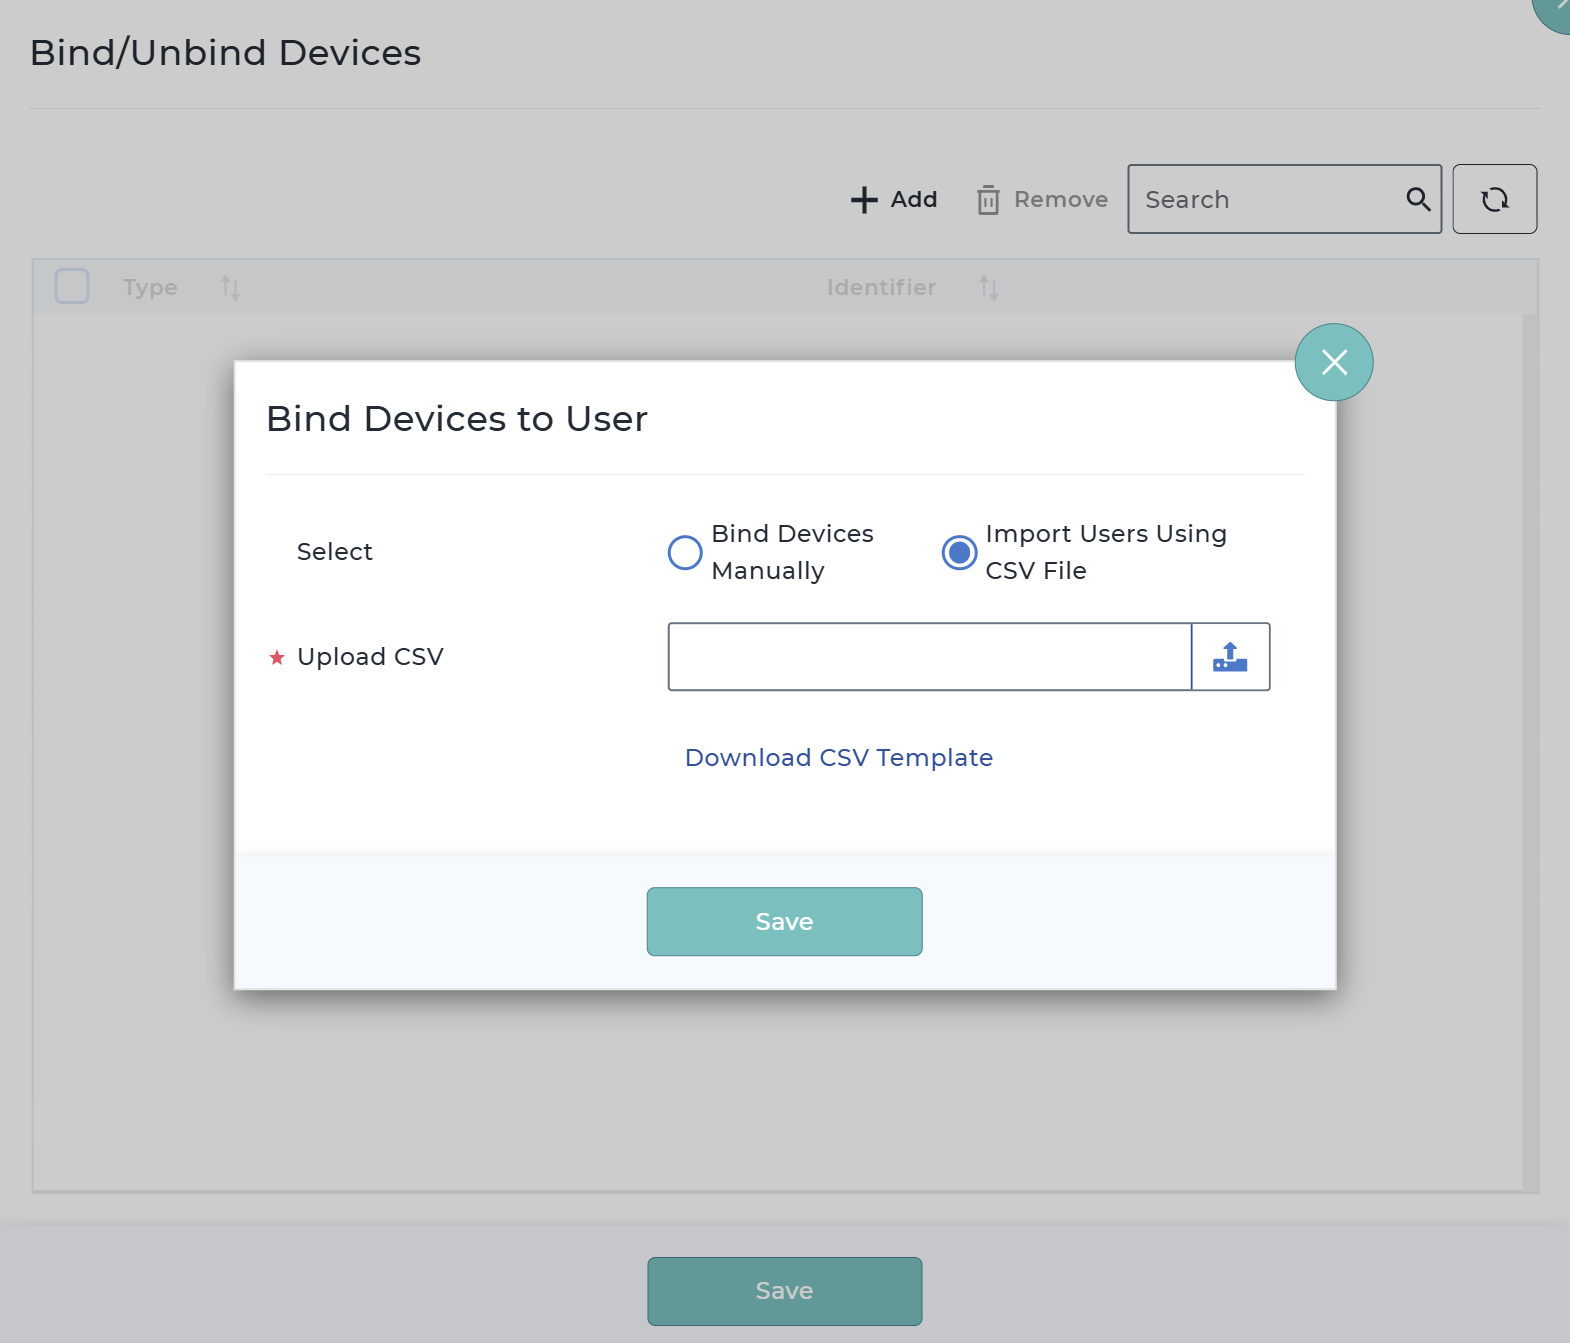
- If the option Import Devices using CSV file is selected, you should upload the device list via csv file and click Save.
| Field | Description |
|---|---|
| Download CSV Template | Use this option to download the predefined CSV Template which helps in preparing the users list. Please ensure your file follows the correct format with the required fields to successfully add users to your organization |
| Upload CSV | Once the device list is prepared, click the upload icon on this page to import the file from the local drive. |
Added devices will be reflected in the Bind/Unbind Devices table.
Disable User – Use this option to temporarily revoke access for the selected user.
Delete User – Use this option to permanently remove the user from the domain.