SAML Based Single Sign-On (SSO)
Overview
SureIdP serves as a centralized Identity Provider (IdP) within the SureMDM platform. It enables secure Single Sign-On (SSO) through the SAML 2.0 protocol for enterprise applications such as Microsoft Entra (Office 365), Google Workspace, Okta, and custom SAML-compliant apps.
How SAML SSO Works
In a typical SAML-based SSO flow:
- A user attempts to access a Service Provider (SP) like Office 365.
- The SP redirects the authentication request to SureIdP.
- SureIdP verifies the user’s identity and enforces conditional access policies.
- Upon successful authentication, the user is granted seamless access without re-entering credentials.
Configuration Requirements
To enable SAML SSO:
- On the IdP side (SureIdP): Admins configure SAML metadata and authentication policies.
- On the SP side (e.g., Google Workspace): The SP is configured to trust SureIdP as the IdP using SureIdP metadata.
Prerequisites
- A custom domain must be added and verified in SureIdP.
- Users must be imported via CSV or automatically synced from external IdPs.
- Admin access to the target application’s admin console is required for SSO setup.
Supported Platforms
- Android
- iOS
- Windows
- macOS
- Linux
Configuring a SAML Application in SureIdP
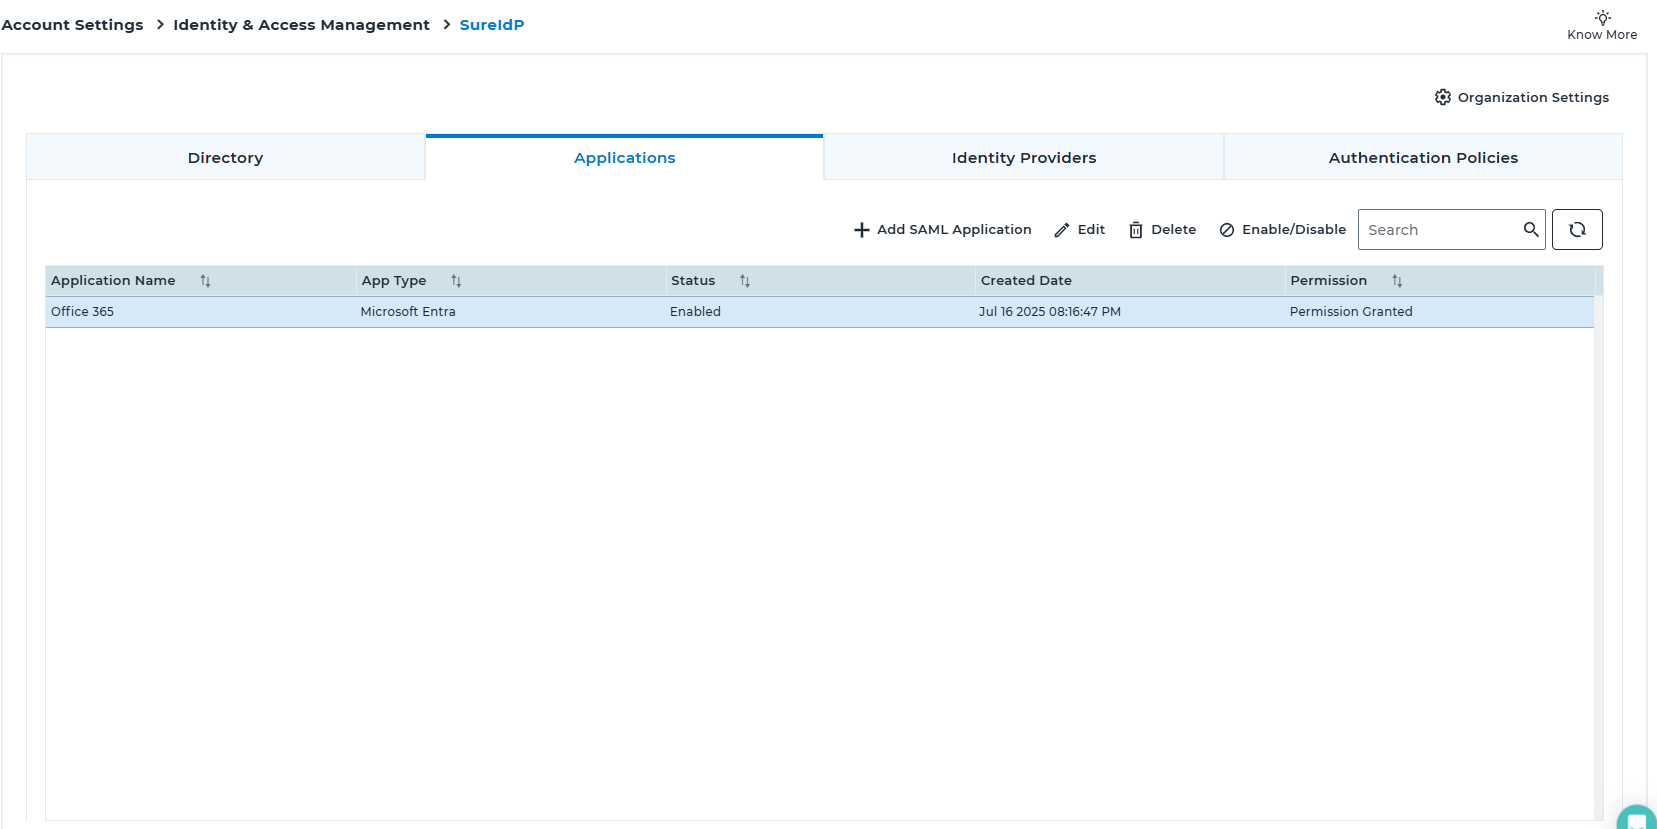
Navigate to SureMDM Web Console → Settings → Account Settings → Identity & Access Management → SureIdP → Applications (tab)
Click Add SAML Application
In the Add SAML Application popup, select the application type and click Next:
- Google Workspace
- Okta
- MS Entra (Office 365)
- Custom SAML 2.0 App
Provide the required Application Details:
- Name
- Description
Configure the SSO settings, including Service Provider metadata and entity identifiers.
Detailed configuration steps are provided in the following sections.Set access rules by selecting from existing Authentication Policies.
Refer to this section for a comprehensive explanation of how to create and apply these policies.Click Save.
The application will appear in the Applications list.Created applications will be reflected in the table under the Applications tab in the SureIdP section.
Application Actions
- Edit: Use this option to edit the created SAML Application configuration.
- Delete: Use this option to permanently remove the application.
- Enable/Disable: Use this toggle to modify the activation status of the application.
- Refresh: Use this option to initiate refresh.
Certificate Management:
To enable passwordless authentication or to enforce that password-based logins occur only on managed devices, SureIdP relies on certificate-based validation.
Certificate Management must be configured to:
Support passwordless authentication using device certificates
Validate if a device is managed before granting access (even for password-based login)
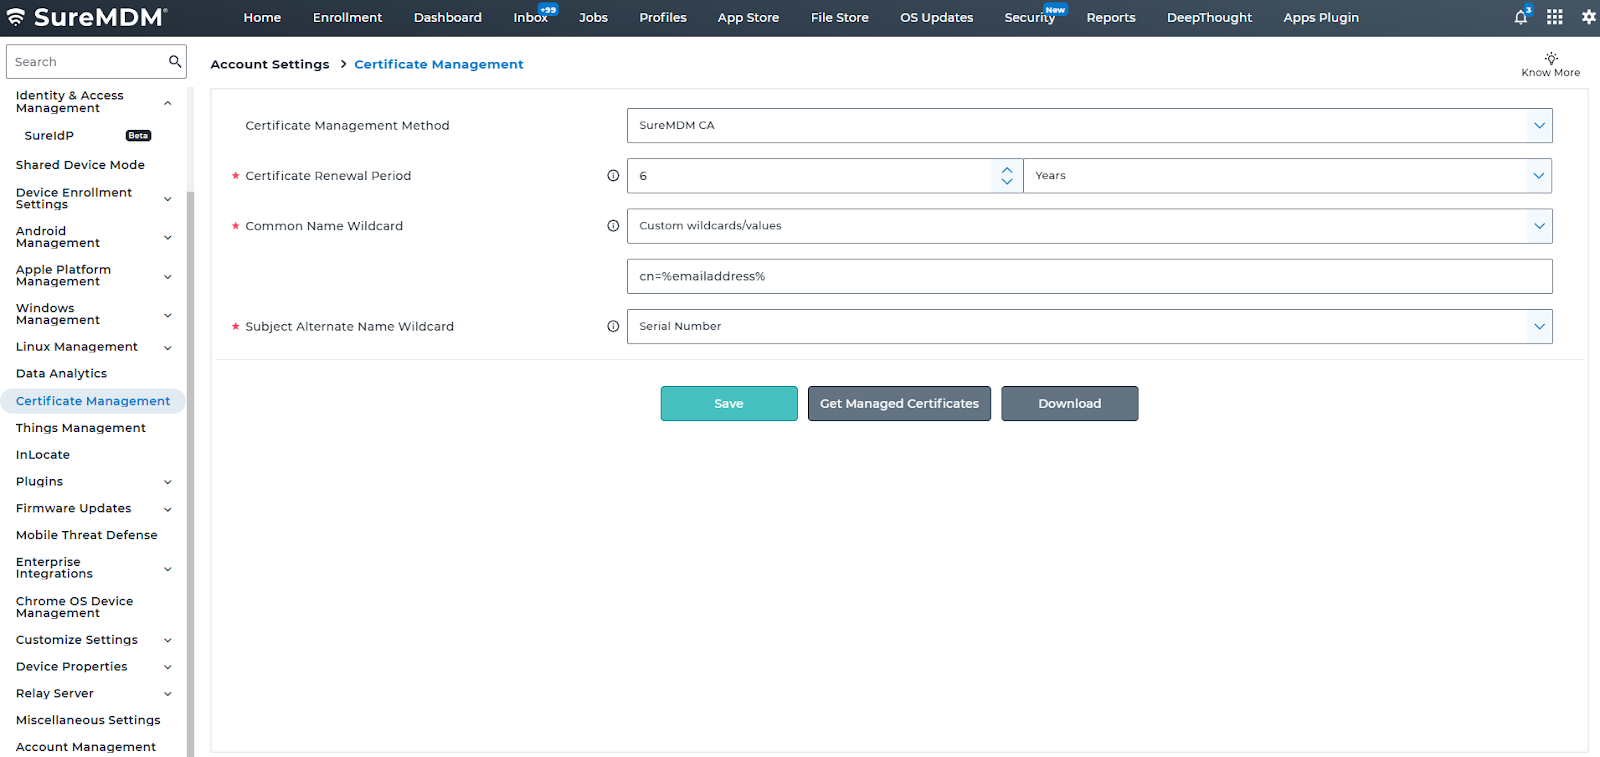
Steps to Configure Certificate Management
Log in to the SureMDM Web Console and navigate to Account Settings > Certificate Management.
Choose the Certificate Management Method from the dropdown (e.g., DCOM).
Set the Common Name (CN) Wildcard, select Custom wildcards/values from the dropdown and set the value as cn=%emailaddress%, to define how user identity is mapped in the certificate.
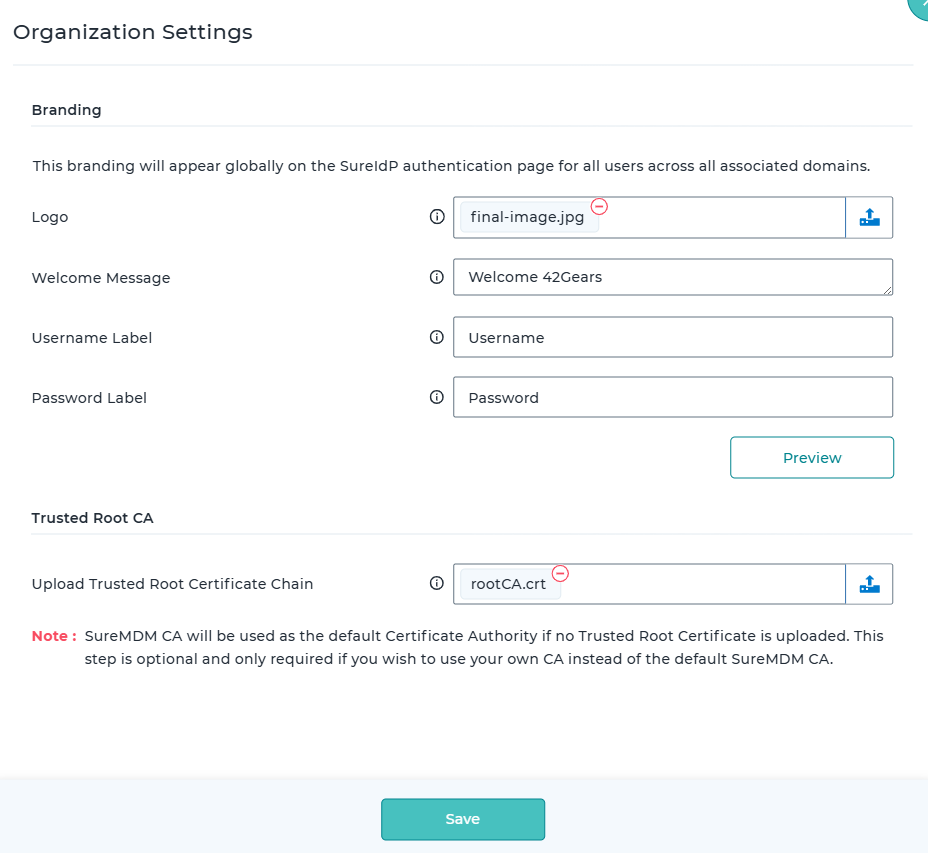
Go to Account Settings > Identity & Access Management > SureIdP Organization Settings.
Upload the Trusted Root Certificate Chain that will be used to validate device certificates issued by SureMDM.
- A valid certificate must be present on the device to enable passwordless login.
- For newly enrolled devices, the certificate profile is automatically pushed during enrollment. However, for existing devices where application SSO is configured after enrollment, ensure that the certificate profile is manually created and deployed to those devices.
- Even when using password-based authentication with device restriction enabled, SureIdP relies on the certificate to verify that the device is managed.