MongoDB Atlas Setup
MongoDB Atlas is a fully-managed cloud database. Atlas manages all the deployments and complexity of deployments on the cloud service providers.
MongoDB Atlas is supported from On-premise build v6.54 onwards.
To setup and configure MongoDB Atlas, follow these steps:
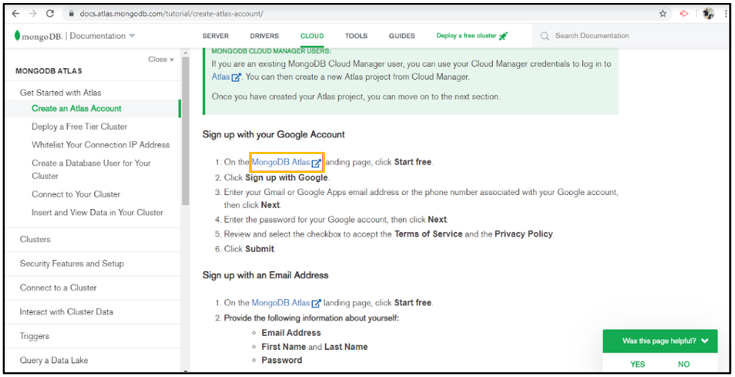
- Click on the below link and follow the steps to create an account
https://docs.atlas.mongodb.com/tutorial/create-atlas-account/
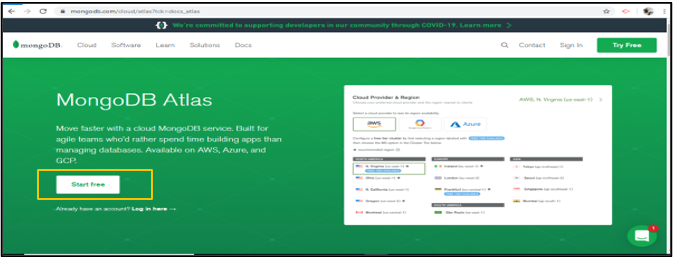
2. Click MongoDB Atlas.
3. Click Start Free.
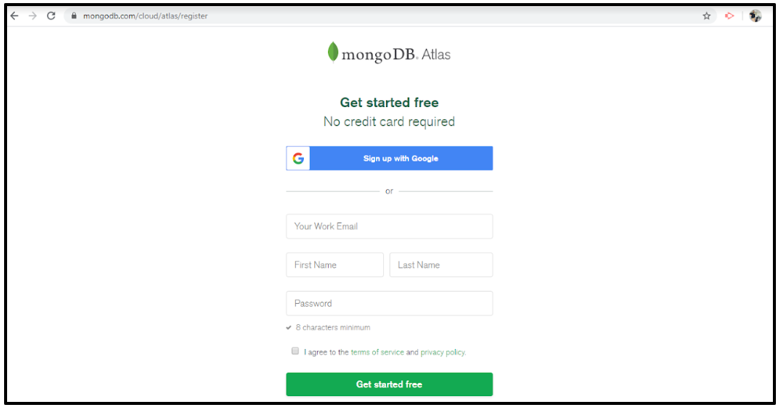
4. Enter Email Address, First Name, Last Name, Password and accept the terms of service and privacy policy and click Get started Free.
5. Select the required cluster and click Create a Cluster.
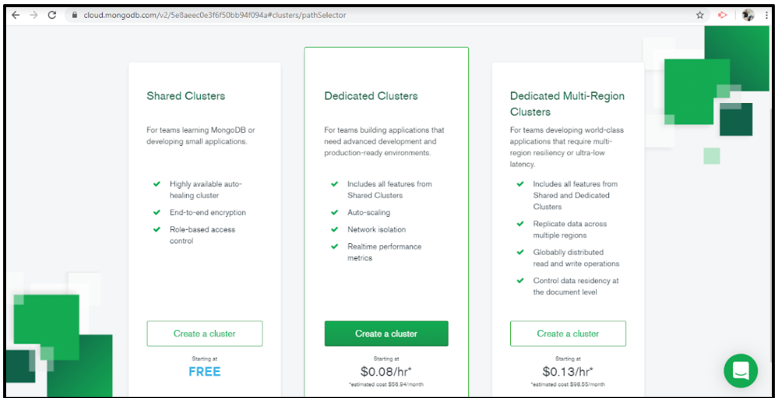
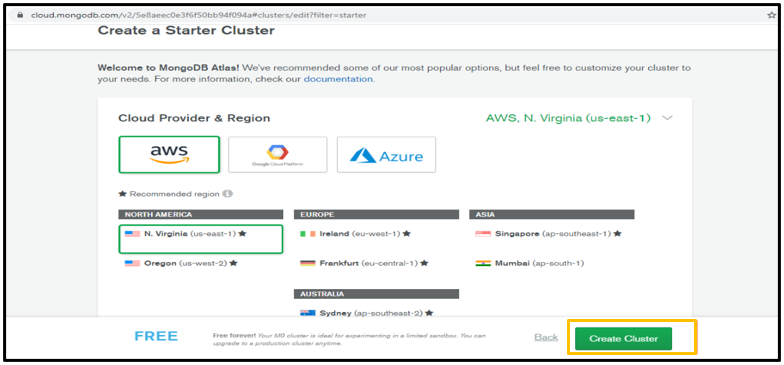
6. Select the Cloud Provider and Region and click Create Cluster.
Create MongoDB user
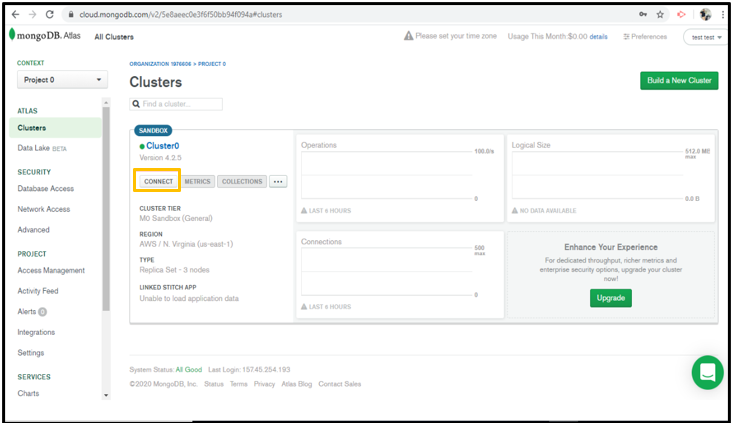
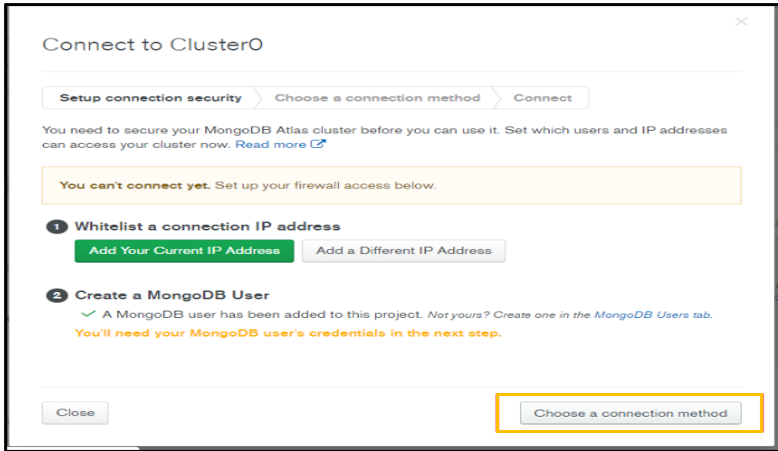
7. Navigate to Clusters and select a cluster and click Connect.

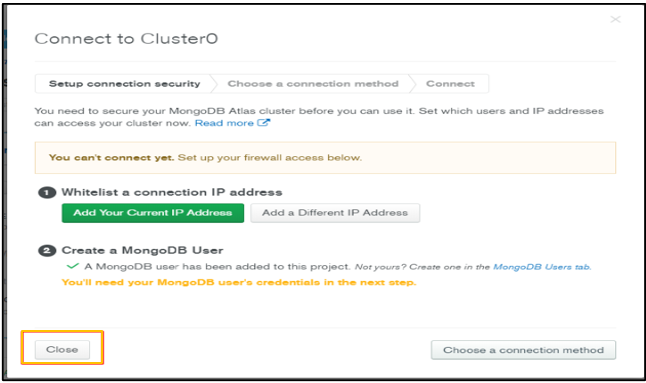
8. Enter Username and Password and click Create MongoDB User.
Password should not contain @.

9. Once the user is created successfully, click close.
Copy MongoDB Connection String
10. Navigate to Clusters and select a cluster and click Connect.
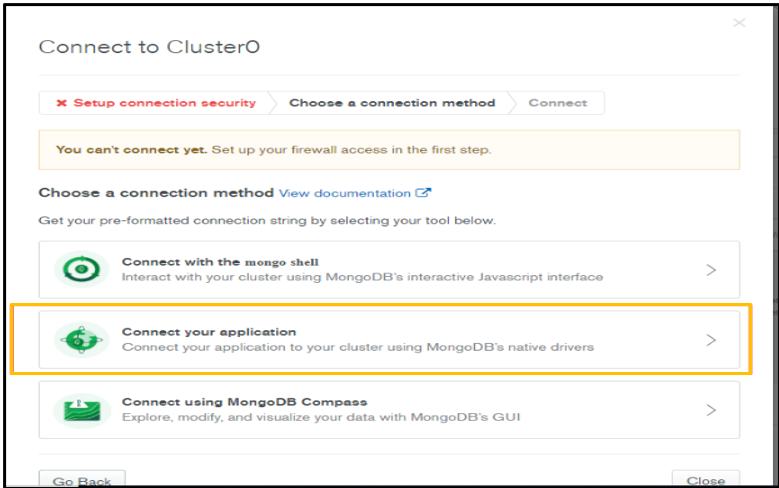
11. Click Choose a connection method.
12. Click Connect your Application.
13. Click Copy.
The connection string will be copied and you can save it in a Notepad file.
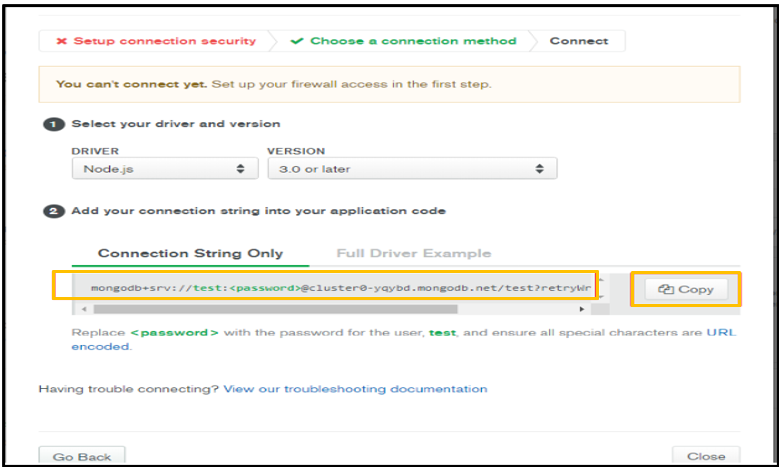
1. Before using the connection string, replace the user name and password in the string.
2. If the connection string contains &, replace it with &.
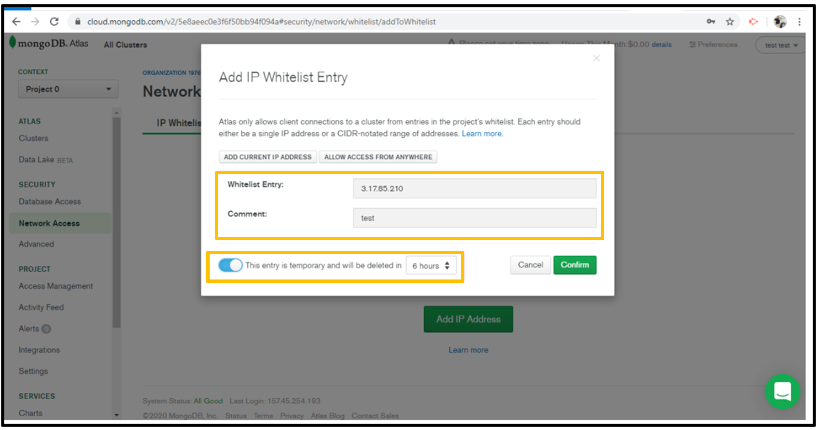
Whitelist the Sever IP
14. Navigate to Network Access and click Add IP Address.
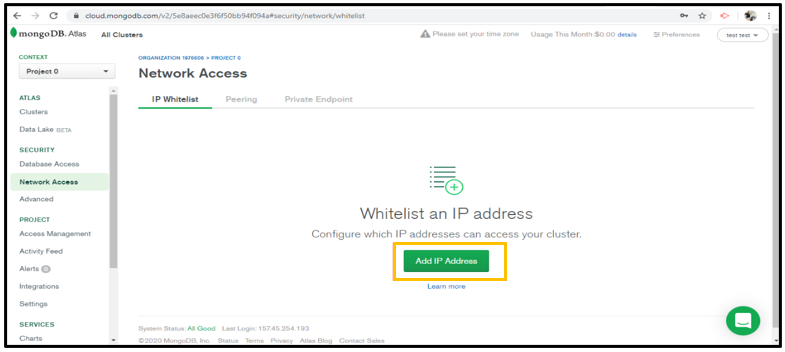
15. Enter IP address in Whitelist Entry field and enter Comment and click Confirm.
Turn ON the toggle button if the user wants to add an IP address temporarily.
16. Navigate to SureMDM Configurator > Database Configuration and paste the MongoDB Connection String copied from step no.13 and click Test Connection.

Paste the copied connection string in DB Worker and Migration tool.
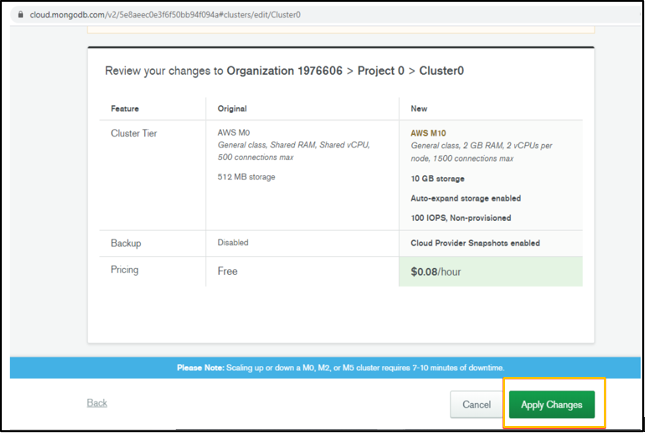
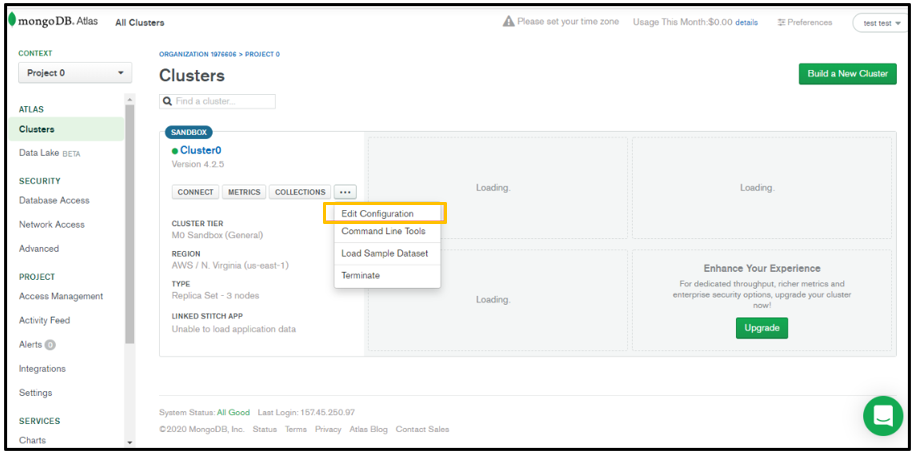
Convert Free account to a paid account
17. Navigate to Clusters tab and select a cluster and click ![]() > Edit Configuration.
> Edit Configuration.
18. Click Cluster Tier.
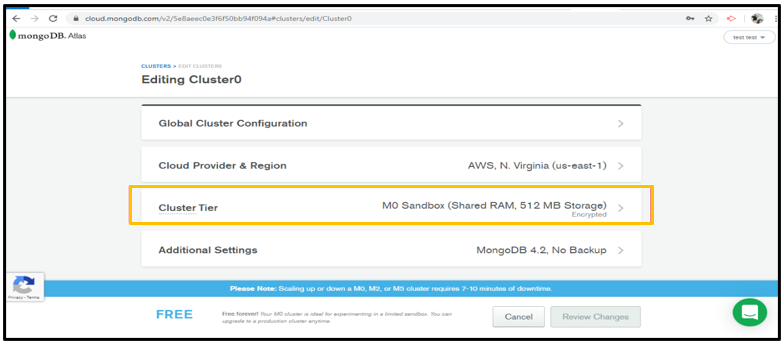
19. Select the required Tier type and click Review changes.
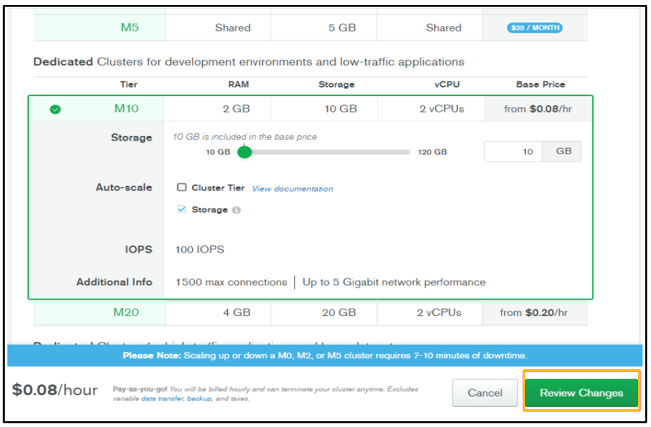
20. Click Apply Changes and enter the Payment Information.