Configure ADFS Server
To apply changes on ADFS Server, follow these steps:
1. RDP into ADFS Server.
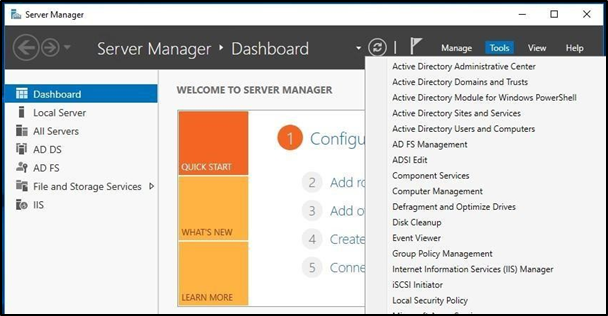
2. Launch AD FS Console from Server Manager.
3. Click Tools tab, select AD FS Management.
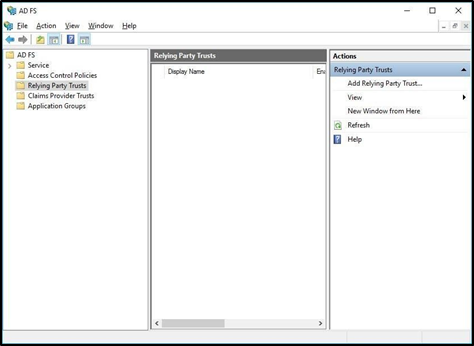
4. Click Relying Party Trusts > Add Relying Party Trust.
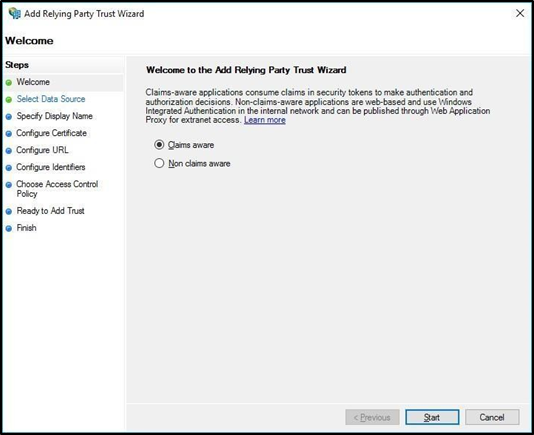
5. Select Claims Aware and click Start.
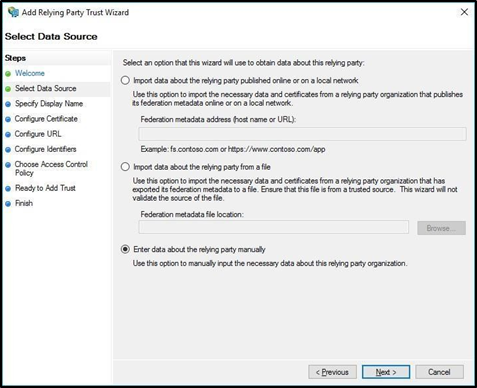
6. Select Enter data about relying party manually and click Next.
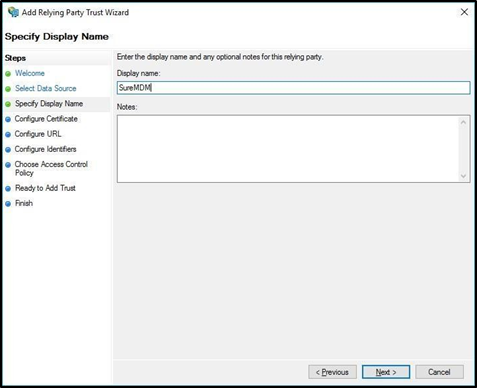
7. Enter Display Name as SureMDM and click Next.
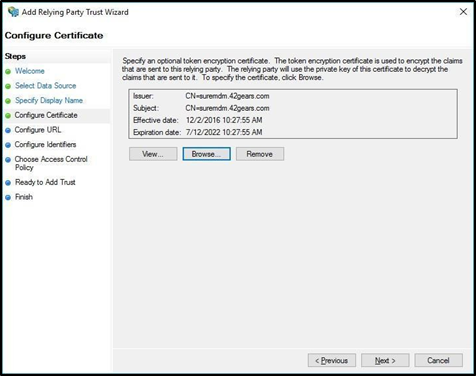
8. In Configure Certificate screen, browse for the certificate (adfs_xxxxxxx.cer) downloaded.
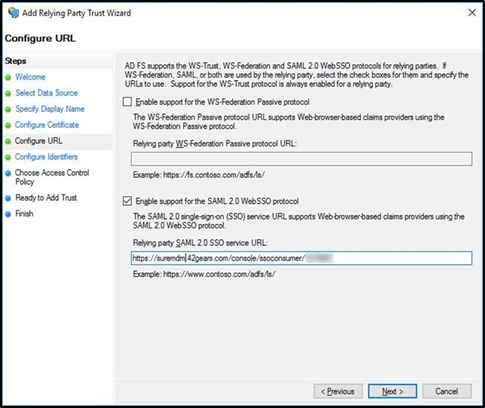
9. Select Enable support for the SAML 2.0 WebSSO protocol and enter the URL as https://suremdm.42gears.com/console/ssoconsumer/1.
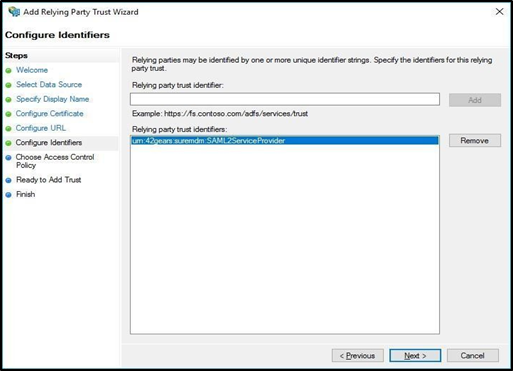
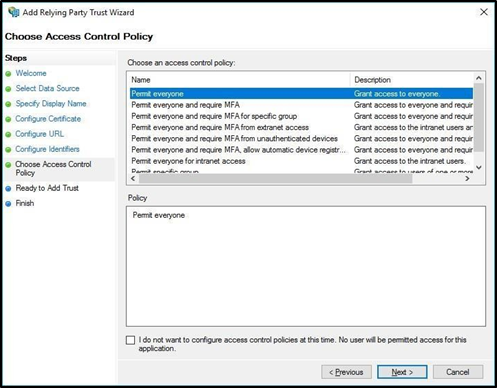
10. In the Relying party trust identifiers field, type urn:42gears:suremdm:SAML2ServiceProvider and click Next.
11. Select the desired option from Choose an access Control policy list box.
12. Click Next > Close.
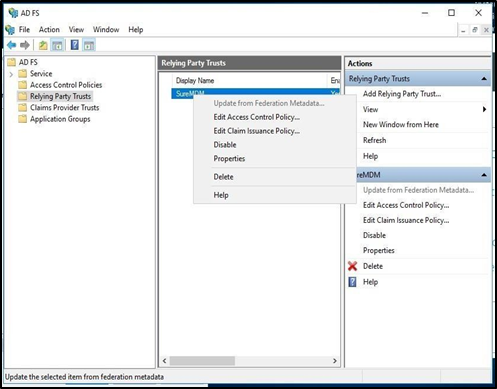
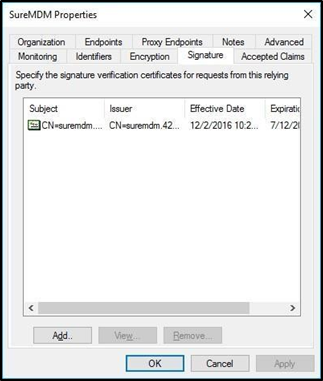
13. In the AD FS Console, right-click SureMDM and select Properties.
14. Select Signature Tab and click Add.
15. Select the certificate (adfs_xxxxxxx.cer downloaded earlier) and click Apply.
16. Select Endpoints tab and click Add SAML.
17. Select Endpoint type as SAML Logout and in the Trusted URL field type https://\OnPremiseServerURL\/console/ssoservice/1 and click OK.

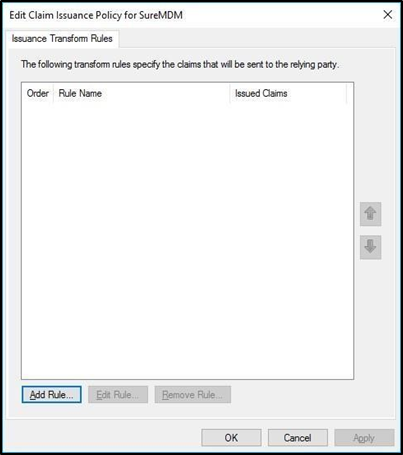
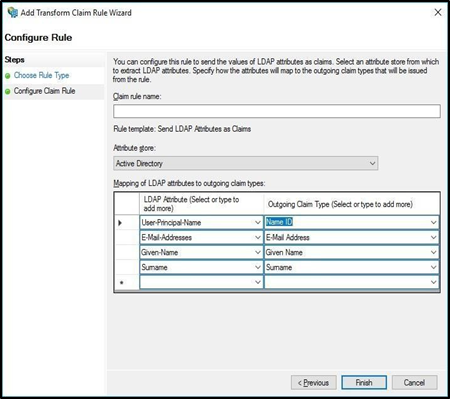
18. On the Edit Claim Issuance Policy Window prompt, click Add Rule > Next.
19. In Claim rule name field enter SureMDM, select Attribute store as Active Directory and select mappings as shown in the following screen and click Finish.
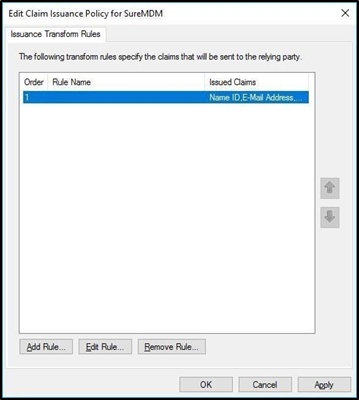
20. Click OK.
21. Use the URL https://\OnPremiseSureMDMURL\/console/ssologin/1 for SSO.