Device Toolbar
With one or more devices selected in the Device Grid, you can perform some actions with the Device toolbar, such as applying a job, locating the device, blocking it, and more. You can perform the following actions using the device toolbar:
- Apply Jobs/Profiles - With one or a group of devices selected in the device grid, you can apply jobs/profiles using the Apply option.
While applying Jobs/Profiles, administrators can configure job deployment based on specific network connections and device charging states to optimize performance and resource usage.
a. Deploy Job On: When deploying jobs/profiles, you can specify the network type required for the job to execute:
Wi-Fi Only: Deploy jobs only when connected to Wi-Fi.
Mobile Data Only: Deploy jobs only when using mobile data.
Ethernet Only: Deploy jobs only when connected via Ethernet.
Ethernet or Wi-Fi Only: Deploy jobs when connected to either Ethernet or Wi-Fi.
Any Network: Deploy jobs regardless of the network type connected to.
Deploy Job On available only for Install Application Jobs, File Transfer Jobs, and Composite Jobs containing File Transfer and/or Install Application Jobs.
b. Device Charging State: You can set jobs/profiles to deploy based on the device's charging status:
Don't Care: Deploy jobs regardless of the charging state of the device.
Plugged In: Deploy jobs only when the device is charging.
These settings allow for optimized job deployment based on network availability and device power status.
Job History - View the total number of jobs/profiles in various states such as Pending/In Progress/Failed/Completed/Scheduled.
Locate - You can track the device's location using GPS. For more information, see Locate the Selected Device.
Move to Recycle Bin - You can move the devices to the recycle bin if they are no longer available on the SureMDM console. When the device comes online, it will start communicating with SureMDM until it is permanently deleted. To remove permanently, delete the device from the Recycle Bin.
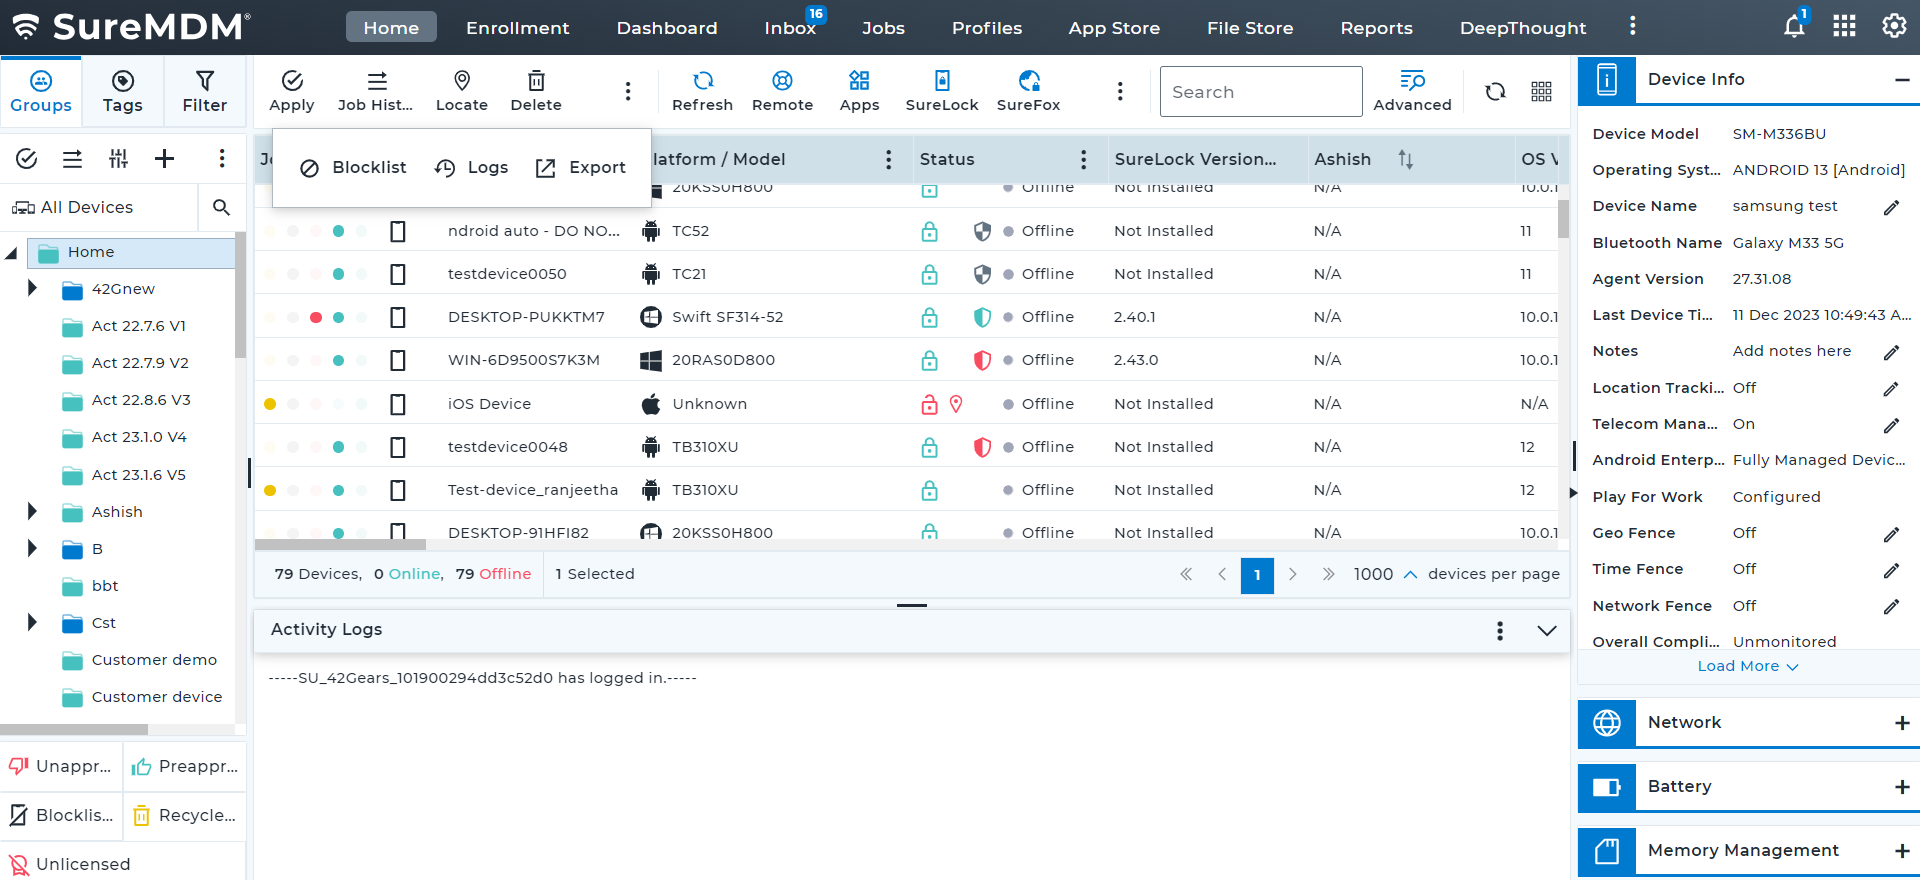
Blocklist - You can blocklist the selected devices using this option.
Logs - View the device log activities of a selected device. For more information, see View Logs.
Export - You can export all device grid data in .csv format with the following options:
Export Devices from Current View – Exports only the devices displayed on the current page.
Export All Devices – Generates a report of all devices in the device grid. To view or download the report, go to Reports → View Reports.
Search - You can search the devices available in the SureMDM console. For more information, see Search Devices.
Locate the Selected Devices
Location tracking feature in the SureMDM console helps the admin provide real-time location information as well as a historical breadcrumb trail of locations for mobile devices. The tracking information can be used to know the current location of a device as well as the locations that the device has been through before it reached the destination.
Enabling Location Tracking
You can enable location tracking using either of the following methods:
Method 1: From Device Information Panel
Select a device from the Device Grid.
Navigate to Location Tracking in the Device Information panel on the right side of the console.
In the Location Tracking prompt, Enable Location Tracking on device checkbox.
Configure one or both of the following tracking options:
- Time Interval — Specify the tracking frequency in hours or minutes
- Distance Interval — Specify the minimum displacement in meters, kilometers, or miles
Combined Interval Behavior When both time and distance intervals are configured, the location will update based on whichever condition is met first.
For Indoor Location Tracking, enable Inlocate on Device checkbox.
Enter the Tracking Periodicity.
Click Save.
Method 2: From Device Toolbar
Select a device from the Device Grid.
Navigate to the Device Toolbar and click Locate.
Click Turn On in the pop-up window.
In the Location Tracking prompt, Enable Location Tracking on device checkbox.
Configure one or both of the following tracking options:
- Time Interval — Specify the tracking frequency in hours or minutes
- Distance Interval — Specify the minimum displacement in meters, kilometers, or miles
Combined Interval Behavior When both time and distance intervals are configured, the location will update based on whichever condition is met first.
Minimum tracking periodicity varies by license type:
- Enterprise License — 1 minute
- Standard and Premium Licenses — 10 minutes
For Indoor Location Tracking, enable Inlocate on Device checkbox.
Enter the Tracking Periodicity.
Click Save.
Location Tracking window
Last Location: The Last Location mode displays the last location of the device. Click on the location to display the details such as date, time at which location was last received, Lat, Lng and Address on Google maps. Last Location has the following option:
- Refresh: When the specified period is reached, the map refreshes automatically and also admin can refresh manually using the Refresh button at any point of time.
History: The History mode displays the historical tracking of the device for 24 hours. Click on the location to display the details such as date, time at which location was last received, Lat, Lng and Address on Google maps. History Mode has the following options:
View History – Use this option to view the location history of the device.
Modify – Edit the period of tracking such as the date and time for which the device location history has to be displayed and Location Accuracy.
Export – Exports the location tracking history in CSV format.
Live Location: The Live Location mode displays the current location of the device. Click on the location to display the details such as date, time at which location was last received, Lat, Lng and Address on Google maps.
Live Location option will be available only for Android devices.
View Logs
The Logs feature allows you to monitor the activity of a specific device. Simply select a device from the Device Grid and click on Logs located in the device toolbar. This will provide detailed log activity for the selected device, helping administrators track and analyze device behavior effectively. A visual representation of this process is provided in the screenshot below:
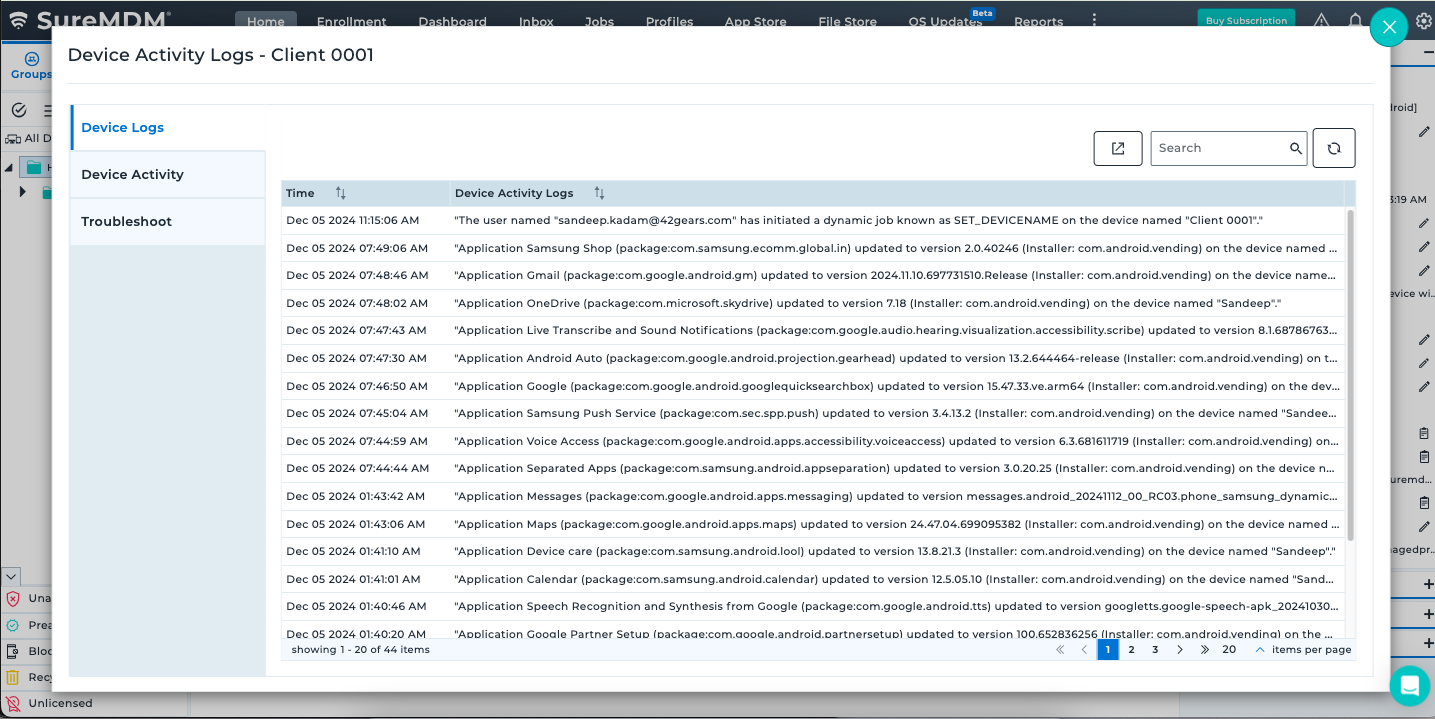
Device Logs
This section displays all the log activities of the selected device.
The Export option allows you to download the device log details in .csv format.
Activity Logs
The activity logs of devices are displayed in the console at the bottom of the interface. This section provides options to filter logs, clear logs, and export logs for further analysis.
- Log Filter: Used to filter logs based on specific criteria.
- Enable Log Filter.
- Enter the required Device Name.
- Enter the required Job Name.
- Click Submit to apply the filter.
- Clear Logs: Used to remove the displayed logs from the console interface.
- Export Logs: Used to export the logs for further analysis or record keeping.
Device Activity
This section shows the following activities for the selected device during the specified period:
- Device info updates
- Remote support sessions
- Online Status
Troubleshoot
This section assists the administrator in retrieving logs from a device in case of issues with any 42Gears product. Use the option below to request logs and share them with the 42Gears Support team for effective troubleshooting.
Log Request Options (Android)
This option is available only for Android devices.
Device Type
Attended - When enabled, a prompt appears on the device, and the report is generated only when the user interacts with it. This mode applies to both supervised and unsupervised devices and requires user intervention.
Unattended - When enabled, reports are automatically generated without any user intervention. This mode applies only to supervised devices. For unsupervised devices, the checkbox is greyed out and cannot be selected.
This option is available only for iOS devices.
Recommendation:
It is advisable to download logs when the device is connected to a Wi-Fi network. If downloading over a cellular network, including while roaming, please be aware that additional charges may apply depending on your network provider.
SureMDM Agent Logs:
- Used to request logs for the SureMDM Agent.
- Applicable for all devices and enrollment modes.
SureLock Logs:
- Used to request logs for the SureLock application.
- The SureLock application must be installed on the selected device to access this option.
SureFox Logs:
- Used to request logs for the SureFox application.
- The SureFox application must be installed on the selected device to access this option.
SureVideo Logs:
- Used to request logs for the SureVideo application.
- The SureVideo application must be installed on the selected device to access this option.
Bug Report:
Used to request a bug report. It provides detailed information about the device's current state for troubleshooting. It includes system logs (e.g., Logcat and kernel logs), device configuration (such as model, Android version, and build details), and running processes with memory and CPU usage. Additionally, it contains battery and network information, app usage statistics, crash reports, and ANR data. It also captures hardware status, sensor data, and security information, including SELinux policies.
Supported only on Fully Managed Devices (Device Owner mode).
- Security Logs:
Used to request Security Logs. It provides detailed information about security-related events on the device. This includes failed login attempts, screen lock and unlock events, device reboots, and app installation or removal activities. They also capture policy compliance violations, such as attempts to bypass security settings, and provide insights into network and certificate access. These logs help admins monitor device security and identify potential threats.
Supported on the following device modes:
- Fully Managed Device (Device Owner mode)
- Fully Managed Device with Work Profile (Work Profile on Corporate-Owned mode)
Requirement: Ensure that Enable Security Logging is enabled under: Profiles > Android > System Settings > Logging, and applied to the selected device.
- Network Logs:
Used to request Network Logs. It provides detailed information about network activity on the device. This includes data on DNS lookups, TCP connections, and network usage by apps. They capture details such as the source and destination IP addresses, ports, and protocols used. These logs help administrators monitor app-specific network behavior, troubleshoot connectivity issues, and detect suspicious or unauthorized network activity.
- Supported only on Fully Managed Devices (Device Owner mode).
- Requirement: Ensure that “Enable Network Logging” is enabled under: Profiles > Android > System Settings > Logging, and applied to the selected device.
- RxLogger Logs:
- Used to request system logs from Zebra devices only.
Log Request Options (Things)
Printer Logs – Allows users to view and track print activity and issues with device or network connectivity for enrolled printers in the SureMDM console. Users can generate and download log reports, monitor print-related issues, and share logs with the 42Gears Support team for troubleshooting.
Allcv Data- Allows users to retrieve the configuration settings of the enrolled printers in the SureMDM console. Users can generate and download allcv report, verify the configuration data and share them with the 42Gears Support team in case of troubleshooting.
Search Devices
There are two types of search available in SureMDM:
A. Basic – You can perform a simple search based on Device Name, Model, Operator, IMEI, and Notes parameters. Basic Search can be used for quick lookups.
Steps:
Navigate to the Device Grid in the SureMDM Console > Enter a keyword related to the device you want to find using parameters such as Device name, Group name, OS type, IMEI, or serial number.
Press Enter or click the Search Icon to view results.
B. Advanced – The Advanced method enables users to filter devices using multiple criteria and predefined fields.
Steps:
Navigate to the Device Grid in the SureMDM Console.
Click the Advanced drop-down. This will list down two options. Advanced Search and Advanced Query:
- Advanced Search: Select this option to enable the Search panel above all the parameters listed in the Device Grid. Users can use operators such as Contains, Starts with, Ends with, etc., in this search panel to combine multiple filters for precise results. Use Advanced Search for broader filtering needs.

- Advanced Query: Select this option to enable the drop-down with a list of parameters supported for Search functionality. Users can select a Parameter such as OS, Status, battery levels, etc., combine it with an Operator such as AND, OR, =, >, <, etc., and press Enter to generate a query. Once done click the Search icon to display matching devices.
For Example: Battery < 20 AND Status = 'Offline'
This query will generate a list of devices with battery levels lesser than 20. To combine multiple queries, users can utilize the AND operator to concatenate multiple queries.
For Example: Battery < 20 AND Status = 'Offline'
This query will generate a list of devices with battery levels lesser than 20 and are offline.

To search for Custom Property and Application Versions, users can use the keywords Prop: and App: respectively to proceed with generating the search results.