Device Groups
Use the Device Group section in the SureMDM console to see a full listing of devices in the specifically selected device groups. In this topic, you will learn how to create and manage device groups for one or more devices. Admins can create logical groups to push job(s)/profiles with just a single click. The groups and subgroups will be listed under Home section of the Device Groups.
Any device in the device grid can be assigned to only one group.
The following table describes the settings available in Groups section:
| Settings | Description |
|---|---|
| Search | Display devices that are part of the Device Groups that you select. Click the Search and type the required user groups name. Scroll down to view the listing of Device Groups that you selected. |
| Add | Add a new group |
| Rename | Rename the group |
| Delete | Delete the group |
| Properties | View group properties details such as total number of devices under a group, total number of subgroups under a group, total devices in the current group, total number of the online device, total number of online devices in the current group and ping all devices will convert all offline devices to online in a group. Note: Ping All Devices option is applicable only for GCM devices. |
| Apply | Push the job(s) to a selected group |
| Job History | View the jobs queued for a group based on the status: Pending/In Progress/Failed/Completed/Scheduled. |
| Move to Group | Move to the other group. |
| All Devices | It shows all devices available in the console, regardless of group association. |
| Show Subgroup Devices | Shows devices in the selected group along with all devices in its subgroups |
Create a Group and Assign Devices
You can group sets of devices into specific groups which, like the organization of devices in multiple groups, act as filters for searching required bulk devices easily.
To create a new group and assign devices to a group, follow these steps:
Navigate to SureMDM Web Console.
In the Device Groups section, select Home and click .
In the Add New Group prompt, enter the desired name and click Ok.
The newly created group will be listed under Home.
There are two ways to assign devices to a group:
- Drag and drop the devices from Device Grid to a group. or
- Select and right-click the device(s), click Move to Group option from the context menu.
i. The alternate option to create a new group is to right-click the Home in Groups and click Add.
ii. To create a sub-group, select and right-click a group and select Add and enter the desired name for the sub-group.
Rename a Group
To rename a group, follow these steps:
Navigate to SureMDM Web Console.
On the Device Groups section, select a group and click Edit.
The existing group name will be displayed in the New Group Name field.
On the Rename existing group prompt, clear the existing group name and enter the desired name in New Group Name field and click OK.
Alternate option to Rename a Group is to right-click on the group or subgroup and select Rename.
Delete a Group
To delete a group, follow these steps:
Navigate to SureMDM Web Console.
On the Device Group section, select a group.
Click More to delete a group or subgroup.
In the confirmation prompt, click OK.
- Deleting a group will delete the devices in the group and its subgroups.
- Alternate option to delete a Group is to right-click a group or subgroup and select Delete.
Apply Job to a Group
To assign job(s) to a group at a scheduled time, follow these steps:
Navigate to SureMDM Web Console.
Select a group and click Apply in Groups section.
In the Apply Job/Profile To Group prompt, select the job(s) from the list.
Select Configure Schedule Time to launch the Schedule Job prompt.
Select an option to Push the job to the device:
- Immediately
- Periodically
- Schedule Days and Time
- Schedule Date and Time
Immediately option is selected by default.
- Click Apply.
Alternate option to push a job to a group or subgroup, right-click a group or subgroup and select Apply.
View Job Status
When a job is applied to a device and if the device is online, then the job will be assigned to that device immediately. If the device is offline, the job will get queued in the Job Queue section with the Status as Pending.
Click Group Job History to view the status of the jobs. The status of the jobs is categorized as the following:
Pending - Jobs that are paused or queued. Also, the admin has the option to Re-Apply the pending / error jobs.
In Progress - Jobs that are in the process of applying to the group
Failed - Jobs that are failed to assign to the group
Completed - Jobs that are assigned to the group successfully
Scheduled - You can see the scheduled jobs in this section.
Pending jobs can be reapplied once the device comes online.
To re-apply the job, follow these steps:
Navigate to SureMDM Web Console and select a group from the Device Group.
Click Group Job History from the Device Toolbar.
In the Job Queue prompt under the Pending section, select a job from the list and click Retry.
Select Configure Schedule Time to launch the Schedule Job prompt.
- The alternate option to view the job status is to right-click a group or subgroup and select Job Queue.
- The jobs under the status (Pending / Success / Failed) can be removed from the list using Remove Job.
Move a Group to another Group
To move a group to another group, follow these steps:
Navigate to the SureMDM console.
On the Device Groups section, select a group, click More and click Move to Group.
In the Group List prompt, select a destination group from the list.
Click Move.
In the confirmation prompt, click Yes. The selected group will be moved to the destination group.
Default jobs from source and destination groups will be merged and applied to the devices automatically.
Group Properties
To view the total number of devices and subgroups in a group, follow these steps:
Navigate to SureMDM Web Console.
In the Device Groups section, click and select a group.
Click Properties to launch Group Properties prompt.
Group Properties prompt will have the following options:
- Total Devices - Number of devices in a group
- Total Subgroups - Number of subgroups in a group
- Total Devices in Current Group - Number of devices in the current group
- Total Online - Number of online devices in the group
- Total Online in Current Group - Number of online devices in the current group
- In Default Jobs, the user has options to add or delete the jobs.
- The group color turns blue when default jobs are assigned to a group.
- Click OK.
Assigned Jobs/Profiles
The Assigned Jobs/Profiles allows assignment of Jobs or Profiles to a selected device group. Once assigned, these Jobs or Profiles are automatically deployed to:
- All devices currently in the group
- Any new devices added to the group
- Devices moved from another group into this group
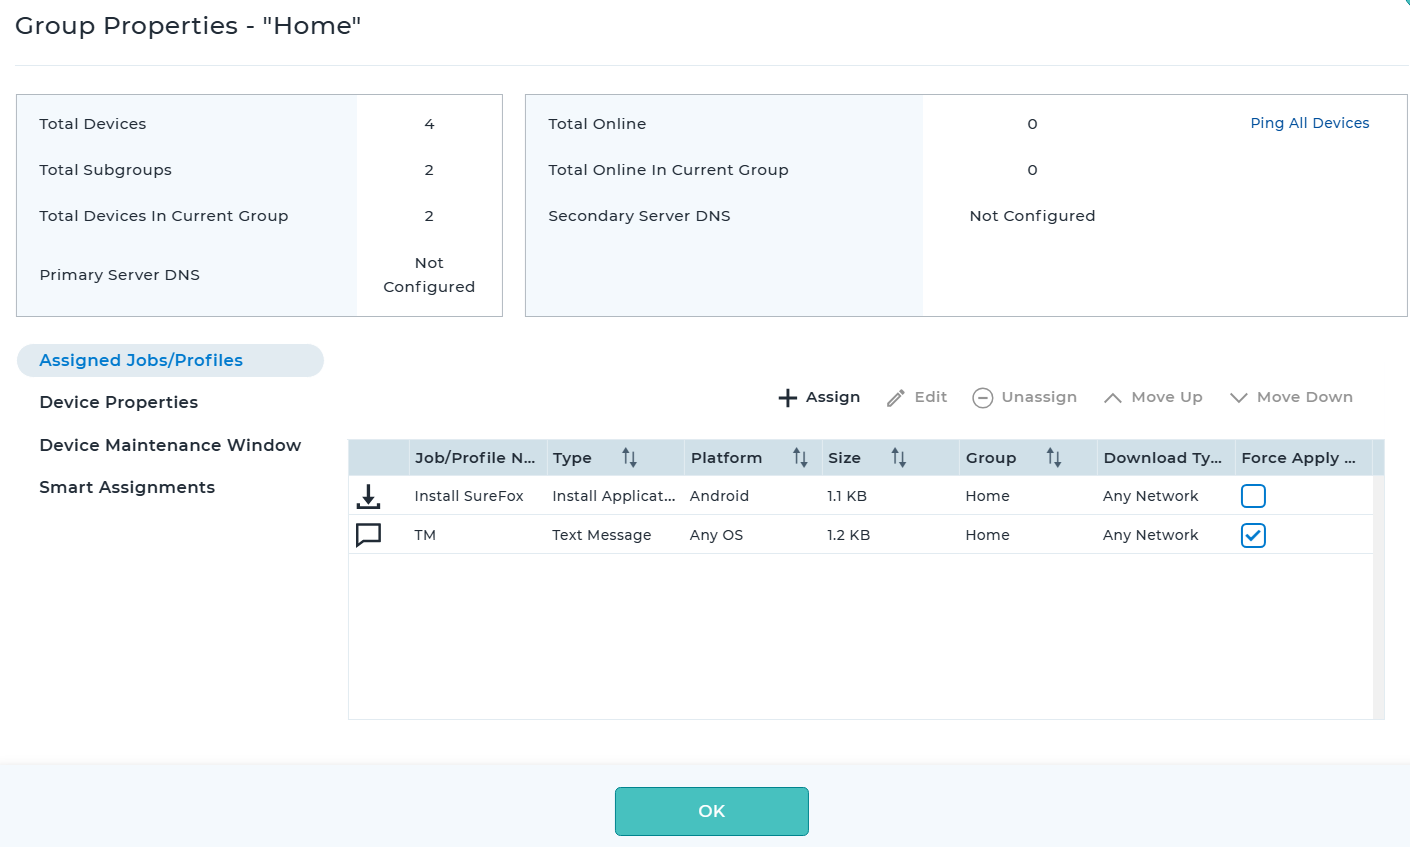
This feature helps to manage and deploy configurations without assigning Jobs or Profiles to individual devices. Groups can be included or excluded as required, making large-scale deployments faster and more manageable. The Assigned Jobs/Profiles section displays a list of Jobs and Profiles assigned to the selected group. This section allows to assign, edit, unassign, reorder, and sync Jobs or Profiles with the relay server.
 |
|---|
The following options are available in the Assigned Jobs/Profiles section:
- Assign - Assign Jobs/Profiles to the selected device group.
- Edit - Modify the parameters of assigned jobs/profiles.
- Unassign - Remove jobs/profiles assigned to the selected group.
- Move Up - Move the selected Job/Profile up in the list.
- Move Down - Move the selected Job/Profile down in the list.
- Sync - Sync the assigned Jobs/Profiles with the relay server.
- Refresh - Refresh the list of assigned Jobs/Profiles.
To assign Jobs or Profiles to a device group, follow these steps:
Log in to the SureMDM Web Console.
Select the required device group and click Group Properties.
Navigate to the Assigned Jobs/Profiles section, click Assign.
Select a Job or Profile from the list of available Jobs/Profiles and click Next.
In the Add Filters dialog, configure the following options:
- Group Inclusions: Enable this option to include only the specified groups for receiving the Jobs or Profiles.
- Group Exclusions: Enable this option to exclude specified groups from receiving the Jobs or Profiles.
- Include Sub-Groups: Enable this option to apply the Jobs or Profiles to all sub-groups within the selected group.
- Model: Select the device model that should receive the Jobs or Profiles.
- OS Build Number: Select the OS build number on which the Jobs or Profiles should be applied.
- Apply on Existing Devices: Enable this option to force deploy the Jobs or Profiles to existing devices.
 |
|---|
- Click Preview to review the selected Jobs or Profiles, target groups, and applied filters.
- Click Save.
Device Properties
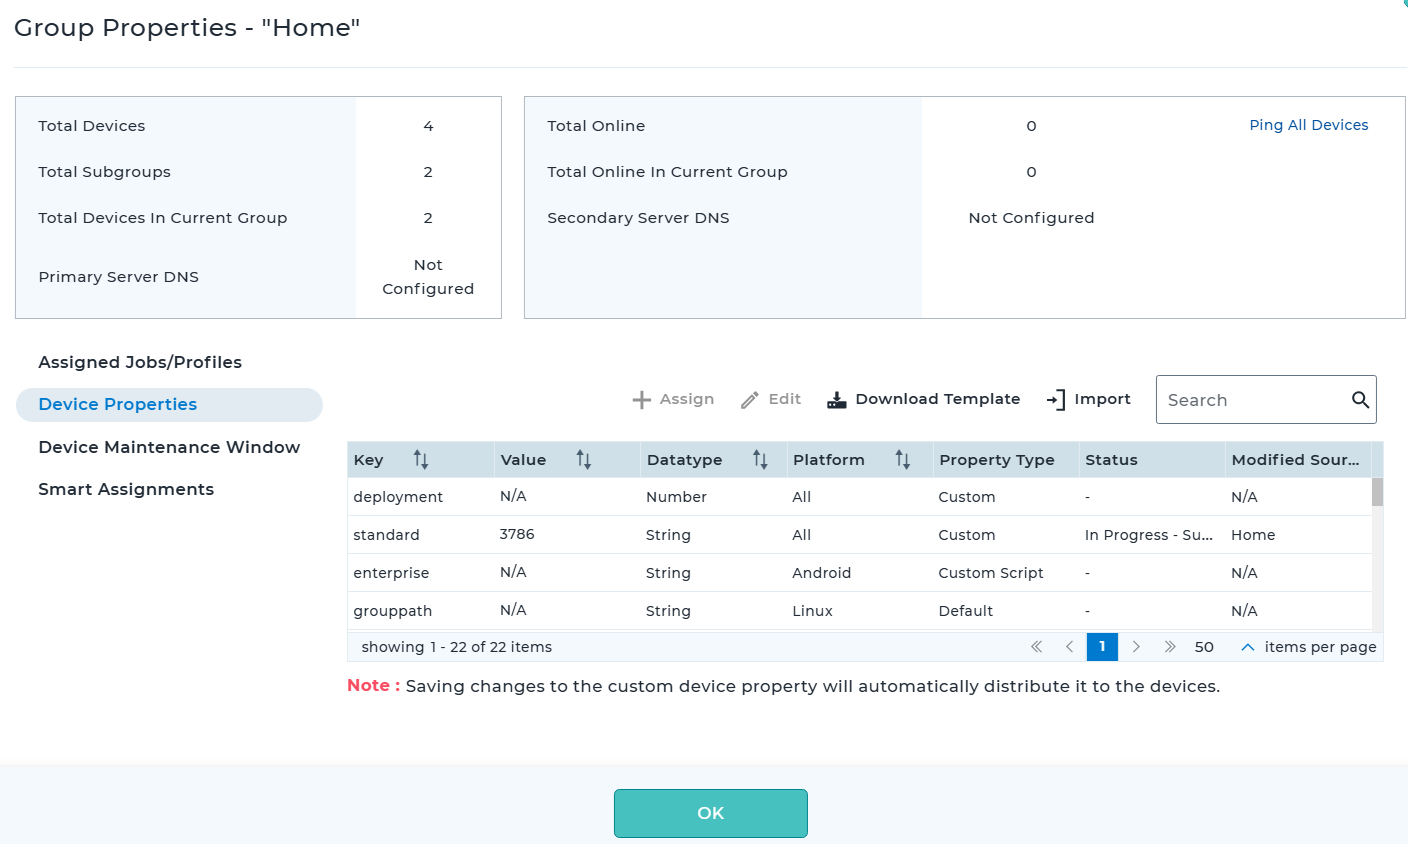
The Device Properties section allows administrators to view and manage custom properties for devices. Custom properties created at the account level are listed here and can be easily assigned to device groups. These properties are created in Account Settings > Device Properties, where administrators can configure value-based and script-based properties. Once created, these properties appear in Group Properties > Device Properties and can be assigned to groups as needed.
The following options are available in the Device Properties section:
Assign - Assign the selected custom property to a group.
Unassign - Unassign the selected custom property from the group.
Edit - Modify the selected custom property.
noteEdit is Applicable only to value-based custom properties.
Download Template - Download a template for custom property values.
Import - Import custom property values using the template.
To assign a custom property to a group, follow these steps:
Log in to the SureMDM Web Console.
Navigate to Group Properties > Device Properties.
 |
|---|
Select a custom property from the list of available properties.
Click Assign.
Click OK to confirm.
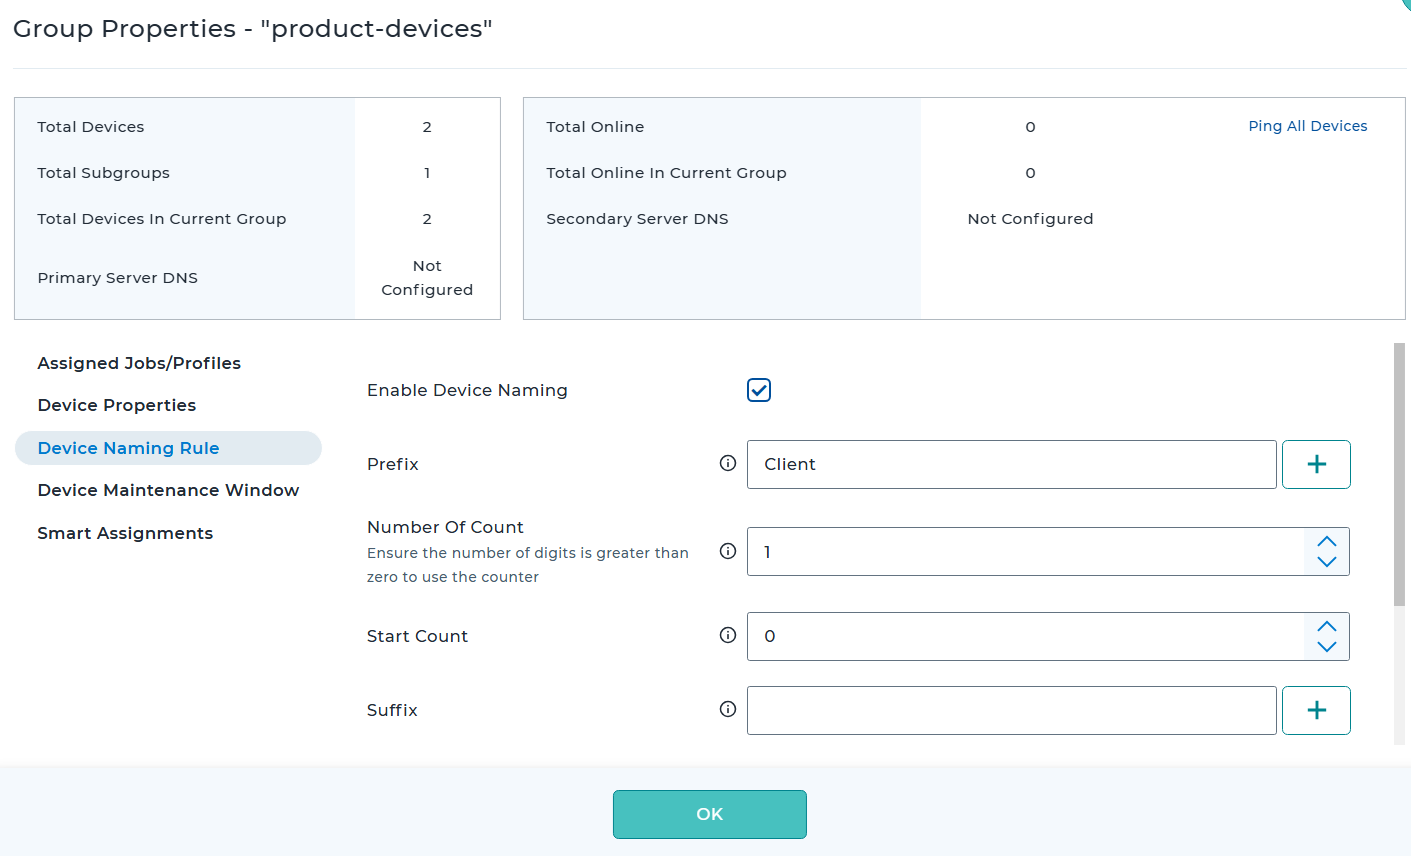
Device Naming Rule for a Specific Group
To configure device naming rule for a specific group, follow these steps:
Log in to SureMDM Web Console.
Select the required device group and click Group Properties.
Navigate to the Device Naming Rule section and click Configure.
 |
|---|
- Configure the required settings and click Apply.
| Settings | Description |
|---|---|
| Enable Device Naming | Use this option to enable the device naming rule for a group. |
| Prefix | Use this option to include text or numerals at the beginning of the device name. |
| Start Count | Specify the number from which the count has to start. |
| Number of Count | Specify the number of characters of the Start Count. Note: The number Of Digits should be greater than 0 |
| Suffix | Use this option to include text/numerals/macros (IMEI, MAC Address, Serial Number) added at the end of the device name. For example - Macro for IMEI can be added as "$IMEI$". |
- The device naming rule feature is supported on Android devices only.
- The alternate option to access Group Properties is to right-click the group or subgroup and select Properties.
Device Maintenance Window
This section allows administrators to define scheduled time windows during which Jobs or Profiles are deployed to devices, ensuring deployments occur only within the specified period.
This feature is supported only for Android devices with SureMDM Agent version 27.35.12 onwards.
To configure Device Maintenance, follow these steps:
Log in to the SureMDM Web Console.
Select the required device group and click Group Properties.
Navigate to the Device Maintenance Window section.
 |
|---|
Choose a specific schedule for jobs/profiles to be deployed into the devices.
Enable Run until Date and select a date.
Select the Start Time and End Time.
noteThe Add Schedule option allows configuration of additional weekly and monthly deployment schedules.
Click Save.
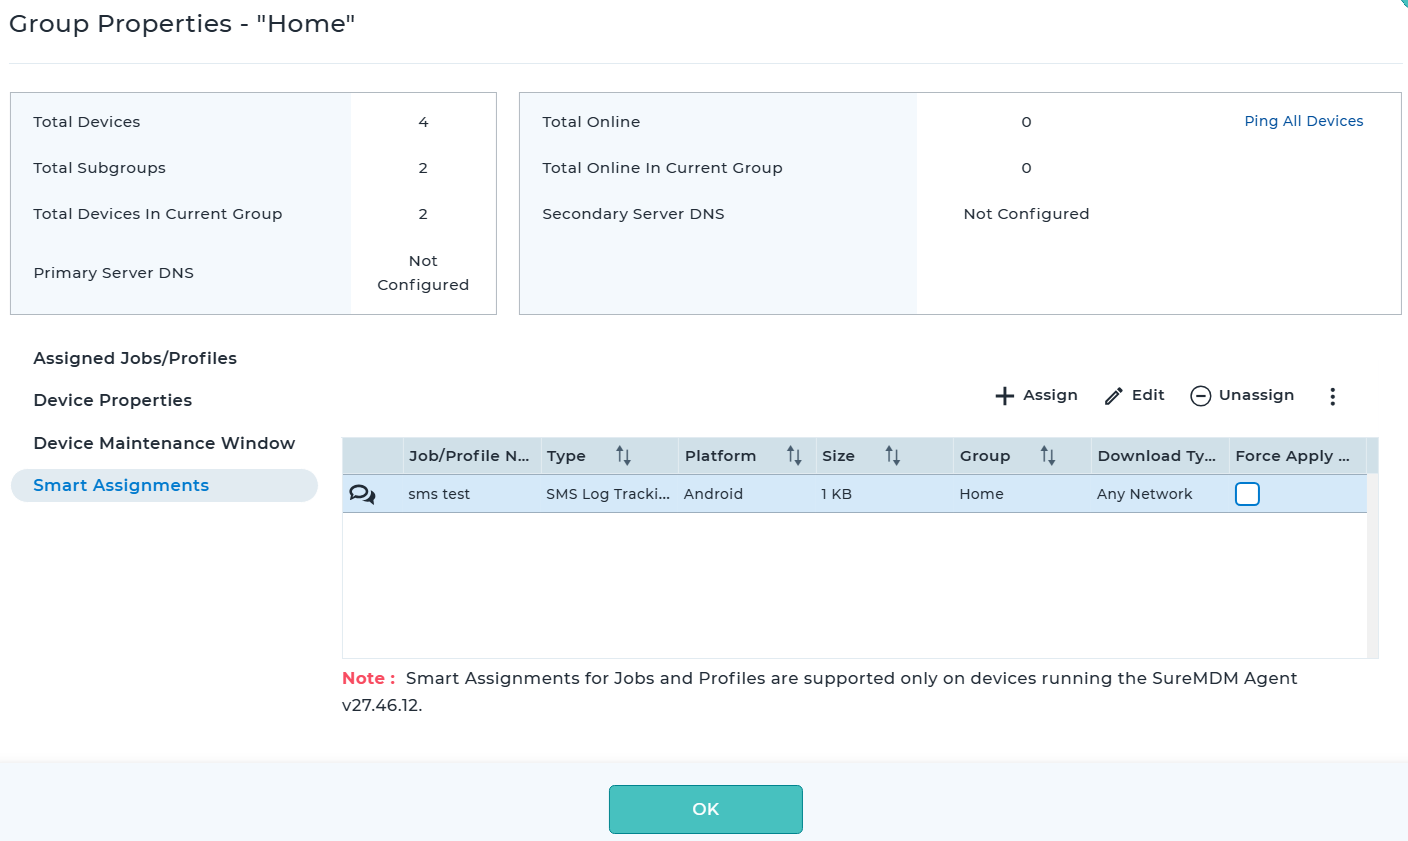
Smart Assignments
Smart Assignments allow administrators to deploy Jobs or Profiles using Advanced Query Filters. These filters enable targeted deployments based on specific device conditions such as agent version, device manufacturer, group path, IP address, and more, making group-based deployments more efficient. Smart Assignments dynamically evaluate both newly added and existing devices, ensuring that any device meeting the defined criteria automatically receives the associated Jobs or Profiles.
To assign a Job or Profile to a group with advanced query filters, follow these steps:
Log in to the SureMDM Web Console.
Select the required device group and click Group Properties.
Navigate to the Smart Assignments section.
 |
|---|
Select a Job or Profile from the list of available Jobs/Profiles and click Next.
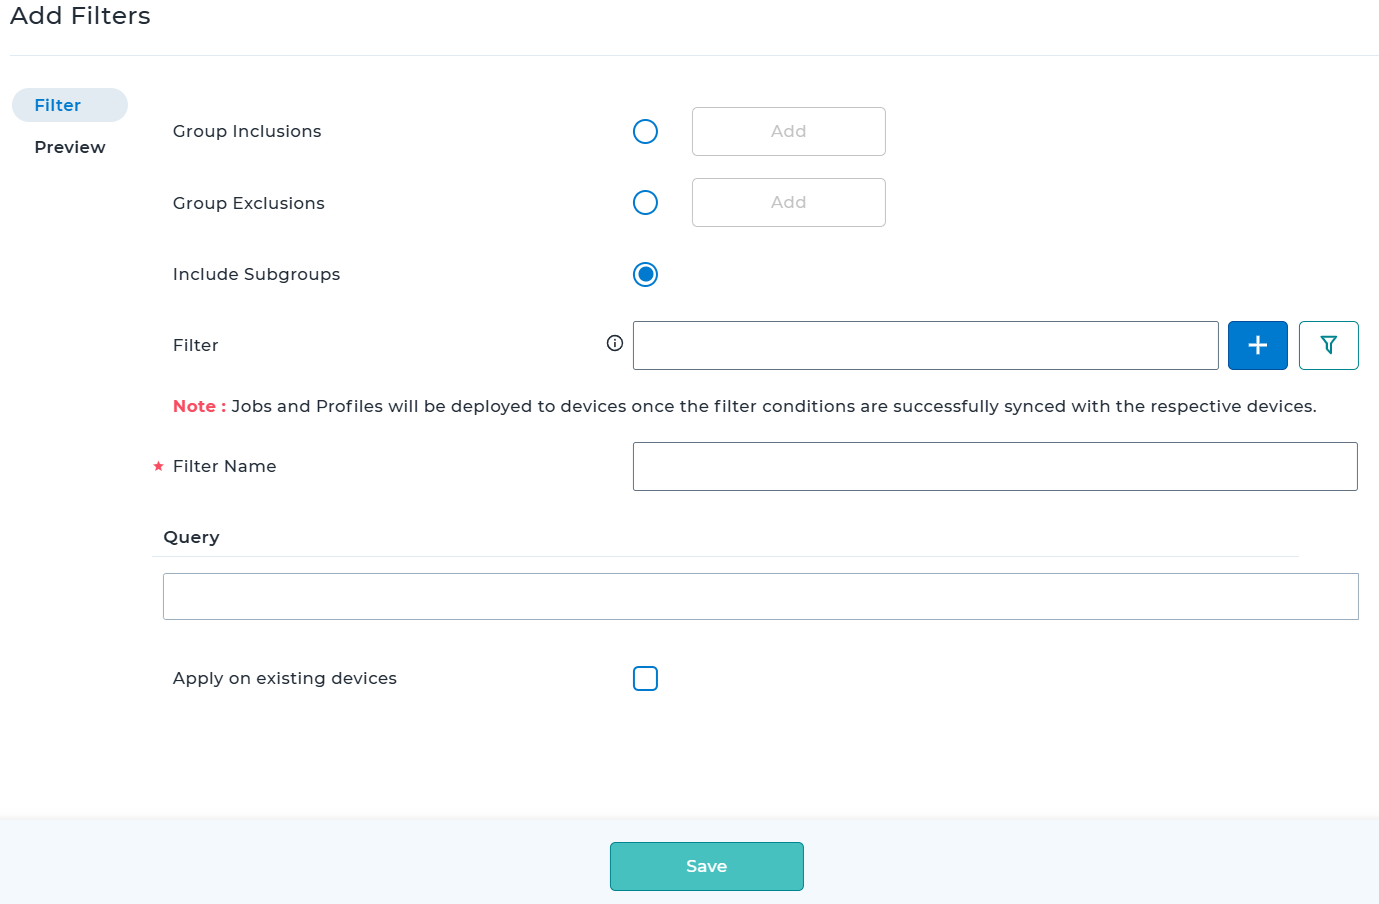
In the Add Filters dialog, configure the following options:
Group Inclusions: Select the groups to which the Jobs or Profiles should be applied
Group Exclusions: Select the groups to which the Jobs or Profiles should not be applied
Include Sub-Groups: Enable this option to apply the Jobs or Profiles to all sub-groups within the selected group
Filter: Add an advanced query filter (new or existing).
To create new advanced query filter,
- Click the Add (+) icon.
- Enter a filter name.
- Add the required query.
- Press Enter to validate the query.note
Ensure you press Enter after entering the query to validate it. An error message appears if the query is not validated.
To add existing advanced query filter,
- Click the Filter icon.
- Select an existing advanced query filter from the list.
- Click OK.
Apply on Existing Devices: Enable this option to deploy the Jobs or Profiles to both existing devices and any devices newly added to the group.
 |
|---|
Click Preview to review the selected Jobs or Profiles, target groups, and applied filters.
Click Save.