Creation of MDM Server in Apple Business Manager
- Login to Apple Business Manager
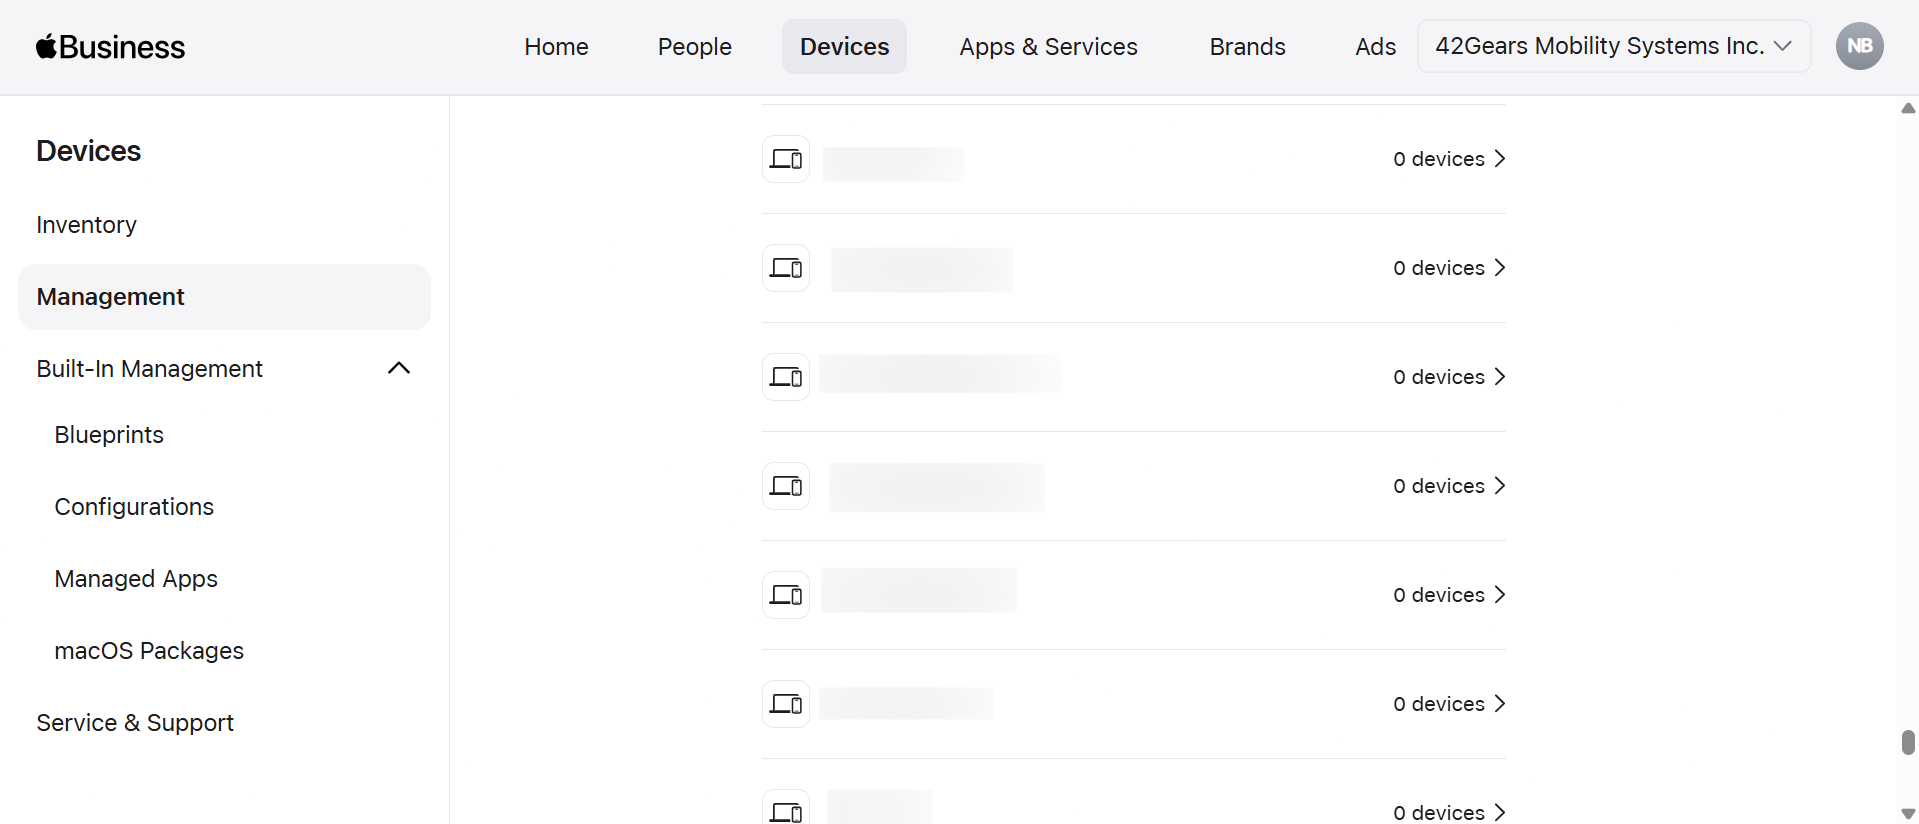
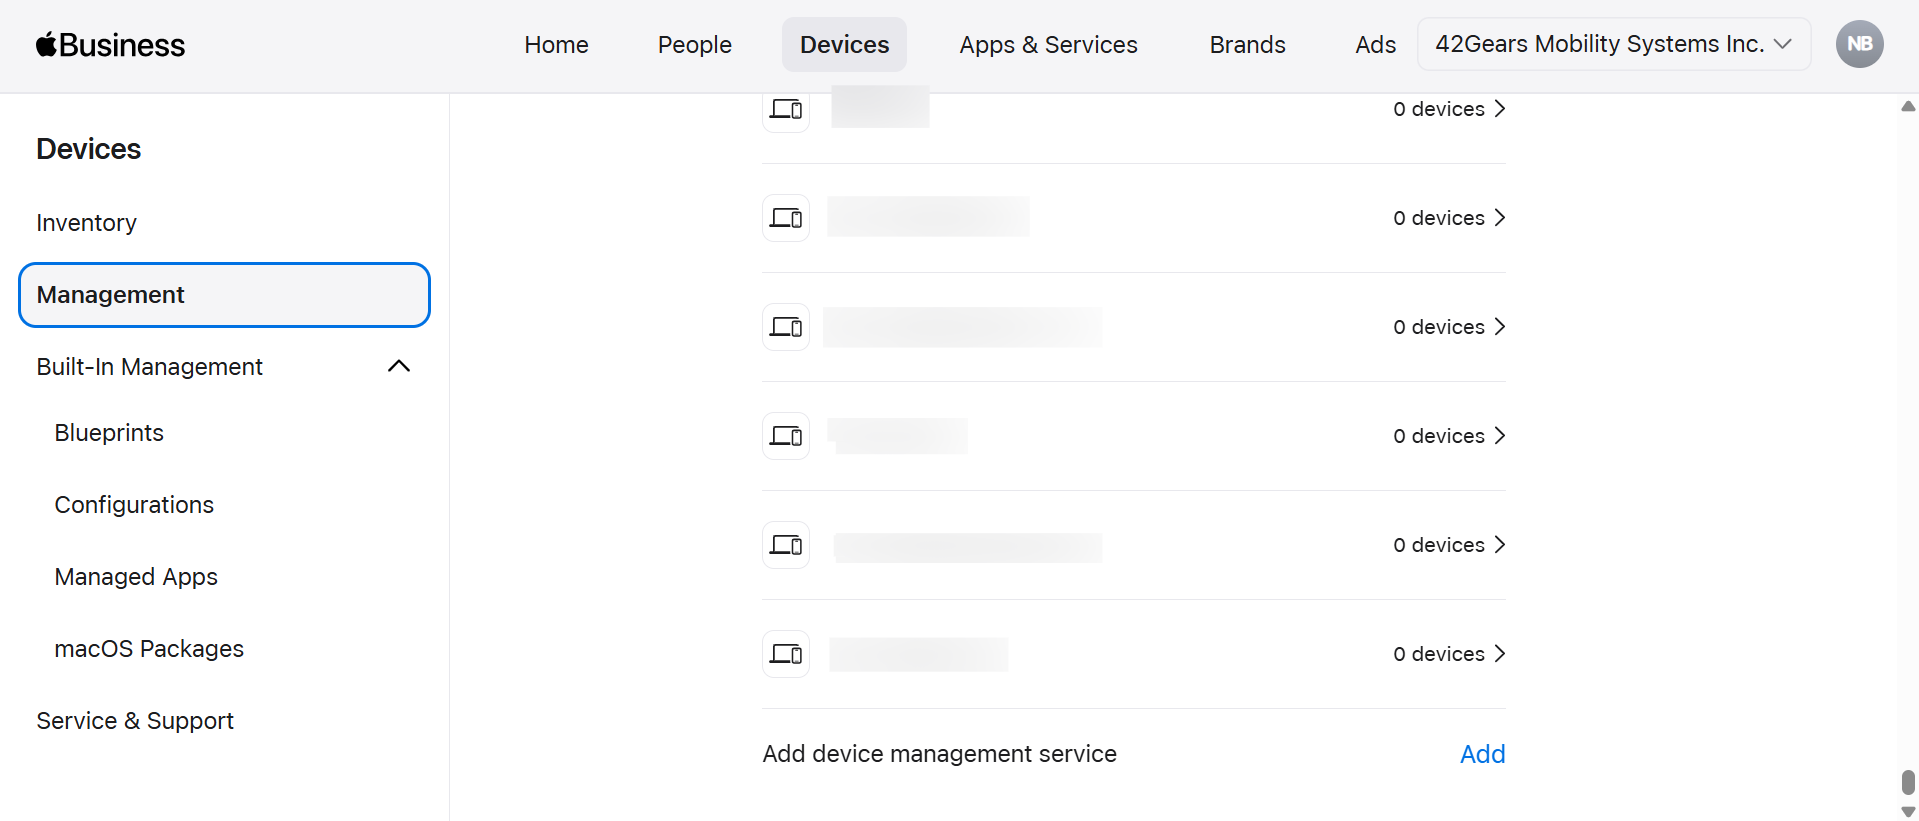
- Go to Devices and then choose Management. Then the below screen will appear as follows:
Click Add
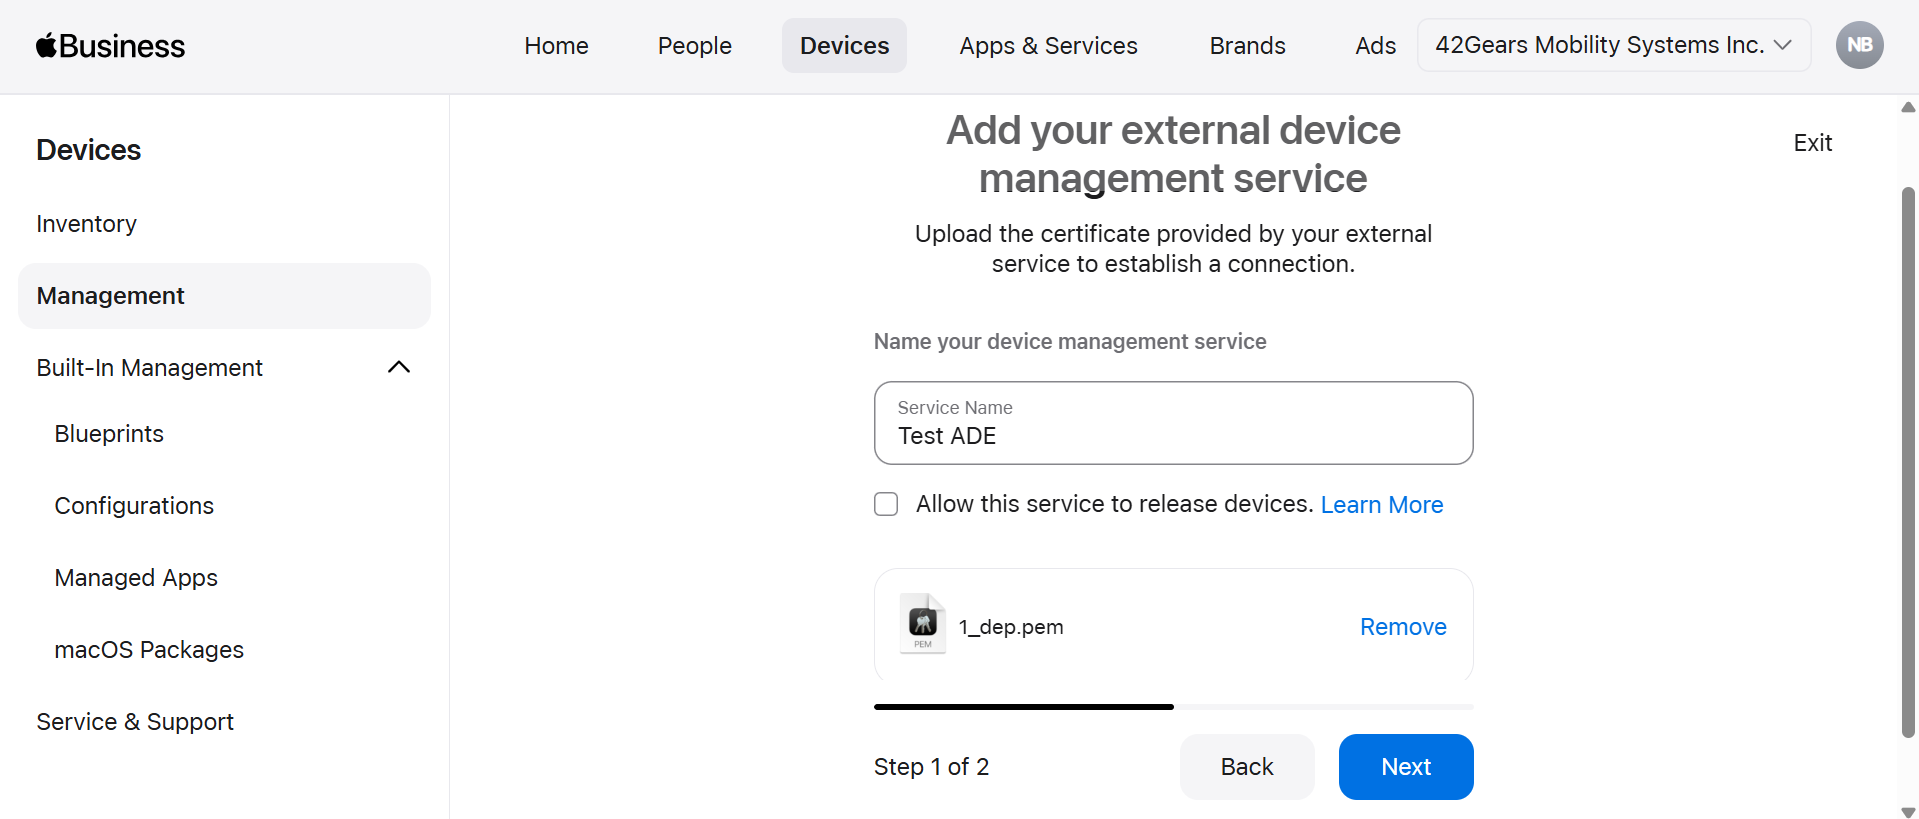
Upon clicking on the Add, the below screen will appear in which the MDM Service Name should be provided.
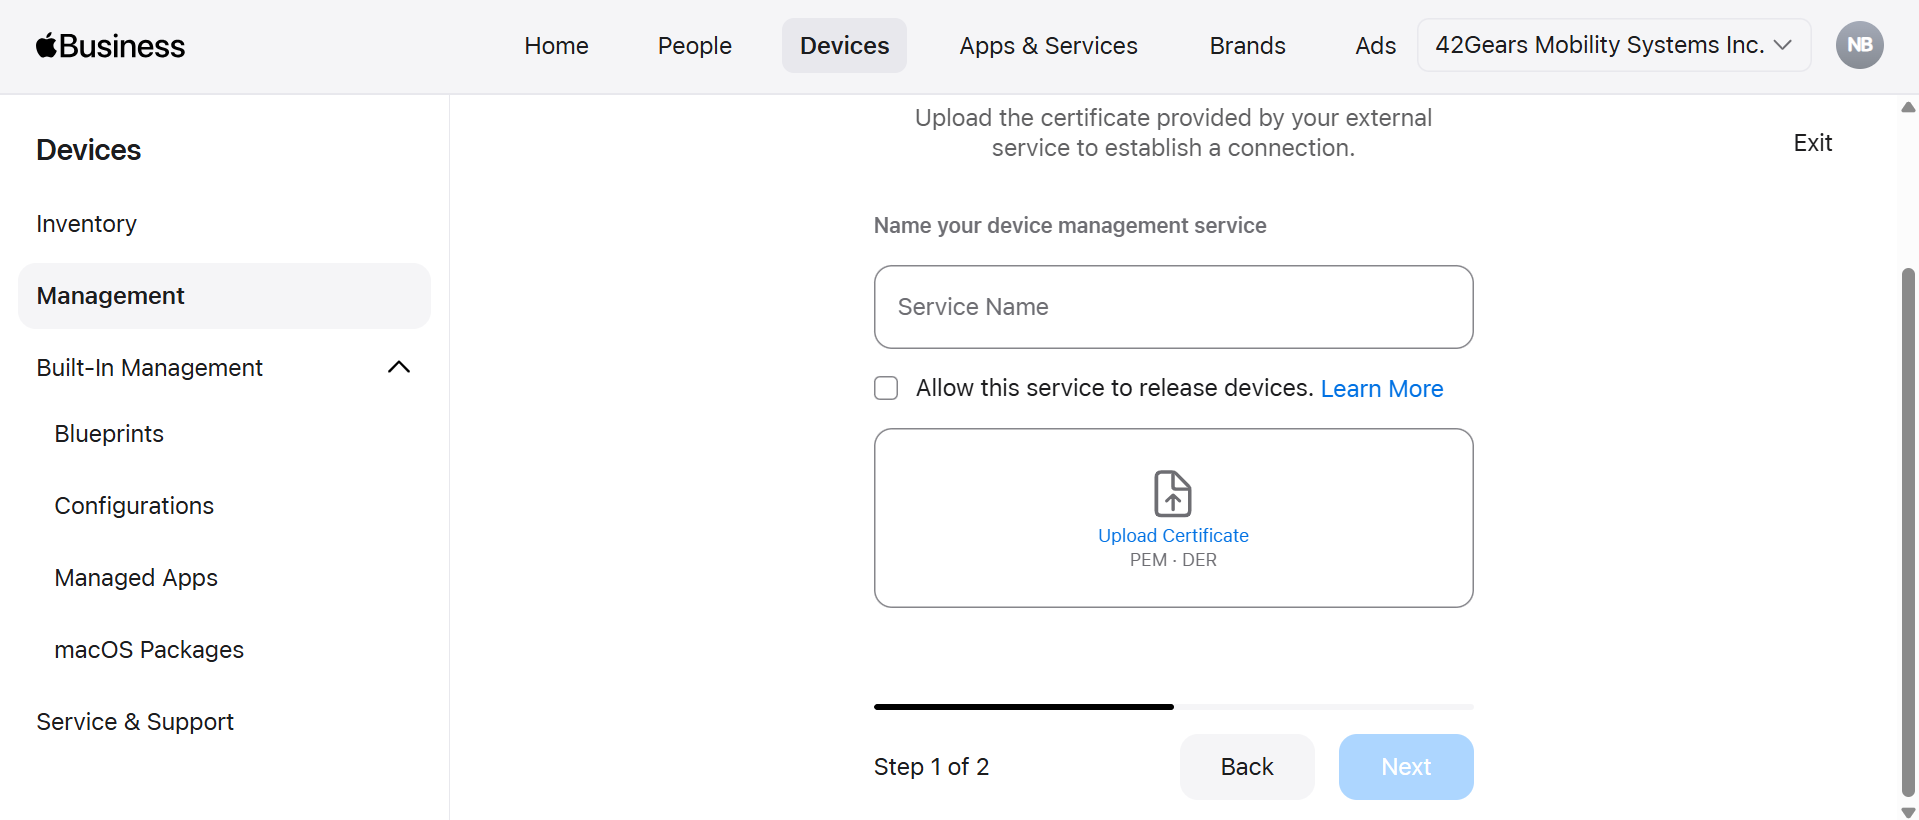
Enable Allow this service to release devices if required. This option is to enable the configuration to release the devices from the created MDM server if required.
- After providing the Service Name, click Upload Certificate. Upload the .pem certificate which was downloaded from the SureMDM server. Then click Next
The .pem certificate should be downloaded from SureMDM Web Console > Account Settings > iOS/iPad/MacOS Settings > ADE > ADE Server tab > Upload Token > Download
- In this step, click Download Service Token to download your service token and click Done.
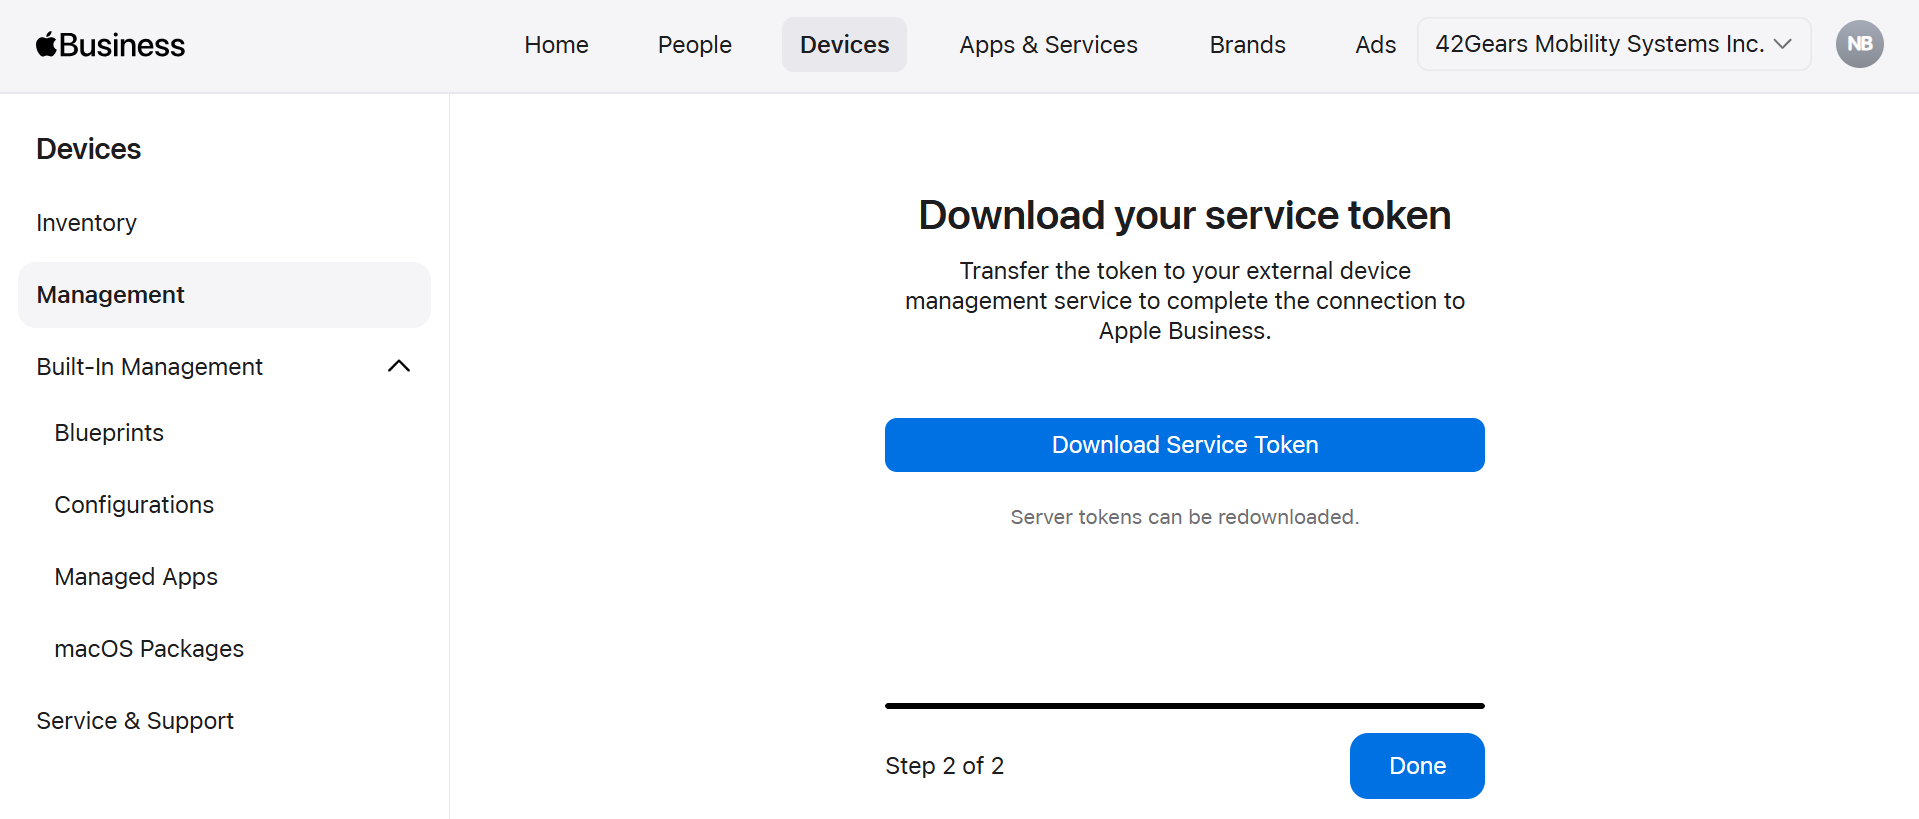
Then the token will get downloaded to your local drive.
- Once the MDM Server is created, then it will get listed in the Services tab under the Management Services section.
Then the token will get downloaded to your local drive.
Uploading the Server Token in SureMDM
1. In the SureMDM Console, browse and upload the Server Token (which was downloaded from Apple Business Manager) in the Server Token field using the upload icon.
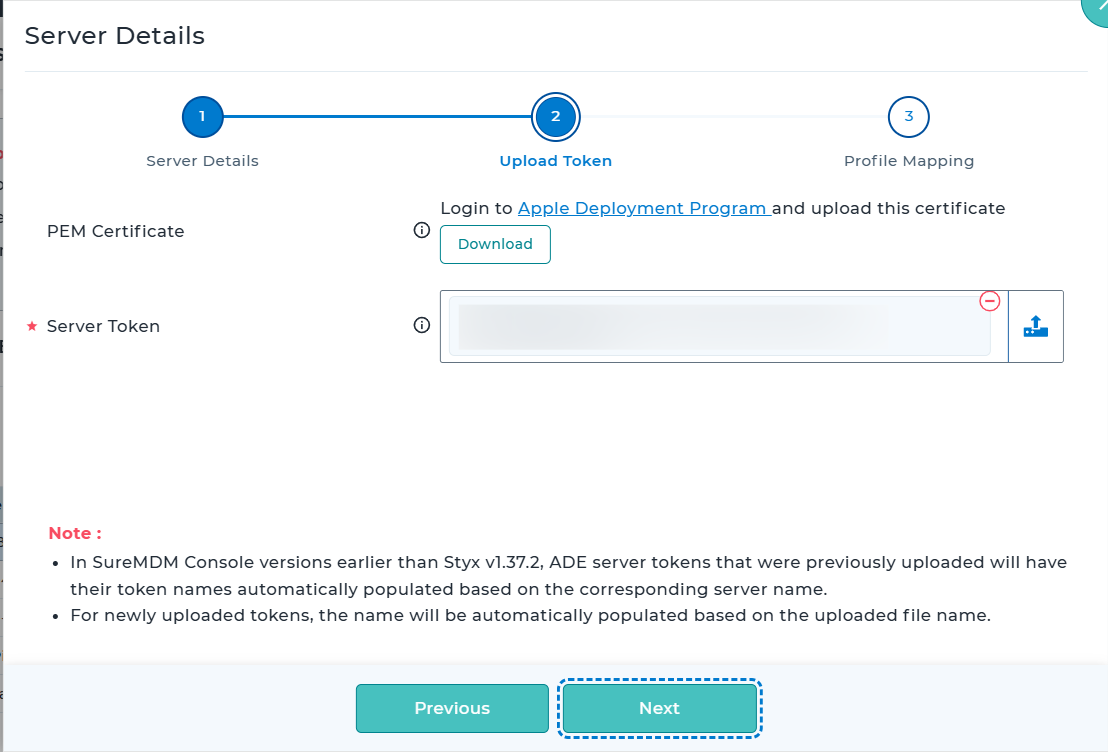
2. After the server token upload, click Next to Profile Assignment
| Setting | Description |
|---|---|
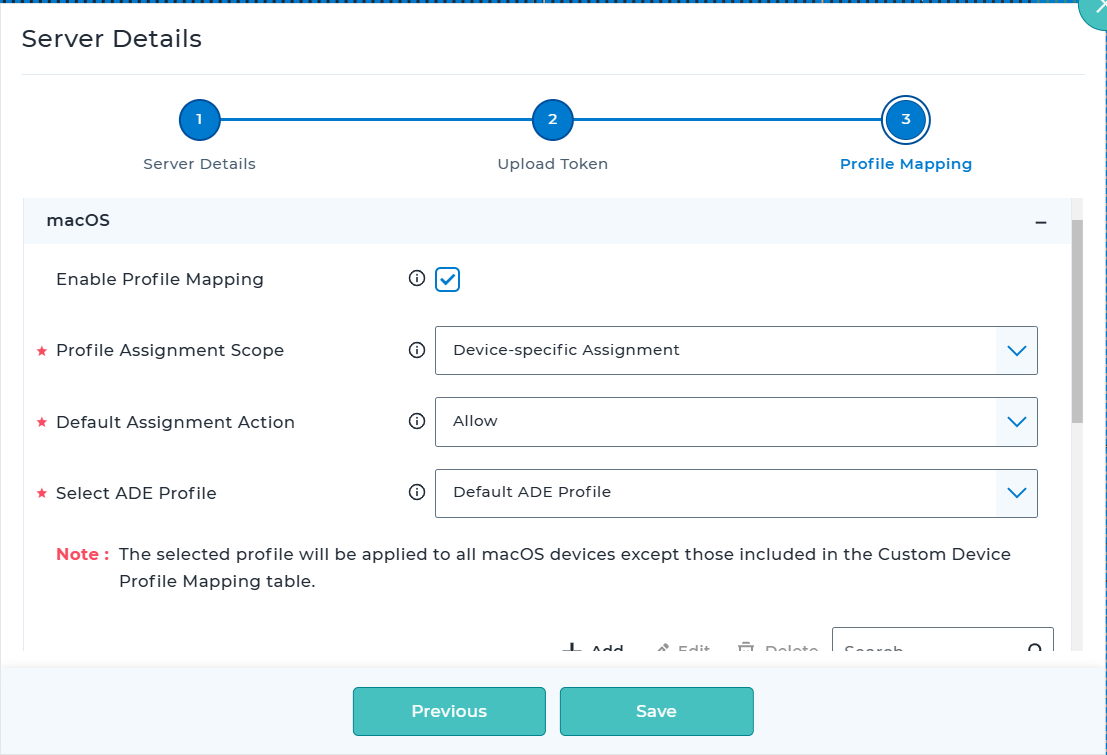
| Enable Profile Mapping | If checked, configured ADE profile will be assigned for macOS devices during enrollment. |
| Profile Assignment Scope | All Devices - Select this option to assign an ADE profile to all devices enrolling through this ADE Server for the selected platform. Device-specific Assignment - Select this option to assign multiple profiles to different sets of devices using Custom Device Profile Mapping. |
| Select ADE Profile | Select a profile which will be applied to the devices during enrollment. This will be applicable only if Profile Assignment Scope is selected as All Devices. (or) Default Assignment Action is selected as Allow |
| Default Assignment Action | Allow - Select this option to allow default ADE profile assignment. Deny - Select this option to restrict default ADE profile assignment. This will be applicable only if Profile Assignment Scope is selected as Device-specific Assignment. |
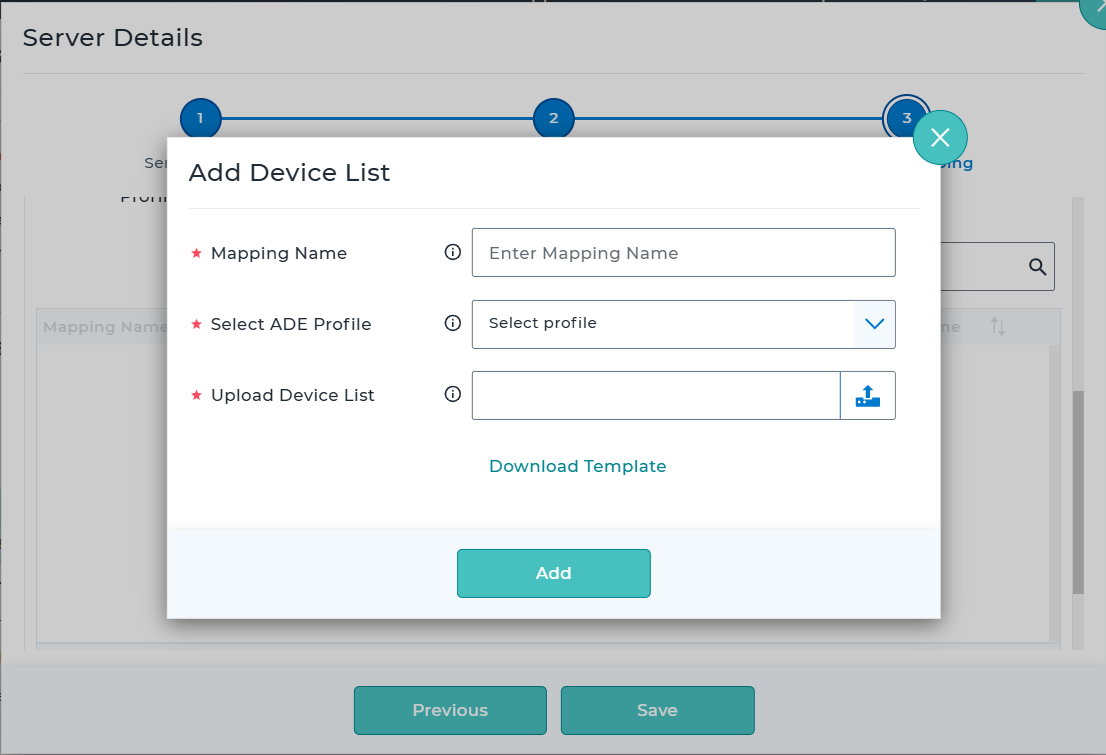
| Table Entries | If the Default Assignment Action is configured as either Allow or Deny, the corresponding device list must be defined in the table section. During device list upload, the administrator should be prompted to select an ADE Profile. The specified devices will then be automatically associated with and enrolled using the selected ADE Profile, ensuring the appropriate enrollment configuration is applied to those devices. |
3. Next, assign the devices to SureMDM by following the steps added here.
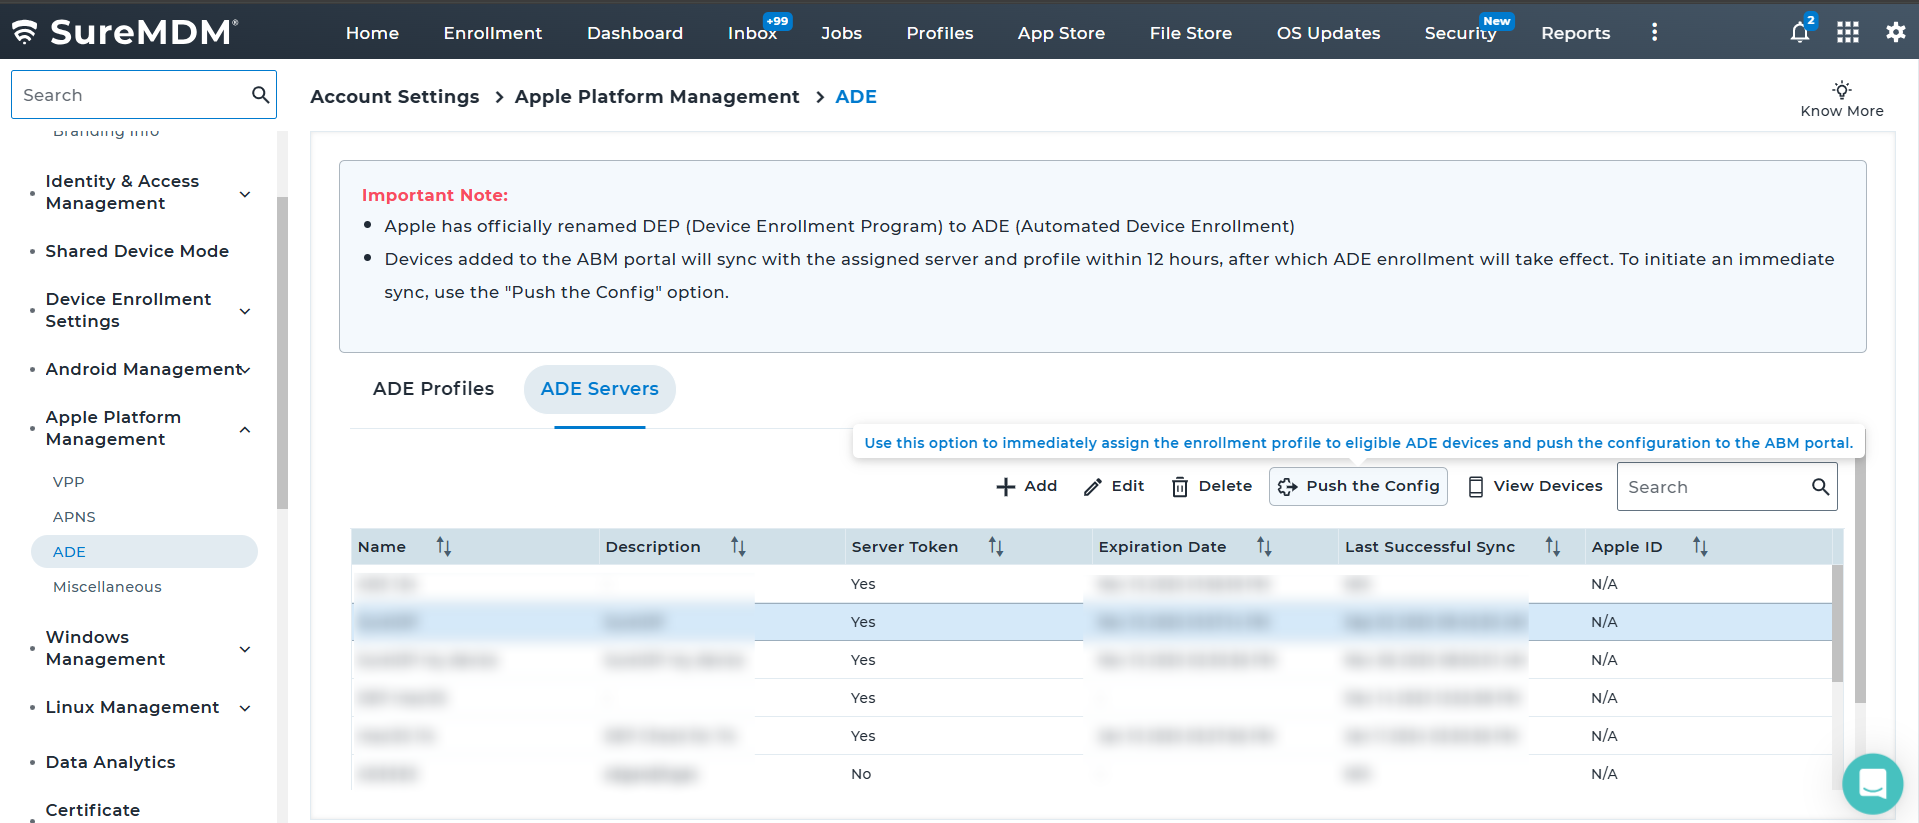
4. Select the created ADE Server and click Push the Config.
To initiate ADE enrollment, the device must be wiped or factory reset.