Generic SSO
Generic Single Sign-On (SSO) is an authentication method that allows users to securely access multiple applications using a single set of credentials. Instead of maintaining multiple usernames and passwords, users can log in once through their organization’s SSO provider and seamlessly access SureMDM and other connected services.
Configure SSO in SureMDM
To configure SSO with your preferred SSO provider, follow these steps:
Log in to the SureMDM Web Console as a Superuser before performing these steps.
Navigate to SureMDM Web Console > Settings > Account Settings > Enterprise Integrations > SAML Single Sign-On.
Configure the Single Sign-On settings for Generic.
| Settings | Description |
|---|---|
| Enable Single Sign-On | Select this option to allow configuring Single Sign-On settings. |
| Select Identity Provider(IdP) | Select Generic. |
| Service Identifier | Enter the Service Identifier URL obtained from your SSO provider. This URL uniquely identifies your service instance in the provider’s configuration. |
| Sign-On Service URL | Enter the Sign-On Service URL provided by your SSO provider. This is the authentication endpoint used for login requests. |
| Logout Service URL | Enter the Logout Service URL if available. This is used to redirect users during logout. Note: In most cases, the Sign-On and Logout Service URLs are the same. |
| SSO Service Provider Name | Choose Provider Name from the dropdown. |
Click Generate Certificate to generate a self-signed certificate on the server and make it available for download.
or
Click Upload Certificate to upload a certificate obtained from your SSO provider.
Use Delete Certificate or Download Certificate to remove or download an existing certificate.
Under the Dynamic Permission Assignment section, please click Add to Configure the Settings:
| Settings | Values |
|---|---|
| Attribute | Under the Role Configuration, define the Attribute Name as Group. This will refer to the group attribute of the user. For steps on how to add Attributes, please click here (e.g., Attribute: Engineering, Value: QA). |
| Condition | Select the conditions from the dropdown: 1. Contain 2. Equals 3. In Note: The condition field defines how SureMDM matches the attribute value received from the SSO provider with the value specified in the rule. |
| Value | Provide the value that the group name must match (e.g., “Admin”, “Manager”, or any other relevant group identifier). The system will look for this value within the user’s group attribute to determine if the role should be assigned. |
| Roles | Specify the roles that should be dynamically assigned to the user when the Group attribute matches the specified value. For example, if the group contains "Admin", assign the Administrator role, or if the group contains "Manager", assign the Manager role. To know more, see Configure Permissions for Role-Based Admin. |
| Device Group Set | Choose an option for Device Group Set from the drop-down menu. To know more, see Configure Permissions for Device Group Set Based Admin. |
| Jobs/Profiles Folder Set | Choose an option for Device Group Set from the drop-down menu. To know more, see Configure Permissions for Job Folder Set Based Admin. |
If the Attribute or Value does not match the information provided by the IdP:
- SureMDM assigns default permissions to the sub-user.
- The user will not receive the intended custom role.
Recommendation: Ensure that attributes and values are consistently configured between the IdP and SureMDM. - Deny Access - This option can be configured only in Default Permission and It determines whether a user should be denied access when the attribute and value conditions from the Identity Provider (IdP) do not match any of the configured roles. If Deny Access is enabled in the default permission and if the attribute and value from the IdP do not match any defined conditions (Contains, Equals, IN), SureMDM will not assign any role to the SSO user, resulting in denied access to the console.
Configure Settings in Your SSO Provider Console
To complete the integration, configure SureMDM as a new SAML application within your organization’s SSO provider.
Log in to your SSO provider’s admin console.
Launch your third party console and configure settings.
Depending on your third-party SSO provider, either upload the certificate downloaded from the provider to the MDM, or upload the certificate generated from the MDM to your third-party SSO provider.
Select Enable support for the SAML 2.0 WebSSO protocol and
a. Enter Name as SureMDM
b. Enter URL ashttps://<SureMDM Server Path>/console/ssoconsumer/<Encrypted Account ID>
Replace SureMDM Server Path and Encrypted Account ID with your SureMDM details.
To locate the Encrypted Account ID, go to: SureMDM Console > Account Settings > Enterprise Integrations > SAML Single Sign-On, and find it under the Assertion URL section.
Save and complete the SSO application setup in your provider console
Once the configuration is complete, users can log in using their SSO credentials at:
https://42gears.suremdm.io/console/ssologin/<Encrypted Account ID>
Replace SureMDM Server Path and Encrypted Account ID with your SureMDM details.
To locate the Encrypted Account ID, go to: SureMDM Console > Account Settings > Enterprise Integrations > SAML Single Sign-On, and find it under the Login URLs section
Users will be redirected to your SSO provider’s login page for authentication.
or
The users can also login from the login page of SureMDM:
- Open the Console Login URL (Eg. Suremdm.42gears.com)
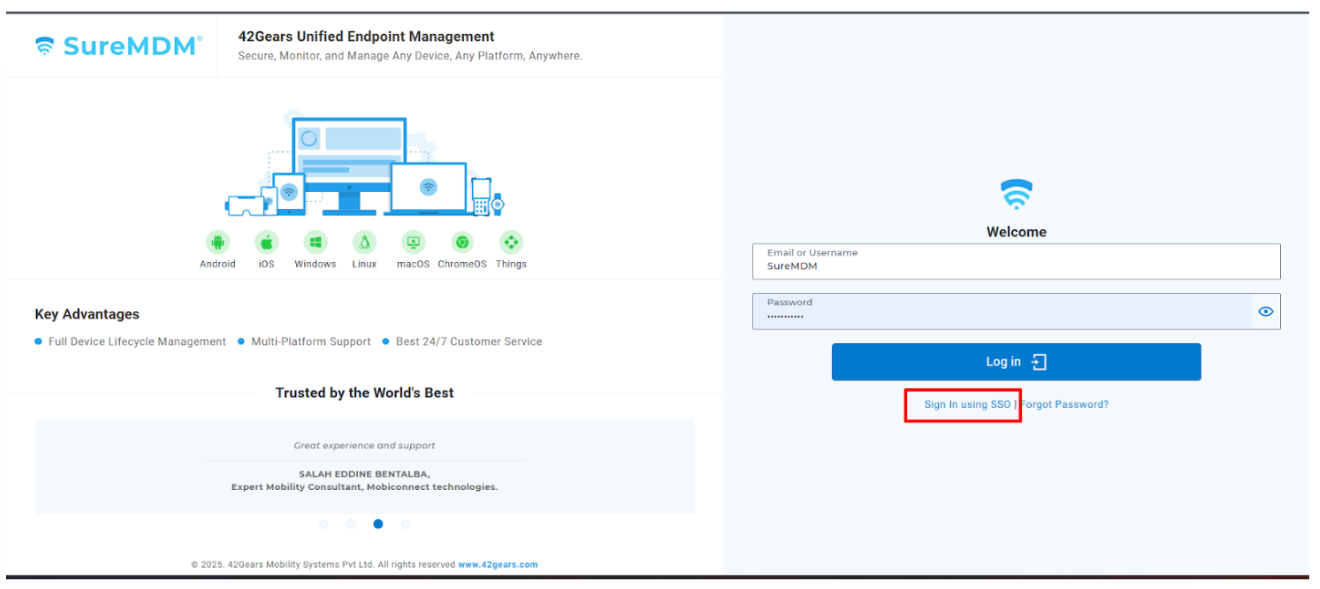
Click on Sign In Using SSO
Select the SSO Application
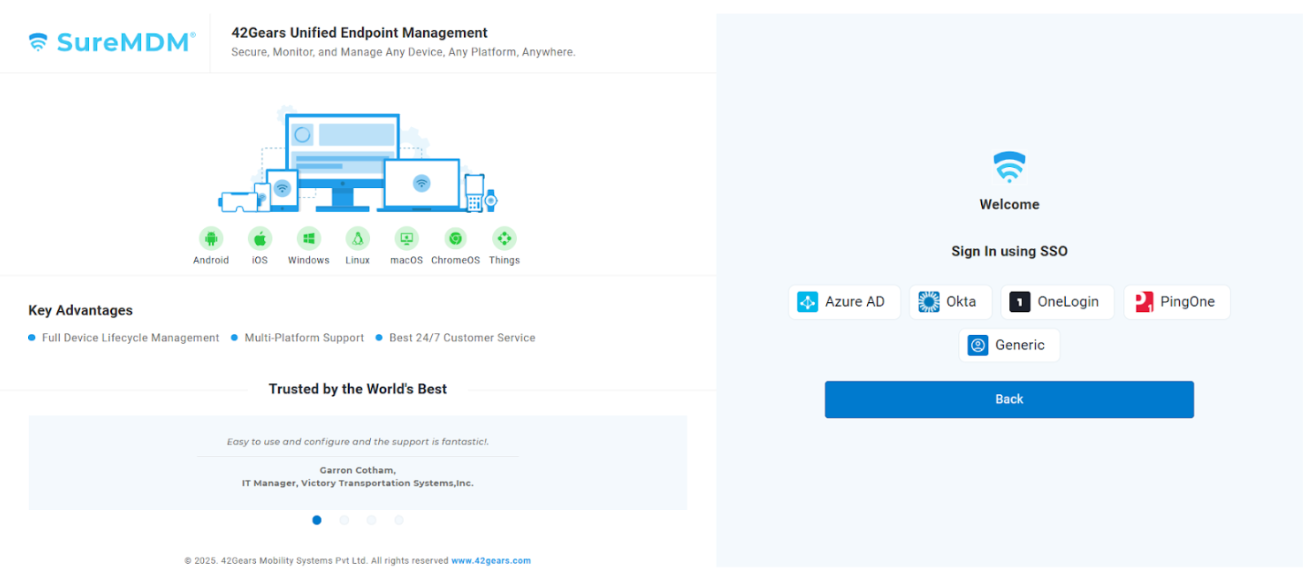
Authenticate using the SSO credentials
Login to the SureMDM account through SSO