Microsoft Entra
This strategic approach seamlessly integrates Microsoft Entra capabilities with the 42Gears UEM Agent, maintaining the right balance between user convenience and enterprise security.
The integration begins by configuring Microsoft Entra as a SAML Identity Provider (IdP) to enable Shared Device Mode. This includes creating a custom enterprise application in the Microsoft Entra admin center, setting SAML authentication parameters, and managing user access through Entra ID roles and groups.
The setup then extends into the SureMDM and SureLock applications, creating a unified authentication experience that simplifies access while safeguarding shared device environments.
The integration process consists of three main steps:
Configure Microsoft Entra for SAML Integration
Configure Shared Device Mode in SureMDM
Configure SureLock Settings
Step 1: Configure Microsoft Entra for SAML Integration
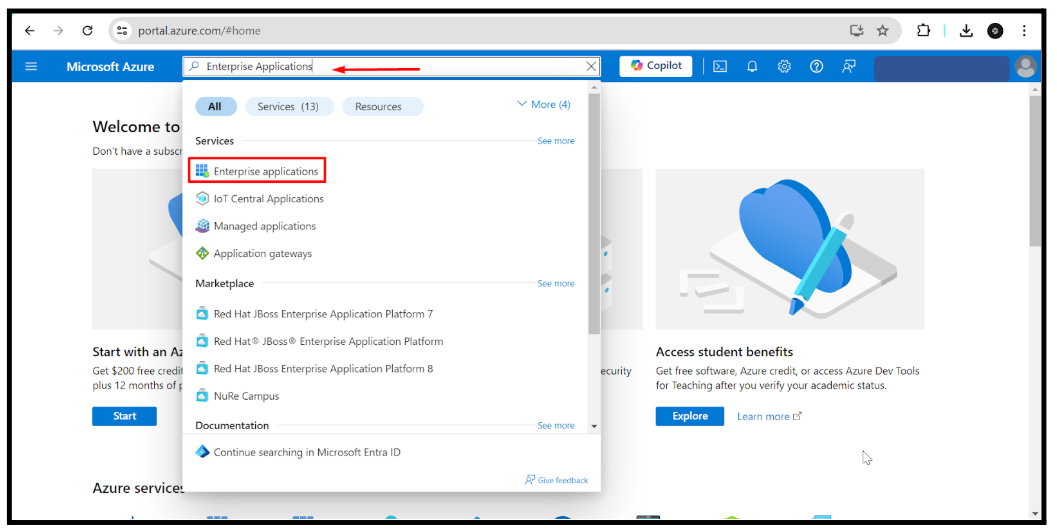
Log in to the Azure Portal with valid credentials.
In the search bar, type Enterprise Applications and open the section.
Click New Application → Create your own application.
Provide an application name.
Select Integrate any other application not found in the gallery (Non-gallery)
Click Create.

Once the application is created, you will be redirected to the application’s Overview Page.
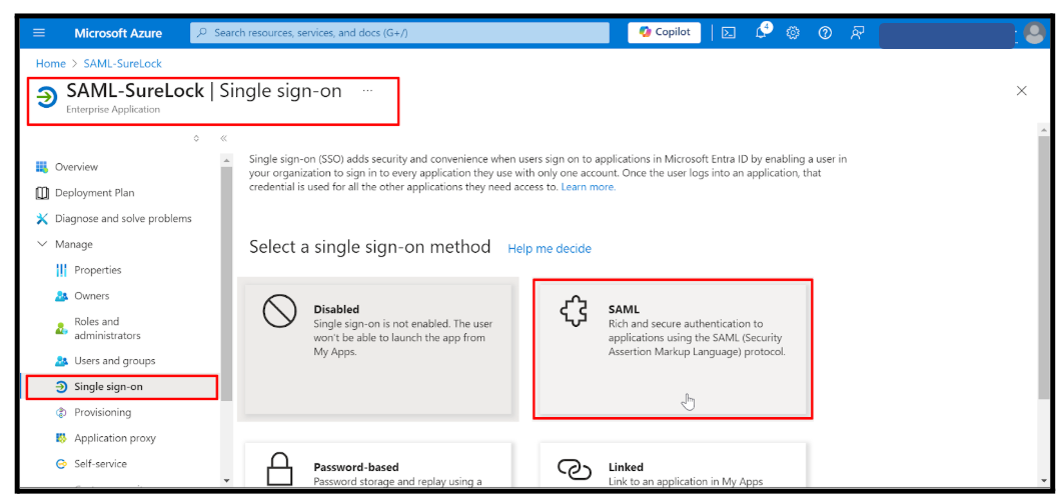
- Click on Single Sign-On.
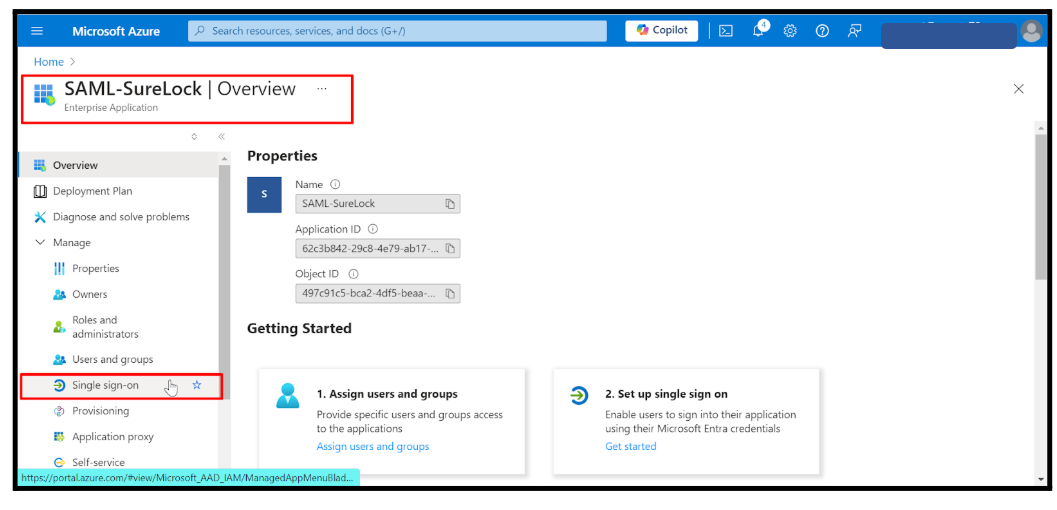
Select SAML as the sign-in method.
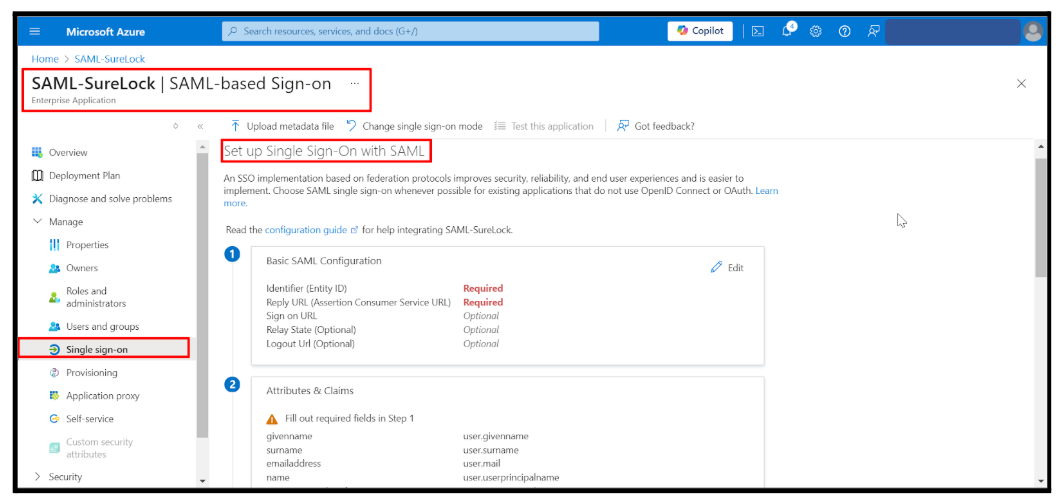
- You will be navigated to Set up Single Sign-On with SAML.
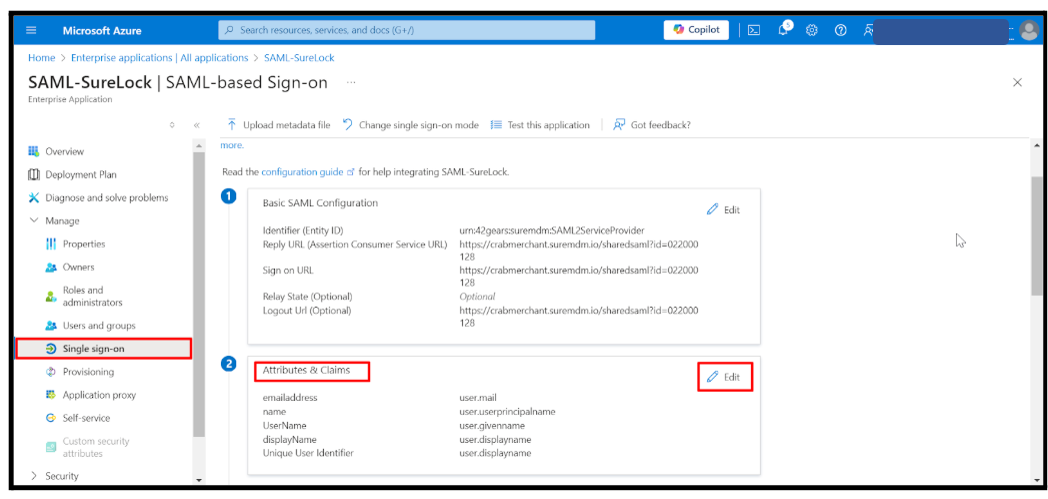
In the Basic SAML Configuration section, click Edit and enter the following values:
Identifier (Entity ID):
urn:42gears:suremdm:SAML2ServiceProviderReply URL (Assertion Consumer Service URL):
https://<Account_URL>/sharedsaml?id=<Account_ID>Sign-on URL (Optional):
https://<Account_URL>/sharedsaml?id=<Account_ID>Click Save.
In the Attributes and Claims section, click Edit.
Click Add New Claim.
Enter the Name (desired value), select Attribute as Source, and map it to the respective Source Attribute.
Click Save.
After configuration, SAML Certificates will be automatically generated.
- Download the certificate in Base64 format.

Navigate to Set up SAML – <Application_Name>.
(<Application_Name> = Name of the SAML application created)Copy the following values:
Login URL
Microsoft Entra Identifier
Logout URL
Step 2: Configure Shared Device Mode in SureMDM
Log in to the SureMDM Console.
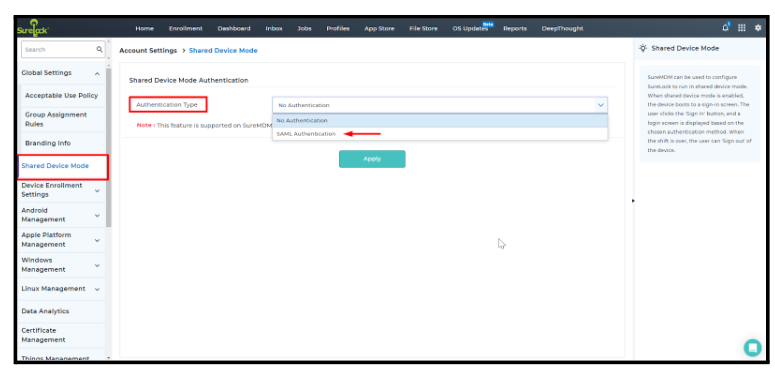
Go to Settings > Account Settings > Shared Device Mode.
Set Authentication Type to SAML Authentication.
Select Microsoft Entra.
Enter the respective values (Login URL, Identifier, Logout URL) copied from point 8 of Step 1.
Upload the certificate downloaded in point 9 of Step 1.
Enter the Meta Tag Key created in the Attributes and Claims section.
Click Apply to save.
Step 3: Configure SureLock Settings
In the SureMDM Console, go to the Jobs section.
Click New Job > Android > SureLock Settings Job.
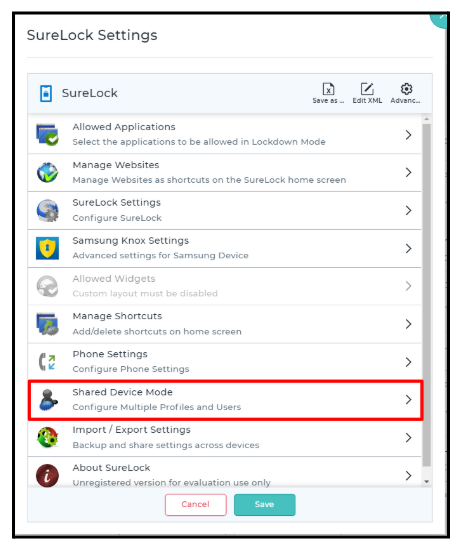
Scroll to Shared Device Mode and enable it.
Create a Profile in the Profile Management section.
The Profile Name should match the value retrieved from the user section in the Entra Portal.
The corresponding Meta Tag should be entered here.
Available meta tags can be found in Microsoft Entra user resource attributes.
Click User Authentication > Server Configuration.
Select Use Config from SureMDM Server and click Save.
Push the SureLock Settings Job to the required devices.
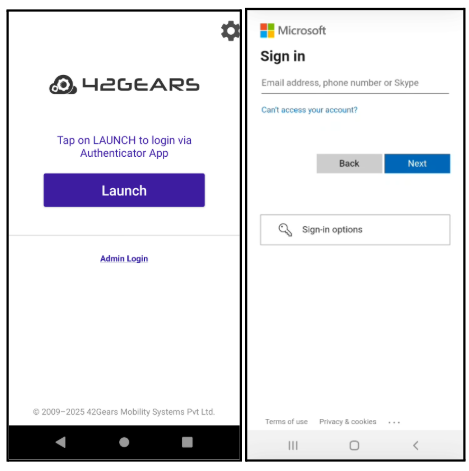
On the device:
Launch SureLock and tap Launch on the Shared device mode login page.
Enter the Microsoft Entra (Azure AD) username and password.
You will be successfully logged into Shared Device Mode using Azure.