Configure G Suite for Custom SAML App
To configure devices using G Suite credentials with SSO, follow the steps below:
Log in to https://admin.google.com with G Suite credentials.
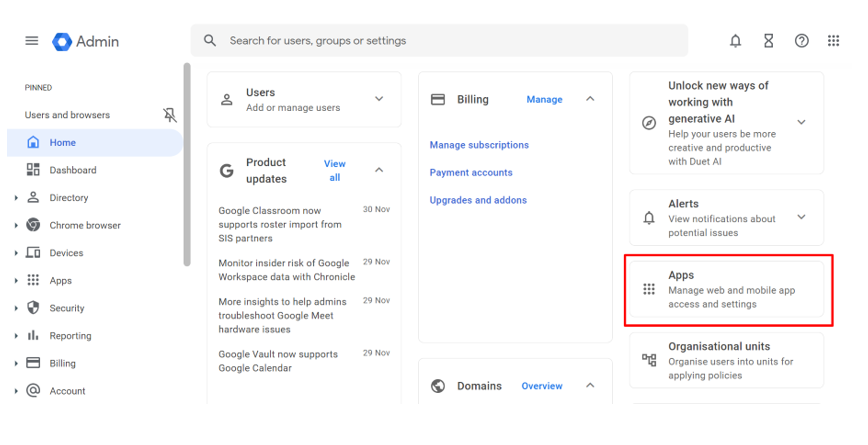
Under Home, click Apps.
Click Web and Mobile Apps.
Select Add App and click Add Custom SAML App from the drop-down list.
On the Add Custom SAML App page, enter the App details and click Continue.
On the following screen, under Google IdP Details, click Continue without making any changes.
In the next 'Service Provider Details' screen, configure Single Sign-on, input Service Provider details, including ACS URL and entity ID, and then click Continue.
An example of an ACS URL and Entity ID is given below:
- Add your SureMDM DNS name and Account ID as:
https://<DNS Name>/console/sharedsaml?id=<account id>
For example: https://suremdm.42gears.com/sharedsaml?id=xxxx
- Entity Id as: urn:42gears:suremdm:SAML2ServiceProvider
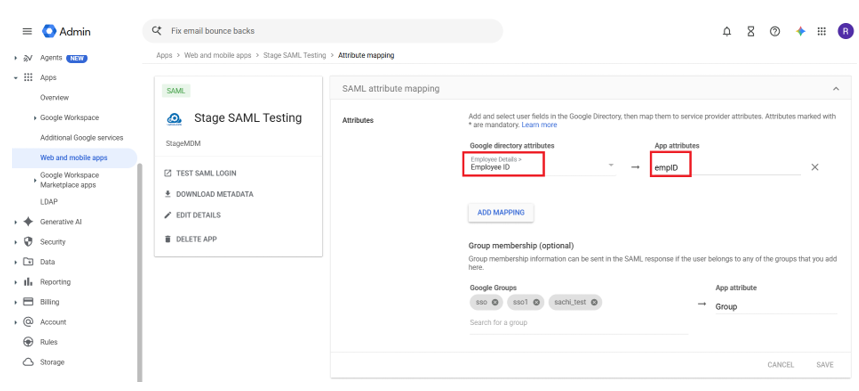
- In the 'Attribute Mapping' page, click Add Mapping and provide the following details:
- Employee Details: Select a parameter from the 'Google directory attributes' list.
- App Attributes: User-defined meta tag, then click Finish.
App Attributes will be your meta tag value.
Reference screenshots: Steps 1–8
Go to the Web and Mobile Apps screen and click on the created SAML App.
In the App Details screen, the 'User Access' option is initially set to 'OFF for everyone' by default. Change it to 'On for everyone' and click Save.
Click DOWNLOAD METADATA in App details.
Copy SSO URL, Entity ID. Click Download to download the certificate, and then click Close.
SSO URL, Entity ID, and Certificate details are required while configuring SSO in SureMDM.
Reference screenshots: Steps 9–12
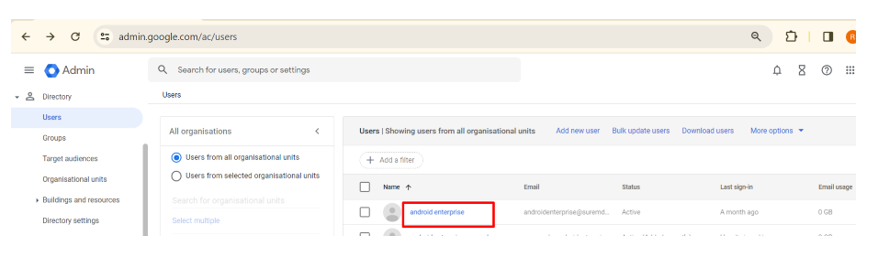
Once the existing user is available, tap on the user
Click User Information.
Enter the required fields in User Information (the same details can be used at the time of profile creation while configuring SureLock settings) and click Save.
Attribute Statements:
Attribute statements are used to send user-specific attributes to the service provider during SAML authentication.
Reference screenshots: Steps 13–14 and Attribute Statements