Configure an Android Enterprise Profile
This option will create a profile for fully managed or dedicated devices.
To configure a Device Owner profile, follow these steps:
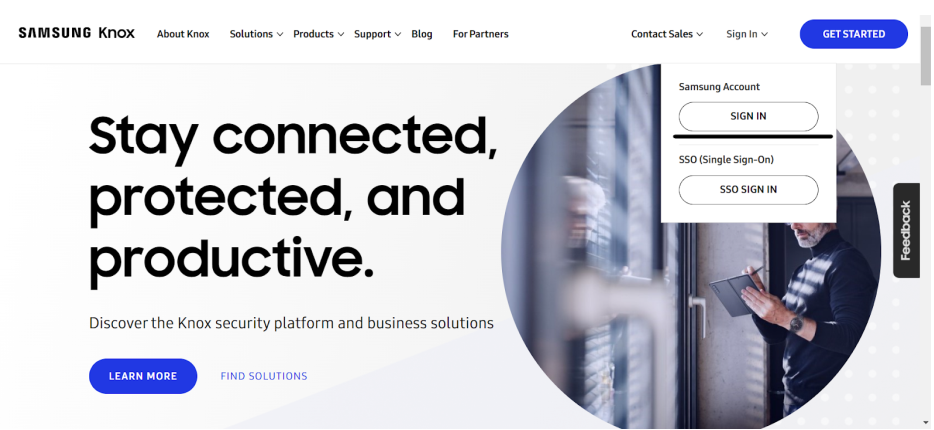
- Open a browser, go to the Samsung Knox website > Click Sign In with Samsung Account.
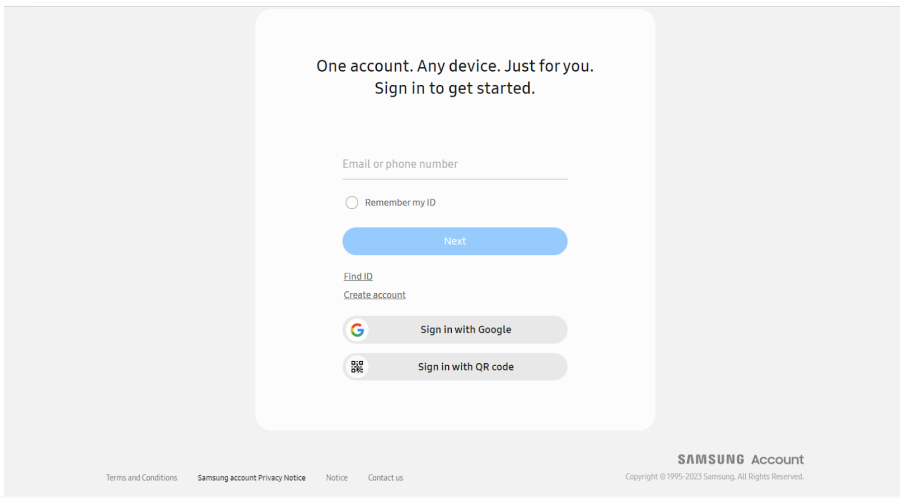
2. Log in with your Samsung Account credentials.
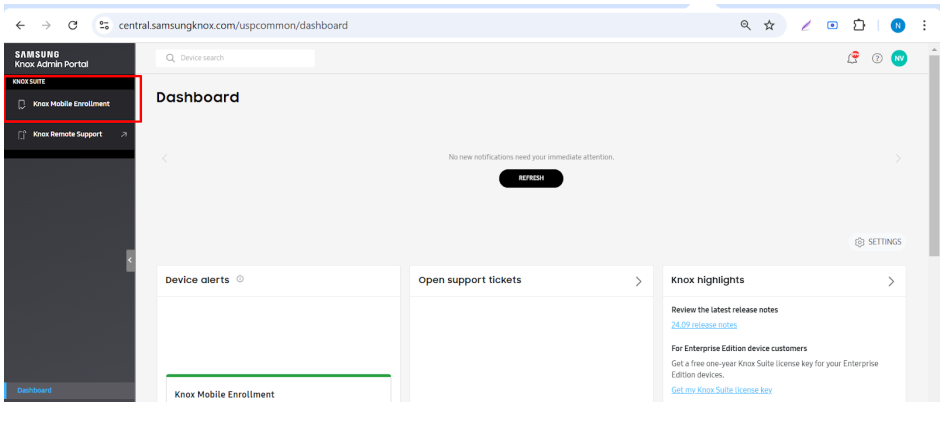
A Samsung Knox Admin Portal dashboard will open.
3. Click Knox Mobile Enrollment.
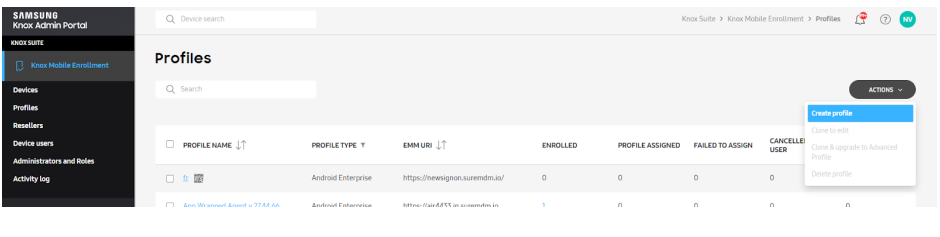
4. Go to Profiles > Actions > Create profile
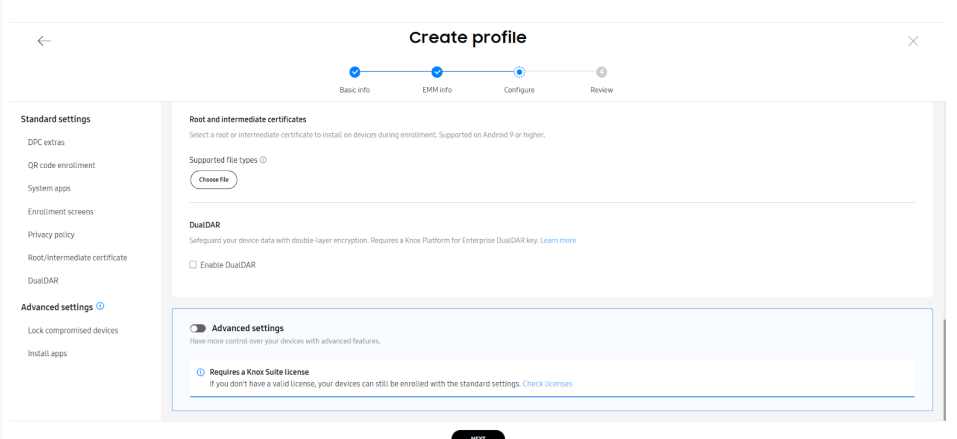
5. On the Create Profile screen:
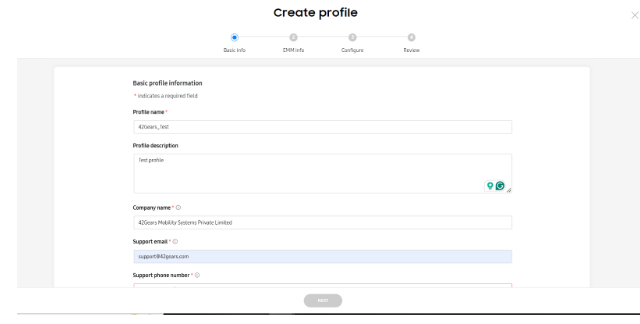
A. Basic Info
- Enter Profile Name
- Enter Profile Description
- Enter Company Name, Support Email, and Support Phone Number
- Click Next
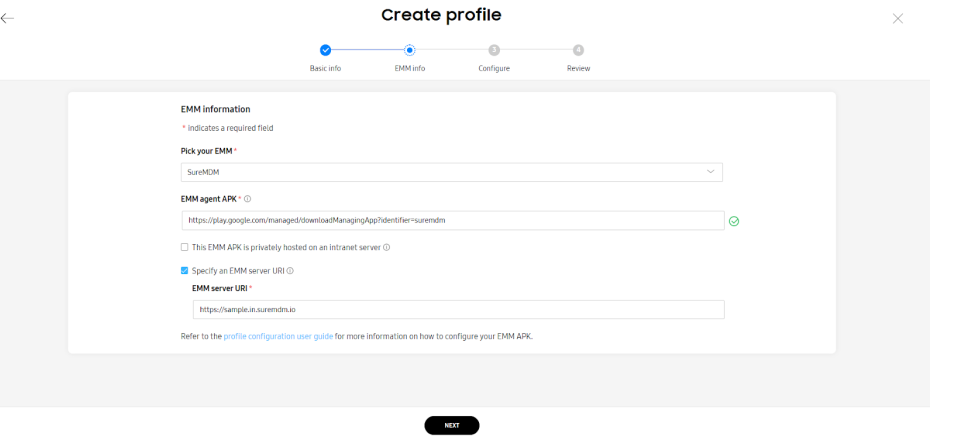
B. EMM Info
- Select SureMDM from Pick Your EMM drop-down list.
- In the EMM Agent APK field, once SureMDM is selected, the link is automatically generated for the SureMDM Agent app.
- Enable checkbox for “Specify an EMM server URL”
- In the EMM Server URI field, provide the SureMDM URL to which devices will be enrolled.
For example: https://sample.in.suremdm.io
- Click Next
C. Configure
- Enter the following details:
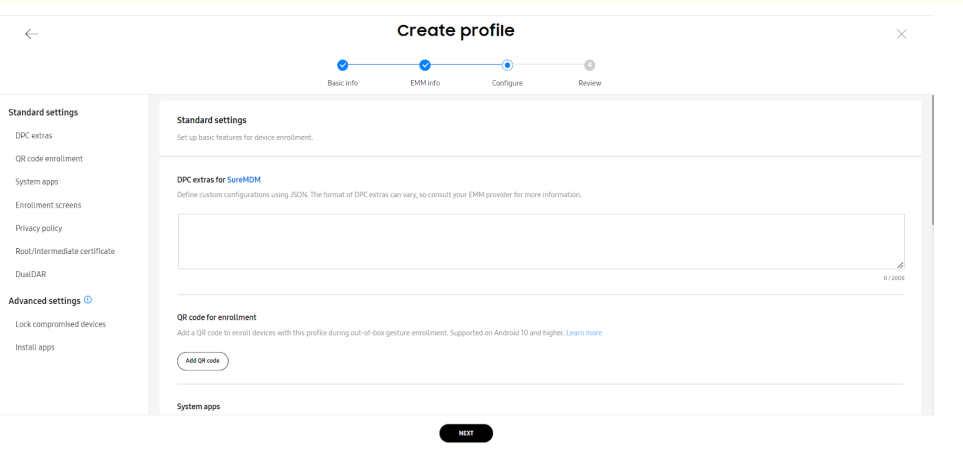
i. DPC extras data (as defined by EMM) - Enter custom configuration type in JSON format.
For Example: You can enter DPC extras data as follows:
With Password
{"CustomerId":"XXX00","GroupPath":"Home/test","DeviceNameType":"UseMac","EnrollmentMode":"0","Password": "ABcd@123#"}
Without Password
{"CustomerId":"XXX00","GroupPath":"Home/test","DeviceNameType":"UseMac","EnrollmentMode":"0"}
- CustomerId is the account id of the SureMDM Console that helps the device recognize the console’s server path. To know your CustomerId, navigate to the SureMDM Web Console and click the Settings icon to view the Account ID.
- Example- CustomerID: 000000*
- ServerPath is the URL used to access the SureMDM Console.
*Example- https://sample.in.suremdm.io
- GroupPath is the path of a group/sub-group in which the device will get enrolled.
Example- Home/test
DeviceNameType is the device name that will be displayed on the console. You can select an option from the following to set the device name:
- UseMac – Mac Address of the device\*
- UseIMEI – IMEI number of the device\*
- UseSerialNumber – Serial number of the device\*
Enrollment Mode - The value defines the type of device enrollment:
0 - Device Owner*
1 - WPCO (Work Profile for Company Owned)*
Password: Device Authentication password set under Device Enrollment Rules of SureMDM account settings.
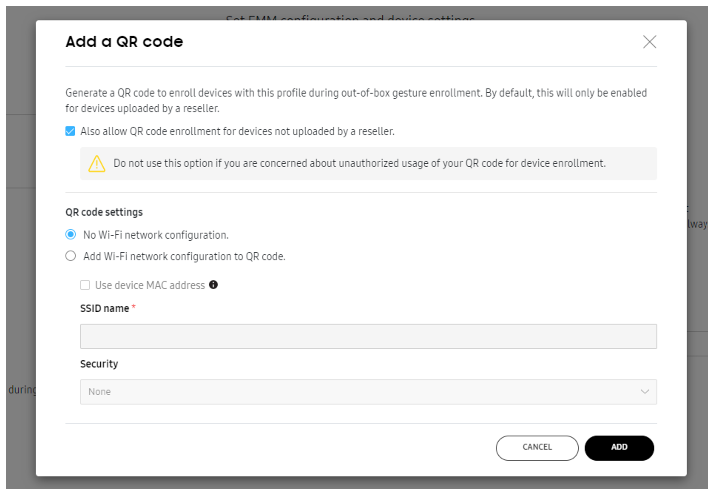
ii. Click Add a QR Code
- For devices bought from a non-reseller, select the checkbox **Also Allow QR code enrollment for devices not uploaded by reseller.
- Select either No Wi-Fi Network configuration or Add Wi-Fi network configuration to QR code.
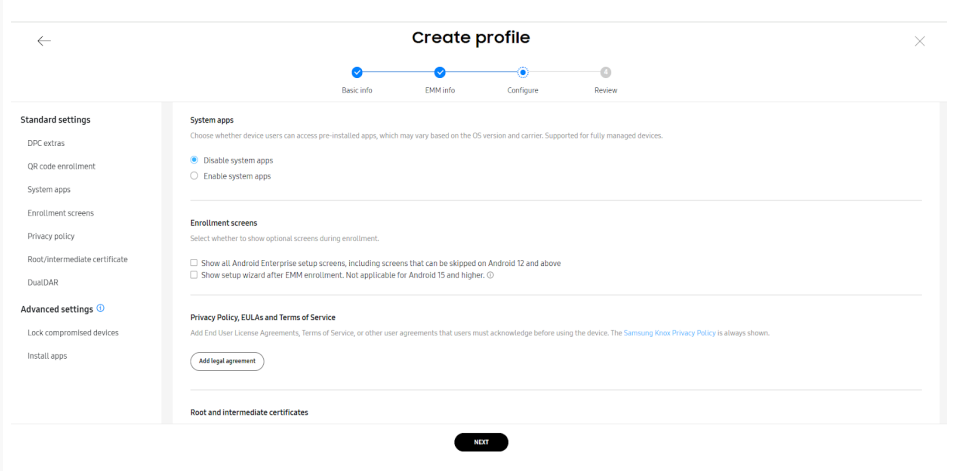
iii. For System Applications, select an option:
- Or
* Disable system applications\* Enable System Apps
iv. Privacy Policy, EULAs and Terms of Service - Click Add Legal Agreement and add any End User License Agreements, Terms of Service, or other user agreements that users must acknowledge before using the service.
v. Click Next
D. Review:
Admin can review the profile and then click Create.

6. The newly created EMM profile will be listed under the EMM Profiles section.
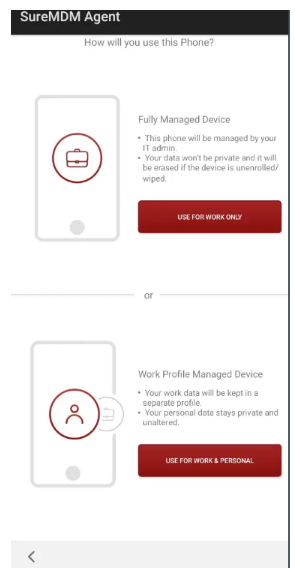
- If devices were bought from a reseller, reboot or factory reset the device. On a successful reboot, the device will show the below options for Android 11 and above devices. Users can select the type of enrollment based on the requirements.
- In case of Reboot it will show an option to reset the device then the user has to configure the device. Device enrollment will take place after factory reset only.
The below screen is shown only when the Enrollment Mode is not mentioned in the DPC extras.
The device will get enrolled directly as Device Owner to the specified SureMDM console for devices running below Android 11.
or
If the devices were bought from a non-reseller, then they can be enrolled using QR code as mentioned below:
7. Reboot or factory reset the device.
8. On the Welcome screen, draw a Plus symbol (+) to get the below options:
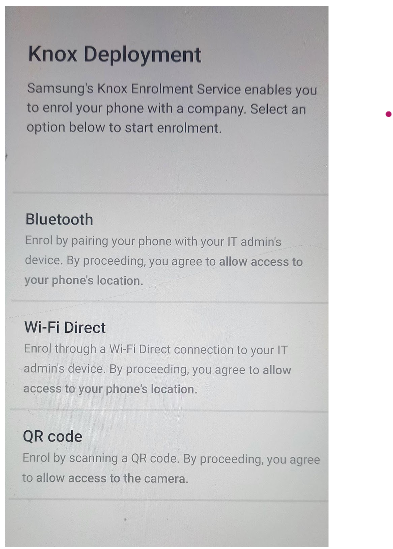
9. Click QR code and scan the QR code created in step 5 and continue with the set up.