Link ABM with SureMDM
In order to perform MDM functions on enrolled iPads, iPhones and Mac OS, the ABM account has to be linked with SureMDM. For linking, a certificate is required which ensures a secure and trusted relationship between ABM and SureMDM. The following are the steps to get successful ABM linking:
ADE Profile and Server Creation
1. Navigate to SureMDM Settings > Account Settings > iOS/iPadOS/macOS Settings > ADE > ADE Profiles > Add.
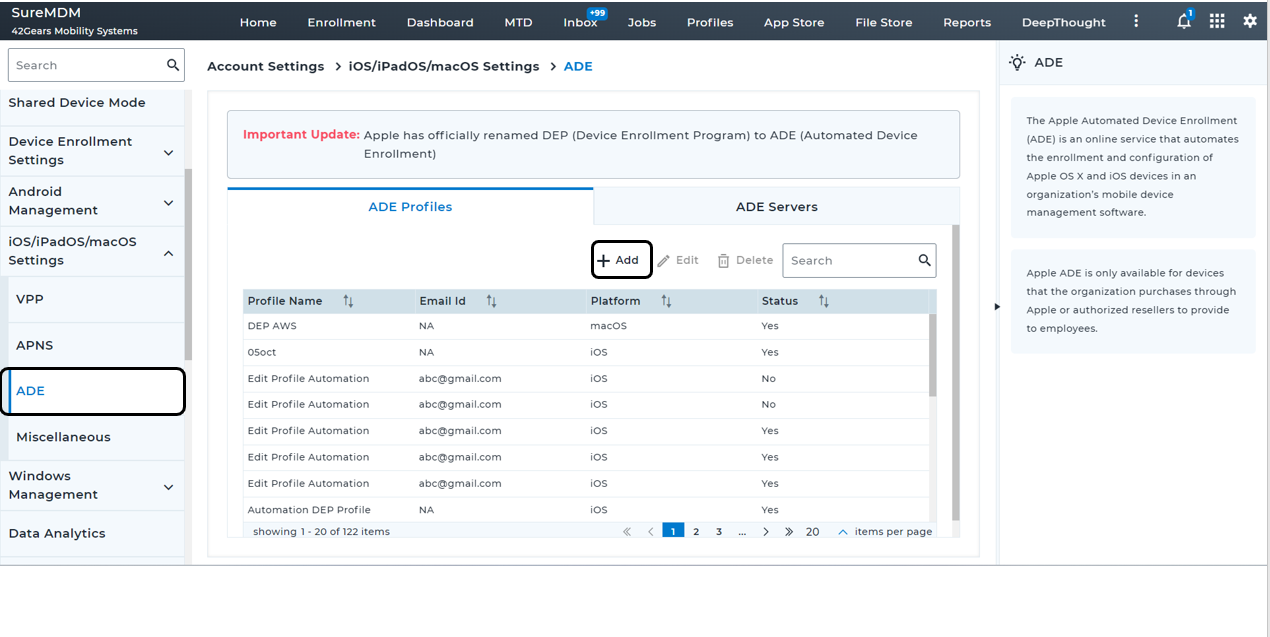
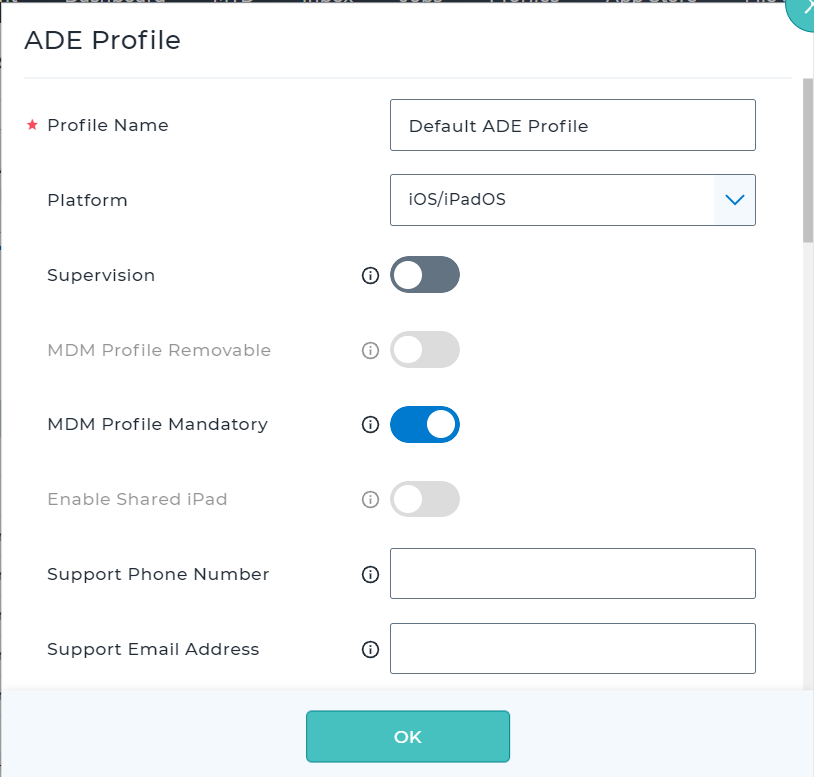
2. Click Add. The ADE Profile screen appears. Type Profile Name with the other required configurations for the platforms iOS/iPadOS or macOS as per the requirement:
- Supervision: Enable to set the device in supervised mode.
- MDM Profile Removable: Disable to ensure that end users cannot remove the MDM profile installed on the device.
- MDM Profile Mandatory: Enable this setting to make it obligatory for users to apply the MDM Profile.
- Enable Shared iPad: Enable to allow iPads with iPadOS 13.4 or above to be shared.
![]() Note: The option Enable Shared iPad is not applicable to macOS profiles.
Note: The option Enable Shared iPad is not applicable to macOS profiles.
- Support Phone Number: The Support Contact Phone Number will appear in the device's About Configuration panel upon setup and enrollment.
- Support Email Address: Support Email Address will appear in the device's About Configuration panel upon setup and enrollment.
- Skip Passcode Setup: If disabled, iOS/macOS Setup Assistant prompts the user to set a passcode during enrollment.
![]() Note: The option Skip Passcode Setup is not applicable to macOS profiles.
Note: The option Skip Passcode Setup is not applicable to macOS profiles.
- Skip Location Services: If disabled, iOS/macOS Setup Assistant prompts the user to enable or disable Location Services during enrollment.
- Skip Restoring From Backup: If disabled, iOS/macOS Setup Assistant prompts the user to restore from backup during enrollment.
- Skip Login with Apple ID & iCloud: If disabled, iOS/macOS Setup Assistant prompt the user to sign in with an Apple ID and iCloud account during enrollment.
- Skip Terms & Conditions: If disabled, iOS/macOS Setup Assistant prompts the user to read and accept the Terms of Use and Conditions during enrollment.
- Skip Touch ID: If disabled, iOS/macOS Setup Assistant prompts the user to configure Touch ID during enrollment.
- Skip Apple Pay Setup: If disabled, iOS/macOS Setup Assistant prompts the user to set up an Apple Pay account during enrollment.
- Skip Diagnostics Setup: If disabled, iOS/macOS Setup Assistant prompts the user to enable or disable sending diagnostic data to Apple during enrollment.
- Skip Siri: If disabled, iOS/macOS Setup Assistant prompts user to configure Siri during enrollment.
- Skip Software Update: Skips the mandatory software update screen in iOS/macOS.
- Skip Screen Time: Skips the screen for Screen Time in iOS/macOS.
- Skip Data and Privacy: Skip the page that explains the Data & Privacy icon.
- Skip SIM Setup: Skips the add cellular plan pane.
- Skip Zoom: Skips zoom setup.
- Skip Android: If the Restore pane is not skipped, it eliminates the "Move from Android" choice from the Restore pane on iOS.
- Skip Watch Migration: Skip Watch Migration.
![]() Note: The options Skip SIM Setup, Skip Zoom, Skip Android, and Skip Watch Migration are not applicable to macOS profiles.
Note: The options Skip SIM Setup, Skip Zoom, Skip Android, and Skip Watch Migration are not applicable to macOS profiles.
- Skip Appearance: Skips the Choose Your Look screen in iOS/macOS.
- Skip File Vault: Disables File Vault Setup Assistant screen in iOS/macOS.
- Skip iCloud Diagnostics: Skips iCloud Analytics screen in iOS/macOS.
- Skip iCloud Storage: Skips iCloud Documents and Desktop screen in iOS/macOS.
- Skip Welcome: Skips the Get Started pane.
- Skip iMessage and FaceTime: Skips the iMessage and FaceTime screen in iOS
![]() Note: The options Skip Welcome and Skip iMessage and FaceTime are not applicable to macOS profiles.
Note: The options Skip Welcome and Skip iMessage and FaceTime are not applicable to macOS profiles.
- Skip True Tone Display: Skips the screen for True Tone Display in macOS.
- Skip Accessibility: If disabled, the user can hear VoiceOver automatically.
- Skip App Analytics: If disabled, the macOS setup assistant will prompt the user to decide whether they want to share app diagnostic data with the developers.
- Skip Unlock with Apple Watch: Skips the Unlock with Apple Watch screen in macOS.
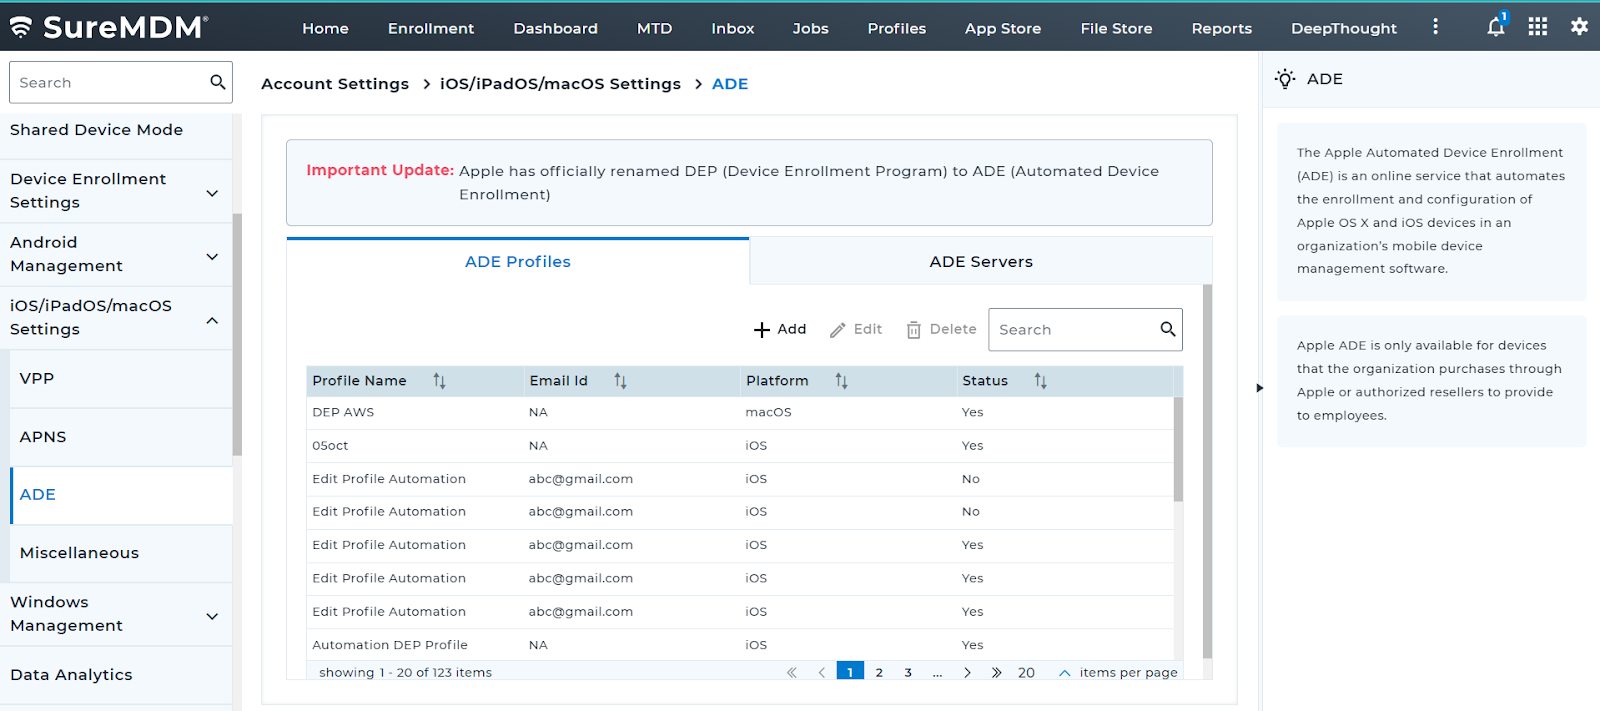
3. Once the ADE Profile is created, then it would get reflected in the ADE Profiles listing page.
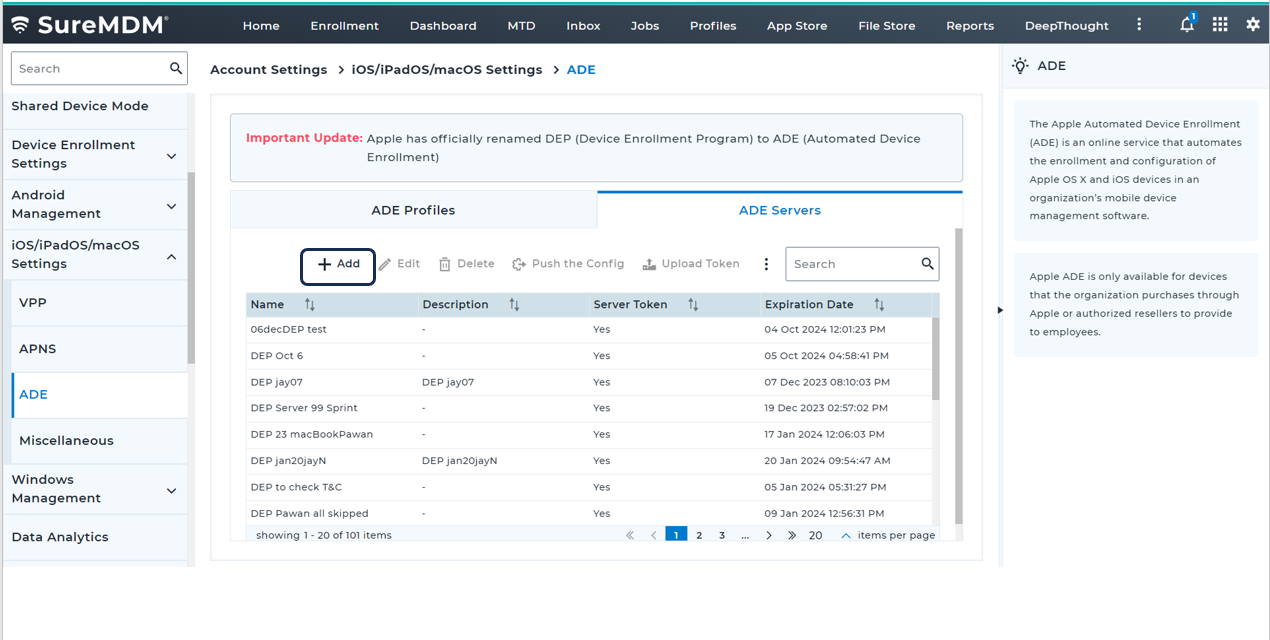
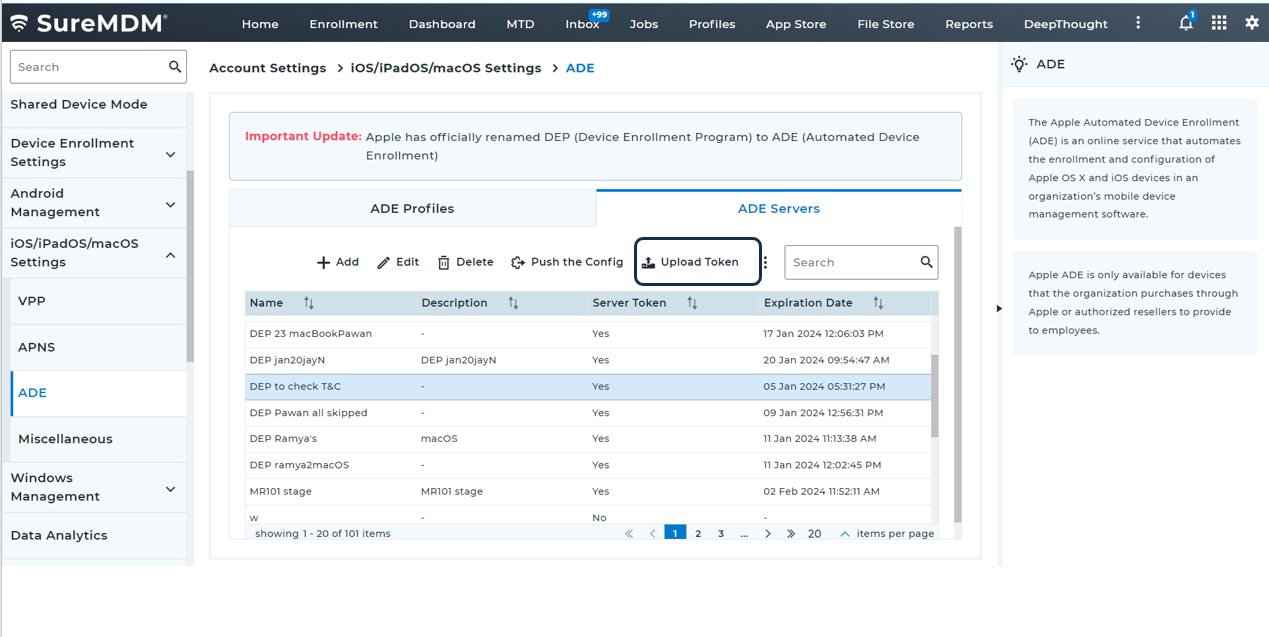
4. Navigate to ADE Servers Tab and click Add
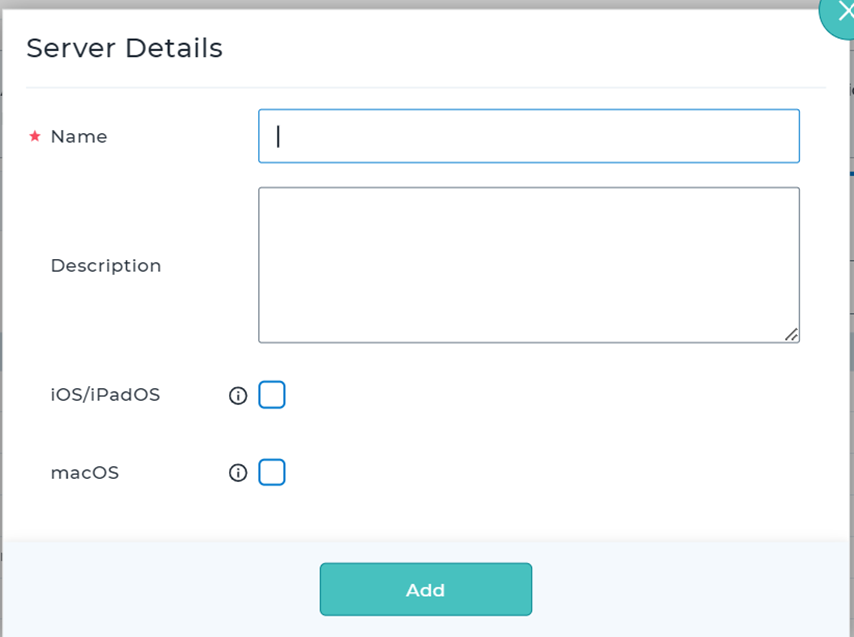
5. Once the Add is clicked, the below popup screen will appear, in which the following information should be provided and click Add:
- Name - Provide the name of the ADE Server
- Description - Specify the description for the server that is about to be created
- iOS/iPasOS: If enabled, allows you to select ADE profile for iOS/iPadOS devices
- macOS: If enabled, allows you to select ADE profile for macOS devices.
6. Then the added ADE Server would get reflected in the listing page

7. Select the created ADE Server and then click Upload Token button
8. Upon clicking on Upload Token, the following popup screen will appear in which PEM Certificate should be downloaded. Click Download
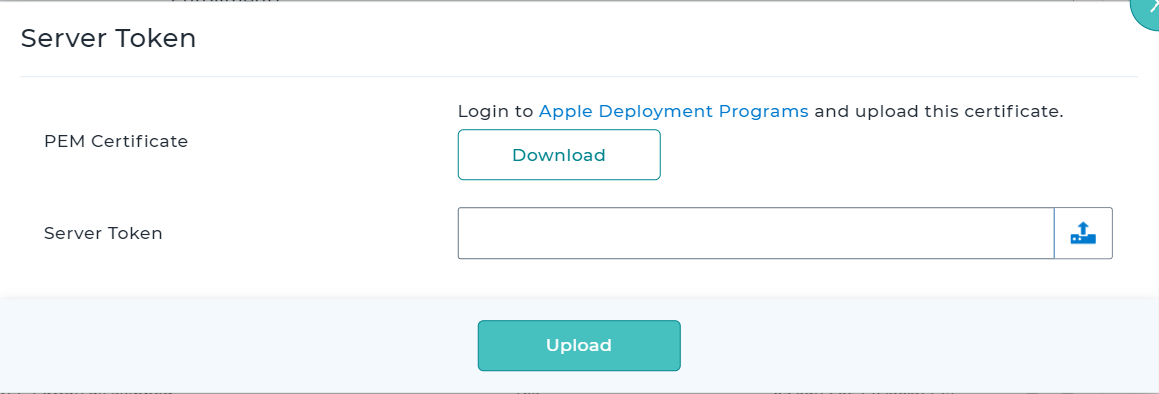
![]() Note: PEM Certificate should be downloaded and uploaded in Apple Business Manager application during the process of MDM Server creation.
Note: PEM Certificate should be downloaded and uploaded in Apple Business Manager application during the process of MDM Server creation.