Configure Content Caching (macOS)
Content caching is a macOS service that helps reduce internet data usage and speed up software installation on Mac devices.
For example, if there are two devices (clients) are connected to the same network and the first client downloads a macOS update, the content cache keeps a copy of the update. When the next client on the same network connects to the App Store to download the update, the update is copied from the content cache rather than from the App Store.
 Note: The device must run macOS version 10.13.4 or later for this feature to work.
To configure the payload for content caching,
1. Navigate to SureMDM Web Console > Profiles > macOS > Add > Content Caching > Configure.
2. Enter a Profile Name.
3. Configure the following settings and click Save.
|
Settings |
Description |
|
General |
|
|
Automatically Activate Content Caching |
Use this option to turn on content caching.
|
|
Automatically Enable Tethered Caching |
Use this option to automatically enable internet connection sharing.
|
|
Automatically Purge Content From Cache |
Use this option to allow the system to purge content from the cache automatically when it needs disk space for other apps. |
|
Cache |
You can select the type of content to cache:
|
|
Maximum Cache Size |
Enter the maximum amount of disk space (in bytes) that will be used for the content cache. The value '0' allows unlimited space. |
|
Port |
Enter the TCP port on which the content caching service accepts the request for upload/download. Set '0' to pick any random port available. |
|
Data Path |
Enter the path to store cached data. The path must end with /Library/Application Support/Apple/AssetCache/Data. |
|
Share Internet Location |
Use this option to allow internet connection sharing and also allow sharing cached content with iOS devices connected using USB. |
|
Enable Display Alerts |
Use this option to display alerts as system notifications on the upper corner of the screen.
|
|
Enable Sleep Mode |
Use this option to prevent the computer from going to sleep when content caching is on.
|
|
Log Client Details |
Use this option to capture logs of the client details such as IP address and port number of the devices that request content. |
|
Client |
|
|
Restrict Content To Local Network |
Use this option to offer content to the devices on the same immediate local network. |
|
Restrict To Listen Ranges |
Use this option to provide the content only to the clients specified in the listen ranges. |
|
Client Listen Ranges |
Enter the range of IPv4 and IPv6 addresses that can receive the content cache. |
|
Public Ranges |
Enter the range of public addresses that the cloud servers should use for matching clients to content caches. |
|
Peer |
|
|
Restrict Peers To Local Network |
Use this option to content cache only peers with other content caches on the same immediate local network. |
|
Peer Filter Ranges |
Enter the range of peer IP addresses that the content cache will use to filter its list of peers to query for the content. |
|
Peer Listen Ranges |
Enter the range of IP addresses. The content cache filters its list of peers using the IP address ranges you enter. |
|
Parent |
|
|
Parents IP Addresses |
Enter the local IP address of another cache from which this cache should upload/download the content instead of uploading to or downloading from Apple. |
|
Parent Selection Policy |
When there are many parent caches, you can select how the IP address can be chosen from the following options:
|
4. Click Save.
The newly created profile will be listed in the Profiles section.
5. Go back to the Home tab and select the macOS device(s) or group(s).
6. Click Apply to launch Apply Job/Profile To Device prompt.
7. In the Apply Job/Profile To Device prompt, select the created profile and click Apply.
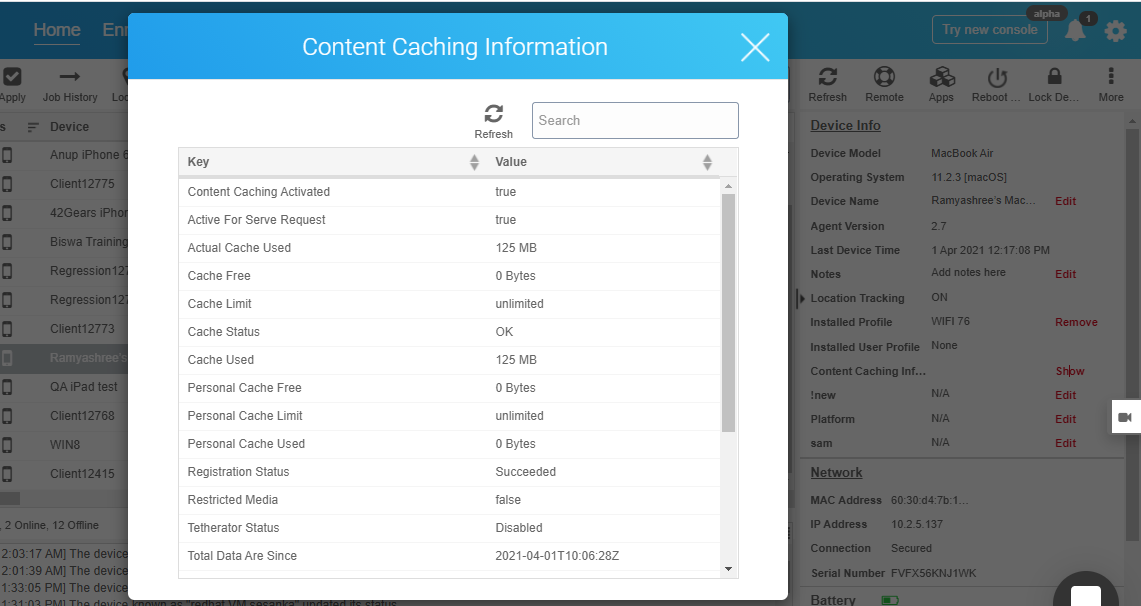
Once this profile is applied on a specific device, the content caching information can be viewed by clicking Show on the Device Information panel.