Manage Contacts
On successful login to AstroContacts Web Console, by default, the console opens with Contacts section.
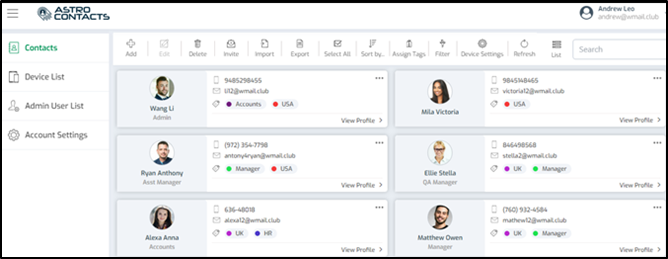
In Contacts section, admin can perform following actions:
|
Actions |
Description |
|
|
Add new contact. See Create a Contact. |
|
|
Edit details for a selected contact |
|
|
Delete selected contact(s) from the list |
|
|
Send an invite to newly added contact. See Send an Invite. |
|
|
Import contacts (in CSV format) in bulk from the saved location. See Import Bulk Contacts. |
|
|
Download the template in CSV format in which user has to fill all contact details to perform Import Bulk Contacts. See Import Bulk Contacts. |
|
|
Select single or multiple contacts and export the details in CSV format. The details in CSV file can be edited and uploaded with the changes. The changes updated in CSV file will reflect in the contact card.
|
|
|
Refresh contact(s) details |
|
|
Select all contacts of a specific page. Admin can further perform actions on multiple contacts such as Delete, Invite and Refresh. |
|
|
Sort First Name of contacts in following alphabetical orders:
|
|
|
Assign tag(s) to a single or multiple contacts. Refer to Assign Tags to Contacts. |
|
|
Filter the contacts based on the tags selected.
|
|
|
Allows admin to remotely control device settings on AstroContacts app from the console. To know about the device setting descriptions, see Device Settings. |
|
|
Switch the view of contacts between List View and Grid View |
|
|
Search can be performed on Contact’s First Name, Last Name, Mobile Number and Email Address |


Related Topics